With the advent of the newer and cheaper flat screen led TV’s, it has made it easy to upgrade those older TV’s in your used RV. A do-it-yourself RV TV mount is a fairly easy thing to do to replace that old style analog tv.
You can also get rid of the converter box and create extra storage too! Plus an RV flat screen TV has a far better picture and takes advantage of latest technologies which can be enjoyed by the avid television viewer.
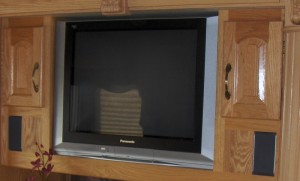
When we purchased our 2006 RV in 2008, it had the older style TV in the bedroom and living area. The one in the living room must have weighed 150 pounds. I had one heck of a time getting it out of its cabinet that the manufacturer had installed it in. But it had to go!
Even in 2008, the picture was not even close to a comparable LCD TV. So I got an idea to solve the problem and gain extra storage space. I also figured I got rid of an extra 100 hundred pounds between the two old TV’s.
- Original Old Style Living Room TV
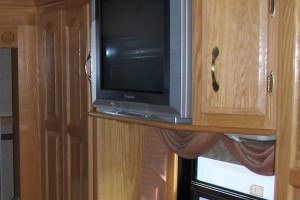
So, here is what I did! I removed the retaining straps that were holding the TV’s in their cabinets and took the TV’s out. I was able to find some folks who were willing to buy them cheap to use in their shop areas. I hate to throw stuff out that works, so I was glad to make a few bucks and have someone else be able to use them.
What I discovered once I had the TV’s out was a nice storage area that could be utilized if I just had a door to cover the front of each cabinet. The living room cabinet was large enough to put shelves in to hold DVD’s, or other items.
- Original Old Style Bedroom TV
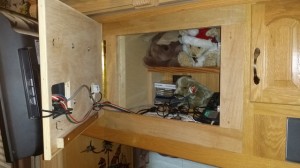
Let’s look at the living room modification first. I built out a framing box inside the cabinet to have something to attach to my new cabinet door. Towards the back of the cabinet, I made two shelves to contain smaller items which keep them in place while moving.
I created a door out of some 3/4″ thick oak veneer board. The finish in my RV is similar so once clear coated it matched fairly well.
- Living Room TV Storage Cabinet
To secure the door to my new oak framing, I used a piano hinge. It is very robust and allows for good door movement. To ensure the door closed, I used a heavy duty cabinet door lock. It has worked well, and the new LED TV has a far superior picture to the old Panasonic flat screen.
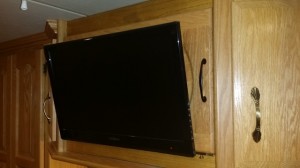
- New RV Flat Screen TV
While I am sitting in the back of the RV, I can also angle the TV out from the cabinet for better viewing.
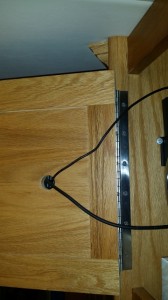
For the bedroom, I did a similar thing. Since the opening was smaller, I was able to use a matching cabinet door for the RV flat screen TV. All I had to do was add a small piece of oak trim on the top and bottom of the opening to customize the modification. Once again a piano hinge worked well to allow for smooth and secure access to the new storage area.
- New Bedroom RV Flat Screen TV
- Bedroom TV Door and Hinge
With the addition of a cabinet pull and a sliding door lock at the bottom of the new door, it is held securely in place during travel! It looks like it came from the RV manufacturer this way.
I hope this was helpful and perhaps gave you an idea of something you can do yourself to add an RV flat screen TV and also create a little more storage area. For those who enjoy full time RV living, extra storage space is a wonderful thing!
Please feel free to leave comments if I can answer any questions you may have!
Blessings,
Howard and Pam




2 comments
Nice work Howard and Pam. Looks great. I’d like to do the same thing. What hardware did you use to mount the TV to the board? Seems like it was a vesa mount which also provided some tilt. Also, might you send a picture of your sliding door lock at the bottom of the door. Thanks.
Author
Hi Jim!
We no longer own that RV, but I used the TV mount that came with the TV and mounted that to the new cabinet door. The sliding door lock was one I bought from Home Depot used to secure a half door.