
Given that Pam and I both work from the comfort of our RV home, when it comes to staying connected we mostly rely upon a good cell phone signal, both for our phones and for our MiFi unit. Having an ongoing need for improved cellular service our search led us to look for the best cell phone booster for an RV!
After doing some research we discovered that the weboost cell phone booster was at the top of the list when it comes to using a cell phone signal booster.
This is the best cell phone booster for a moving RV!
RV’s have specific needs when it comes to cellular devices. You see, unlike a traditional home, the RV home is on the move and therefore needs good cellular service while rolling down the highway and when stationary. So the question becomes what device do you rely upon to give you a consistent cell phone signal and MiFi hotspot signal when in travel mode as well as in static mode?
A Cell Phone Signal Booster While an RV is Parked
This is a relatively easy fix! There are many products on the market that will get the job done and some of these come from those that are designed for boosting the cell signal in a house. They can also work in an RV, but they are not the best cell phone booster for an RV!
Examples of this would be the Verizon Enterprise LTE, The Wilson Pro Series, the SureCall Force 5 and Fusion 4 Home, the weboost Home, and the HiBoost Home. These units are designed for home applications that could work in an RV, but antenna designs and unit coverage may be more than needed in an RV environment. Certainly, the ones mentioned here are also more expensive than one specifically designed for RV use.
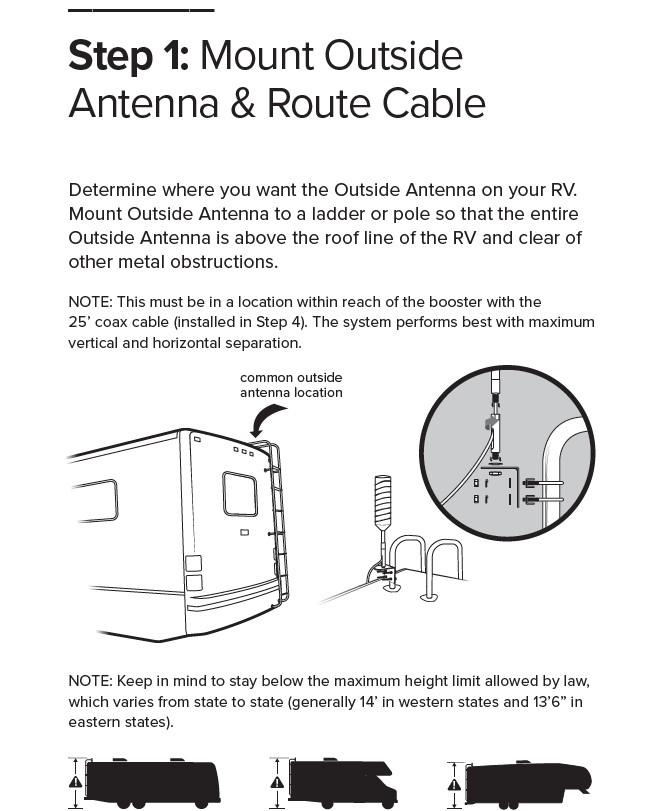
The other issue is the setup of the antenna that grabs the signal from the cell tower. For an RV it is best if it is an Omni-directional cell phone signal booster antenna. There are not too many places the antenna can be mounted on the roof without screwing something in or mounting it to the rear ladder.
There are lots of options and homemade remedies when the RV is going to stay in a fixed location and not be used to travel as they were designed to. If that is the case a home cell phone signal booster can suffice if the price is significantly less that one designed for an RV.
A Cell Phone Signal Booster While in RV Travel Mode
When the RV is always on the move you want a cell phone signal booster that is seamless and allows the RV owner to use it while in travel mode, or in a fixed location. This can be difficult! In order to have an antenna that is high enough above the roof yet not exceed the 13′ – 6″ maximum height recommendations can be problematic depending on the class of RV that the owner who requires this device owns.
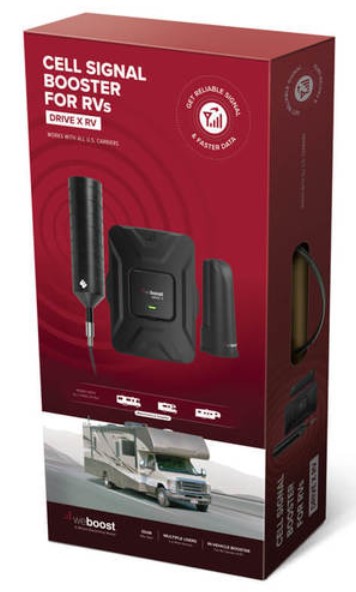
After much research, the owners of yourfulltimervliving.com concluded that the weboost Drive X RV is the best cell phone booster for an RV!
Pam and I have been enjoying full time RV living since 2008 and have very specific needs when it comes to our use of cellular devices. Since starting to RV in 2002 we have always looked for ways to be online connected as we traveled.
I can remember an RV trip in 2003 where I was conducting business while Pam drove the RV through Dallas, TX. I had a Verizon flip phone that I was using as a modem in order to gain access to the internet. The data transfer speed was not great but it got the job done.
Since then technology has continued to improve. In 2007 we got our first Verizon hotspot as I needed mobile internet access for my business. Back then it was 3G, and it was truly unlimited. That lasted till 4G came on the scene and then the plan went away. We have had several other MiFi hotspots since then. Our latest is a 4G LTE 2.4 GHz unit that allows some pretty impressive upload and download speeds during travel if there is a cell tower nearby.
But there are still times that we lose the cellular phone signal as we travel between cities. So, how does a cell phone signal booster work while rolling down the highway?
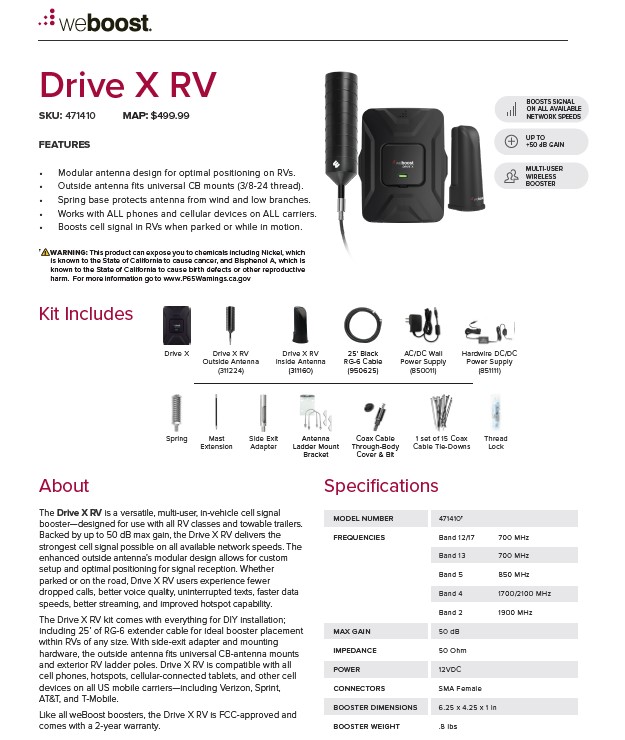
The weboost cell phone booster boosts the cellular voice and data signal so there are fewer lost calls as well as increased download and upload speeds when it comes to hotspot usage in weak signal areas.
Most signal boosters have 3 components, plus coax cable to connect them. A powerful antenna reaches out to access a voice and 3G, 4G, and LTE data signal and transfers that signal to the booster. The booster receives the signal, amplifies it while serving as a relay between the nearest towers during travel. The boosted signal is passed to an interior antenna that allows cellular devices to receive the boosted signal. Signals are passed back and forth through the network.

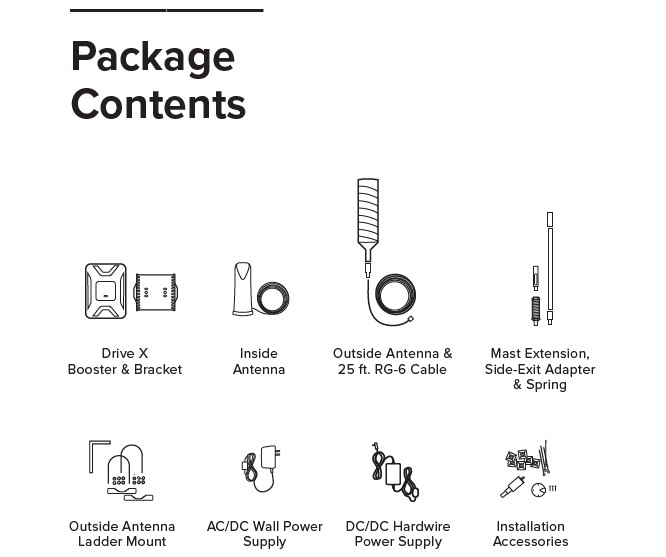
What’s in the Box? Watch our intro video!
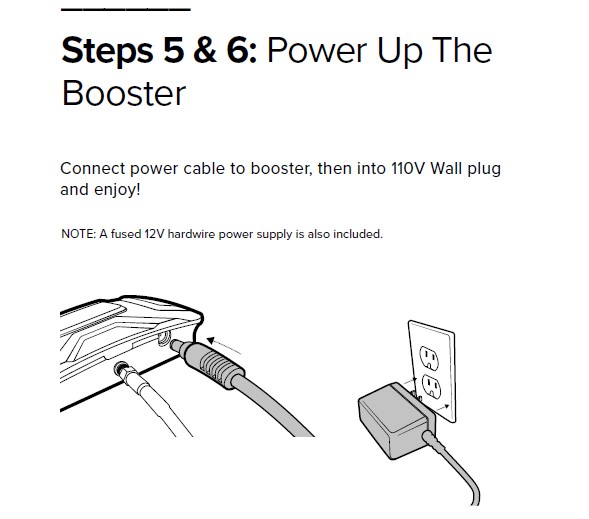
What About Powering the weboost Cell Signal Booster?
The weboost Drive X RV comes with adapters to run it on either 120-volt or 12-volt power. What would be the disadvantages of offering two power sources? The most obvious one is that if using the weboost cell phone booster while driving, and requiring a 120-volt power source, the booster will have to be connected to an inverted circuit or the generator would need to be running. It sounds silly to have to run the generator just to boost a cellular signal! Also, inverted circuits may not be in a place where the weboost cell phone signal booster is going to be located. The manufacturer recommends the unit be installed in a cabinet near a power source.
The better choice would be to hook the unit to a 12-volt power source using the included DC/DC power adapter. That way, regardless of whether the RV has 120-volt power from shore power, the generator, or an inverter if the RV has one, the booster will remain operational all the time.
We like to enjoy displaced camping on a regular basis: boondocking! That means we are not hooked to water, sewer, or electric services. So, during these times of staying overnight at Walmart, Cracker Barrel, Cabela’s, truck stops, or rest areas, with the weboost hooked to 12-volt power we don’t have any interruption in our boosted cellular signal.
Before purchasing the unit we did download the install instructions from weboost. They were helpful in determining if the Drive X RV system would truly work for our needs, and what was going to be the best way to install it. Since cabling was going to be involved in getting the signal from the roof antenna to the inside booster, we had concerns as to how that was going to work.
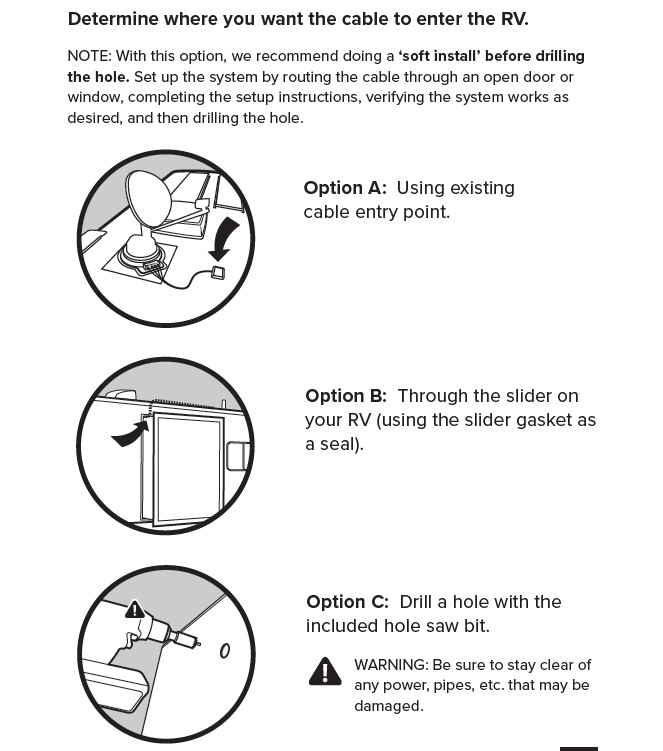
I certainly was not going to use the included hole saw to put a hole in the sidewall of the RV in order to pass the RG-6 coax cable to the inside of the RV! So what were my other options? You can get a window cable that allows the cable to pass through a window close to where the booster would be mounted. That would mean a cable would be hanging out the RV during travel. That was not an option for us!

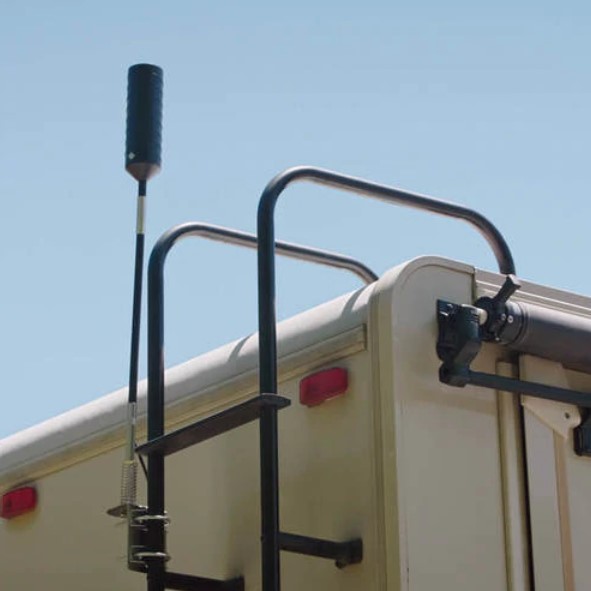
So first I had to figure where would be the best place for the antenna to be mounted. As shown above, the weboost Drive X RV comes with a roof ladder bracket that would allow me to mount the antenna and mast to the ladder. But, with the 25′ of coax cable that was included, there was no place where the cable could enter the RV and have enough cable to reach the booster in the cabinet location I had chosen.
The install instructions recommend the most straight-line distance between the booster and the indoor antenna that you can achieve using the 25′ of included coax cable. That means if you took a tape measure from the roof antenna directly in line to the inside cell signal booster, they would measure as far away from each other as possible.
Taking that fact into account, for my Tiffin class A RV, the best location for the roof antenna was upfront, and the best place for the booster was in the bedroom entertainment cabinet where there was easily accessible 12-volt power.

But first, as recommended, I did a soft install to gauge the effectiveness of the booster. I placed the antenna on the roof by mounting it to a woodblock so I could move it around. I used the 25′ of RG-6 coax cable that was included and passed it through a roof vent so I could power up the booster.
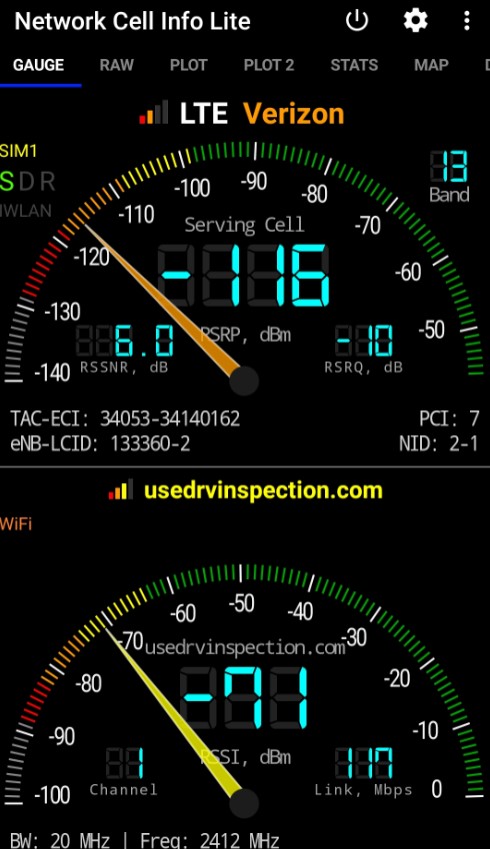
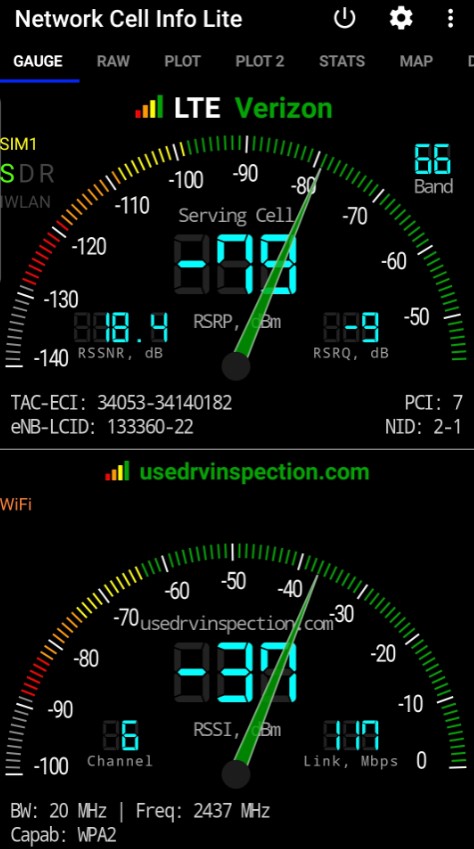
I had at least 20′ of separation between the booster and the antenna. My cell phone signal went from two to five bars right off the bat. My MiFi performance jumped significantly to 20-30 Mbps download and about the same for upload speed. These numbers were a significant increase in cellular signal strength!
Now that I determined that the weboost cell phone booster was working as advertised, it was now time to begin the final install.
weboost Installation Process – Outside
As mentioned, my weboost roof antenna needed to be at the front of the RV and the weboost booster towards the rear of the RV. But how was I going to run the cable for a clean install without having a cable running along the roof and having to put holes in it as well?
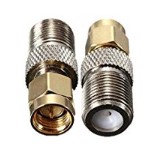
We have a small satellite antenna on the roof that we do not use It has two RG-6 coax cables that already penetrate the roof through a sealed plate and they terminate in the cabinet that I wanted to place the booster in. Bingo! The solution to my problem. My only concern was that I needed to add two additional connectors to the setup to make it work. Would the addition of these two connectors degrade the signal to and from the roof antenna to the booster?
I called weboost to ask their technical support staff what their thoughts were on my idea. They felt I might sacrifice some signal gains by doing what I suggested. But, given the cleanliness of the install, I decided to order the 2PCS SMA male to F female straight RF coaxial adapter connectors that I needed to make it work.
The next issue was how to get the roof antenna mounted so that it would extend as high above the roof as possible without having it hit trees and other impediments while driving. If I used all the antenna pieces that were included in the weboost Drive X RV kit, the antenna would be about 30″ above the top of the roof. That is a great height to assure maximum signal strength, but that would not work while driving. So how could I have the antenna raise and lower easily to overcome this problem?
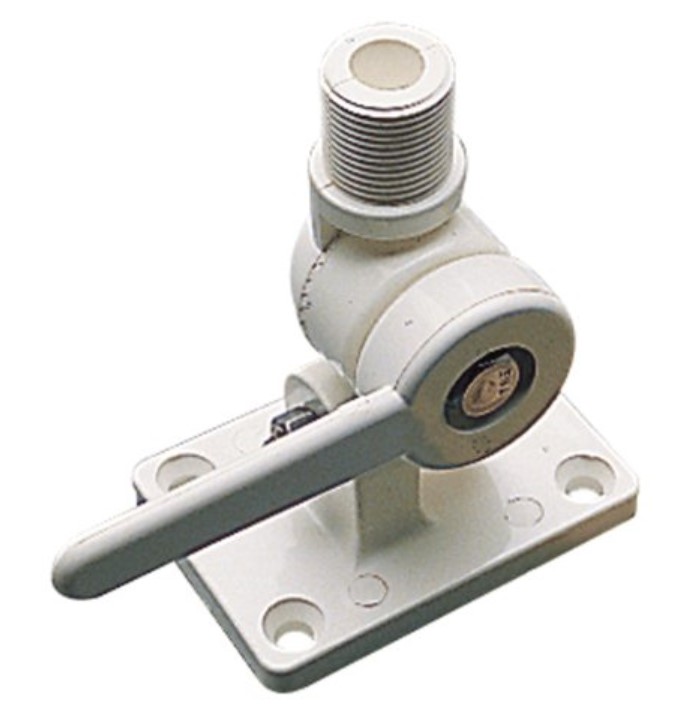
So I did some more thinking and found a marine bracket that would allow the roof antenna to attach to the marine bracket and allow it to fold down, at any angle I wanted during travel yet still be usable. In other words, during travel, my cell phone signal booster would still be functional. But, do I want to put four holes in the roof to mount the bracket? No Way!!
I could Eternabond the mount directly to the roof, but the base of the mount is so small that it would not be very stable during travel. Then the thought came that I could attach the marine bracket to something and Eternabond that to the roof. So that is the route I decided to go.
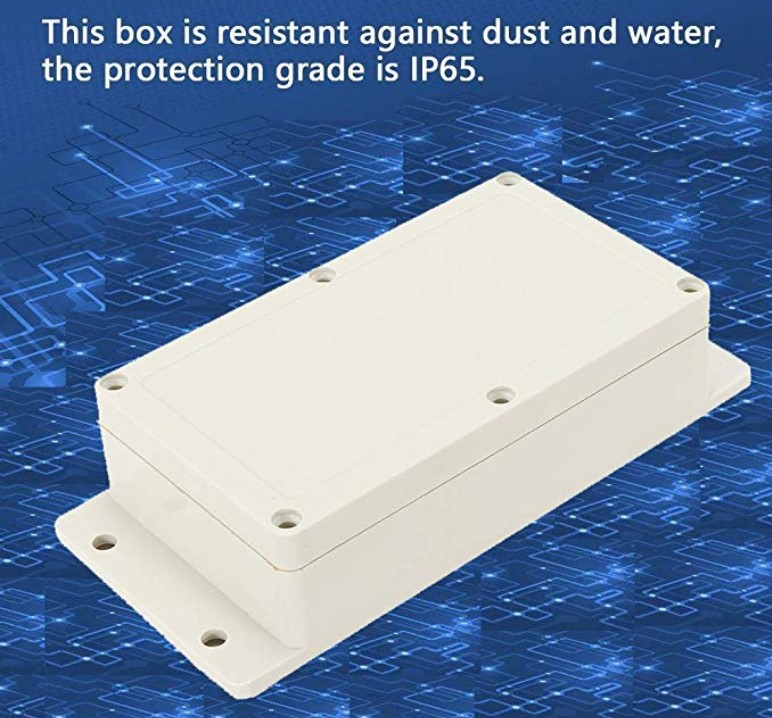
And because the box was in two pieces it made installation easy as the antenna and marine mount would be secured to the box cover and the box itself could be attached to the roof with Eternabond without having to fight the antenna. This option also allowed for the cover to be removed if the antenna needed to be taken off.
weboost Installation Process – Inside
With the roof install taken care of we were left with finalizing the interior install. I have seen a lot of RVers add WiFi boosters and other electronic devices and really ruin the look of the interior of their RV with visible cable, power cords, holes on woodwork, etc. I did not want to do that!
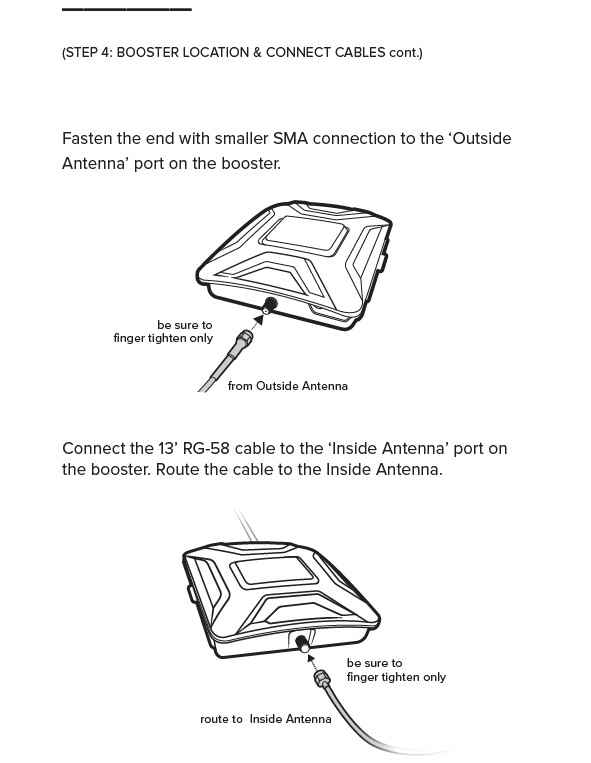
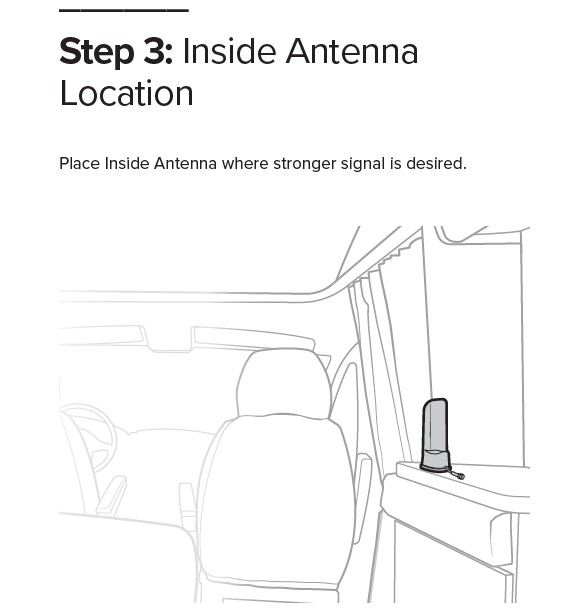
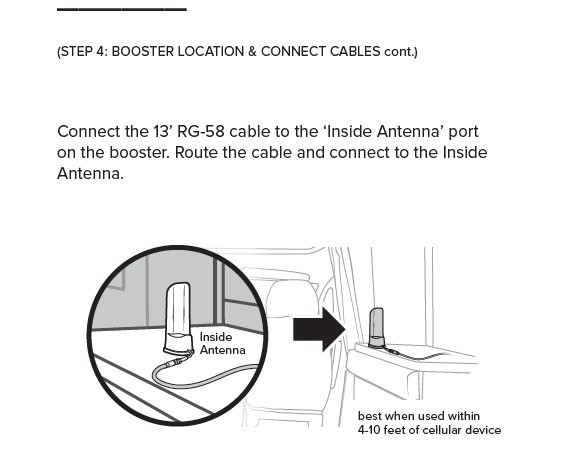
My problem on the inside was the 13′ of RG-58 coax cable that was included in the kit to go from the booster to the inside antenna was not going to be enough length to reach a usable location. The instructions recommend that for the boosted signal to be most efficient your cellular devices need to be within 4′ to 10′ of the inside antenna. The 13′ of cable that was included in the Drive X RV kit did not allow the inside antenna to be at my work station.
My only solution was to get more cable. I did some research and found RG-58 cable made by Wilson Electronics. I chose it as it was stated as a low signal loss cable for the 30′ that I ordered.

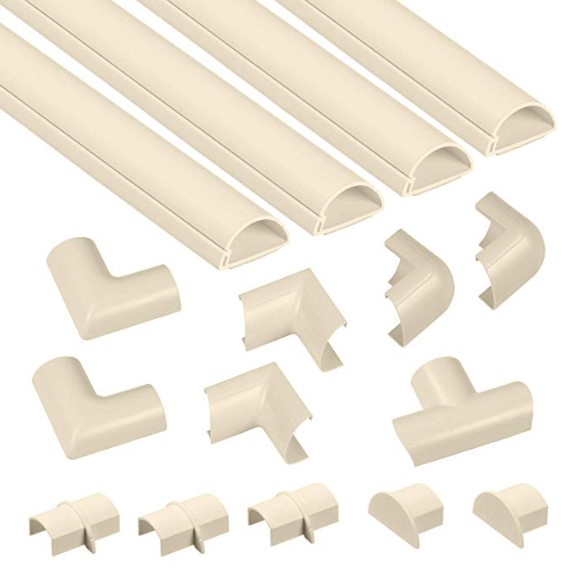
My next challenge was how to get the 30′ of cable from the curbside bedroom entertainment cabinet to the streetside front work station without having it hanging from the ceiling. Going through the floor was not an option either. I noticed that the AC ductwork would serve as a great wire chase. The cable could enter an AC exhaust vent near the rear bedroom cabinet. The 30′ cable would exit from an upfront AC exhaust vent that was adjacent to the dinette/desk area. All I needed was a way to hide a few feet of cable at each end. So I ordered a D-Line Mini Cable Raceway kit.
Once all my parts and pieces arrived from Amazon I took an afternoon to finalize my weboost Drive X RV install.
- I ran the cable through the AC ductwork.
- I verified the correct amount of cable at each end.
- I secured the cable using the D-Line Raceway Kit.
- I mounted the weboost booster inside the cabinet using the included bracket.
- I mounted a vent fan to keep all electronics in the cabinet cooler (optional).
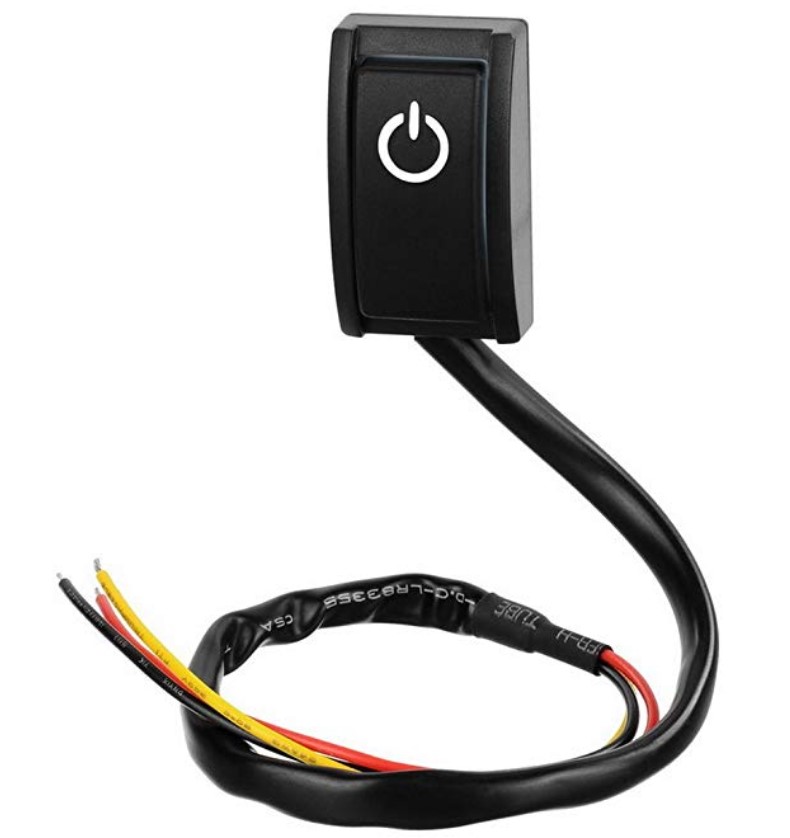
- I accessed the 12-volt power supply and connected the fan, a switch, and the weboost booster to the RV’s 12-volt power.
- I secured all wires and cleaned up the debris from the install process.
Check out our video of how the whole system came together and how it works!
Once this was all completed I was able to fire up the booster and check my boosted signal quality. I had achieved a 40 – 50 db signal gain for cell phone service and a really good readout from Speed Test Master of the Verizon MiFi6620L’s performance.
Cell Phone Signal Booster Results!
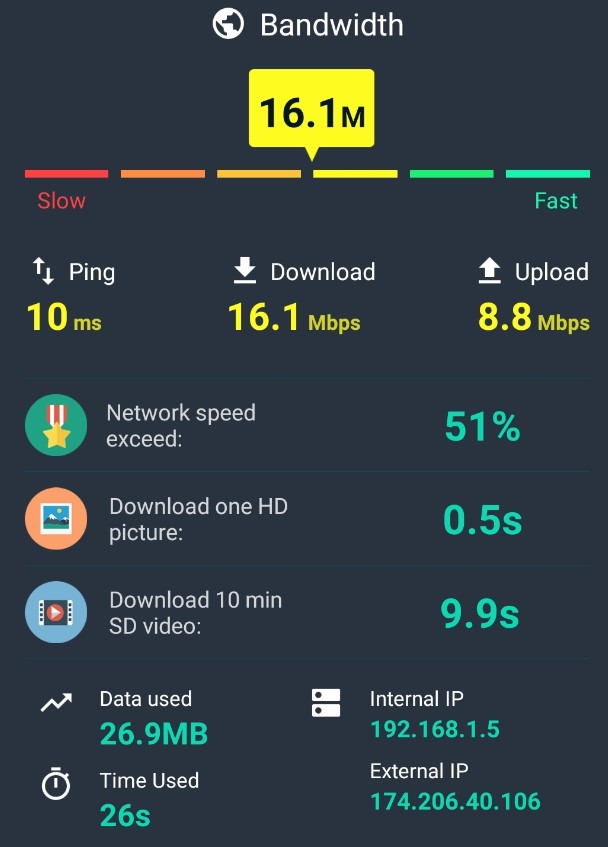

Notice that the “Data Used” was twice the amount of the unboosted signal! The big difference in the performance of our MiFi unit has been in the upload speed. In the test above that can be seen in the 8.8 Mbps compared to the boosted results of 25.4 Mbps.
From the Installation manual here is what is stated about the weboost’s cell phone booster performance.
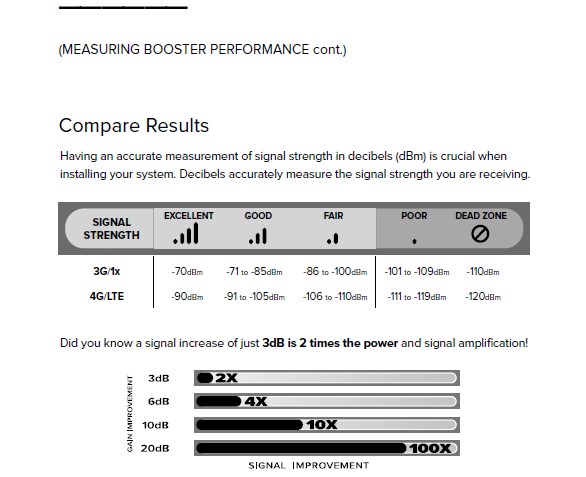
When doing a timed signal test I also showed great improvement over the unboosted signal.
Our Final Thoughts!
Based on the reviews I read of different products on the market that would suit my needs, it was clear that the weboost Drive X RV would work the best for our needs:
- A good signal boost of a 40 – 50 db gain.
- A clean install that allows seamless connectivity as we move the RV – no need to remove poles and wires.
- Allow use of the weboost cell signal booster during travel days and during boondocking when no 120-volt power is supplied to the RV.
- An antenna that is almost three feet off the roof when static but easily changeable for travel days.
- A two-year warranty and customer support
We hope you found this discussion and review useful as you decide what is the best cell phone booster for an RV!
Happy Travels!
Howard, Pam, Lindsey, and Winston


Recent Comments