
The Ultimate DIY RV Shopping Guide: Use an RV Inspection Checklist for a Smarter Purchase
Shopping for an RV is an exciting adventure, but it can also feel overwhelming with so many choices and details to consider. Whether you’re a first-time buyer or a seasoned traveler looking to upgrade, having a solid plan can make the process much smoother.
It does not matter whether an RV purchase is for a new or used RV. Both can have issues that need to be addressed before a purchase is finalized. If an RV is purchased without verifying that everything works, two things will happen: the warranty will cover the repair, and time will be wasted, or, in a used RV, the new owner will end up paying for something that should have been functioning at the time of purchase.
Save Thousands – Do it Yourself!
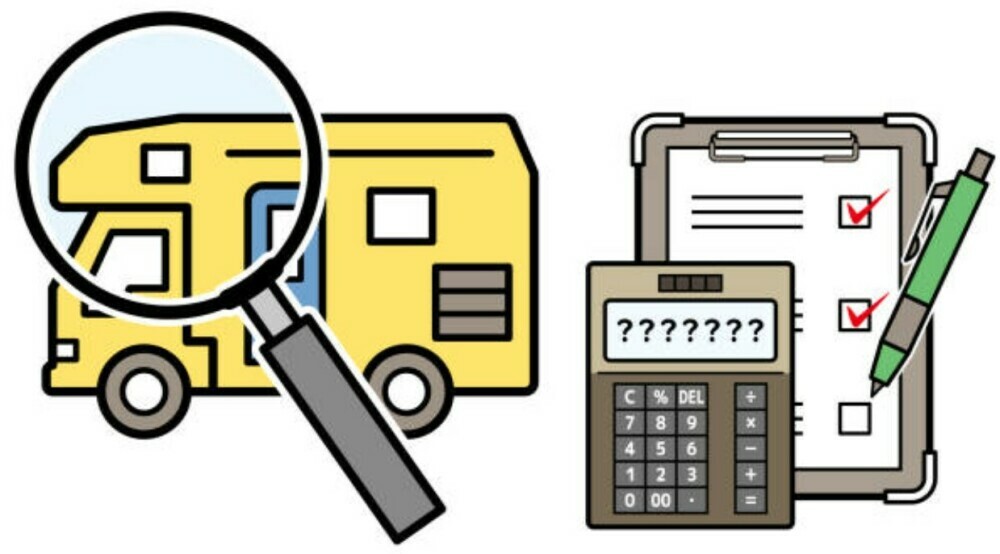
One of the best tools you can use to avoid all these issues is an RV inspection checklist. This handy guide will help you thoroughly evaluate any RV you’re interested in, ensuring you make a wise investment. Let’s break it down into five sections for easy understanding and application.
Why You Need an RV Inspection Checklist
When you’re shopping for an RV, it’s easy to get caught up in the excitement of envisioning your future travels. However, it’s crucial to keep a level head and inspect the RV thoroughly before making a purchase. Here’s why an RV inspection checklist is your best friend:
1. Avoid Costly Repairs: A thorough inspection can help you identify potential problems that could lead to expensive repairs down the line.
2. Ensure Safety: Checking critical systems like brakes, tires, propane, and electrical systems ensures the RV is safe for you and your family.
3. Get the Best Value: An inspection helps you assess the RV’s condition and determine if the asking price is fair, giving you leverage in negotiations.
4. Peace of Mind: Knowing you’ve done a comprehensive check allows you to buy with confidence.

Preparing for the Inspection
Before you start your inspection, gather the necessary tools and materials. Here’s what you’ll need:
* Flashlight: Essential for checking dark areas like under the RV and inside compartments.
* Notebook and Pen: To take notes on what you find during the inspection.
* Camera or Smartphone: To take pictures of any issues for later reference.
* Multimeter: Useful for checking electrical systems.
* Gloves and Old Clothes: You might get dirty during the inspection.
Next, it’s time to download or create your RV inspection checklist. You can find many templates online, but as a founding member of the NRVIA, I have included it here. Here are some key areas your checklist should cover:
1. Exterior Condition: Look for dents, rust, fiberglass cracks, and signs of water damage.
2. Tires and Suspension: Check tire tread, sidewalls, and suspension components.
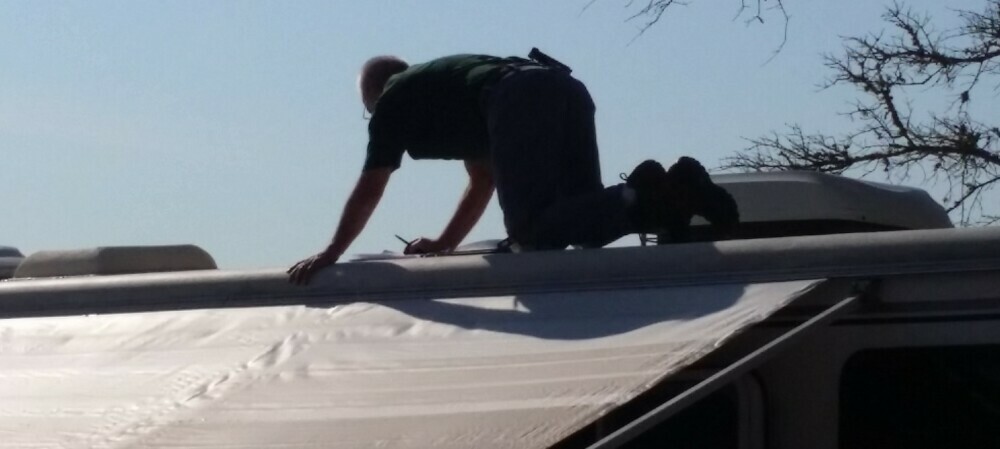
3. Roof and Seals: Inspect the roof for cracks or leaks and check all seals around windows and doors.
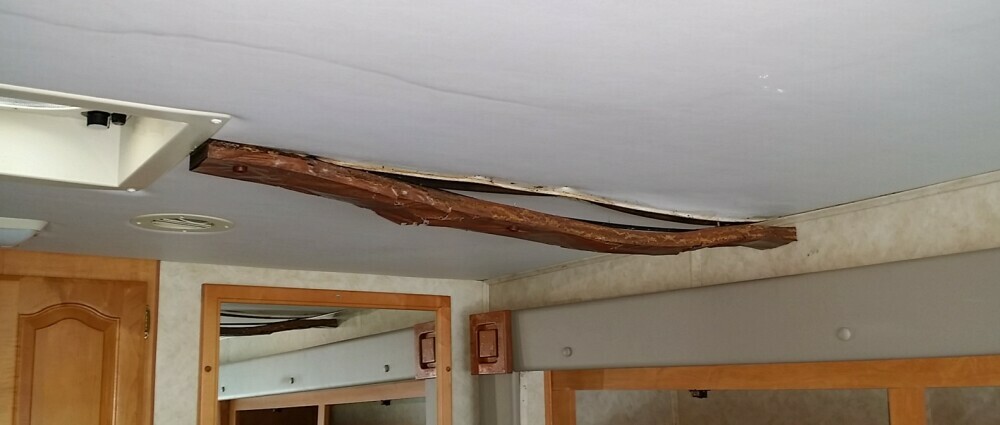
4. Interior Condition: Check for signs of water damage, soft spots in walls, ceilings, floors, mold, and overall cleanliness.
5. Appliances and Systems: Test the refrigerator, stove, microwave, air conditioner, and heating system.
6. Plumbing: Check for leaks and test the water pump, faucets, and toilet.
7. Electrical Systems: Test all lights, outlets, and batteries.
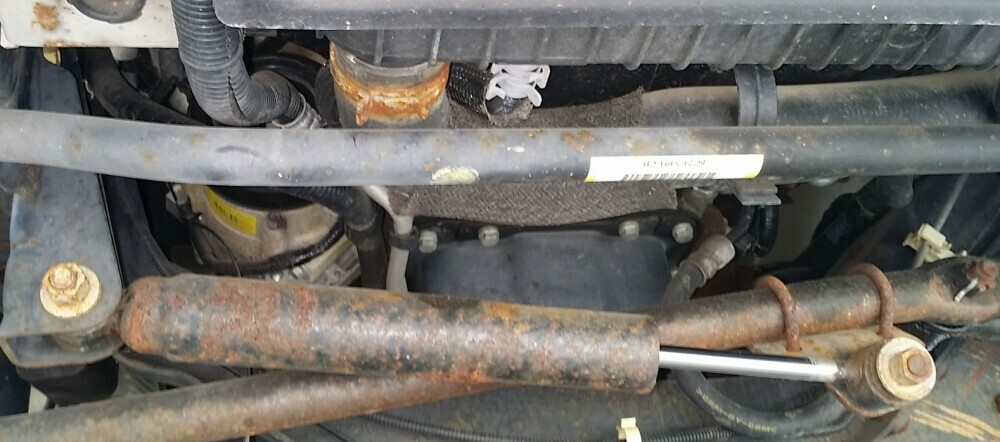
8. Engine and Mechanical (for motorhomes): Check fluid levels and belts and listen for unusual noises.
This is a brief list of the major items one would investigate in a high-level RV inspection. Click here for a complete downloadable list that you can use to perform your own RV inspection.
Conducting the Exterior Inspection
Start with a thorough inspection of the RV’s exterior. Here’s a step-by-step guide:
1. Walk Around the RV: Look for any obvious damage, such as dents, scratches, or rust. Pay close attention to areas around seams and edges.
2. Check the Roof: Use a ladder to get a good look at the roof. Check for cracks, punctures, or signs of water damage. Inspect all sealant around vents and skylights.
3. Inspect the Tires: Examine the tire tread and sidewalls for wear and cracks. Don’t forget to check the spare tire too.
4. Examine the Windows and Doors: Open and close all windows and doors to ensure they function properly. Check seals for cracks or signs of water damage.
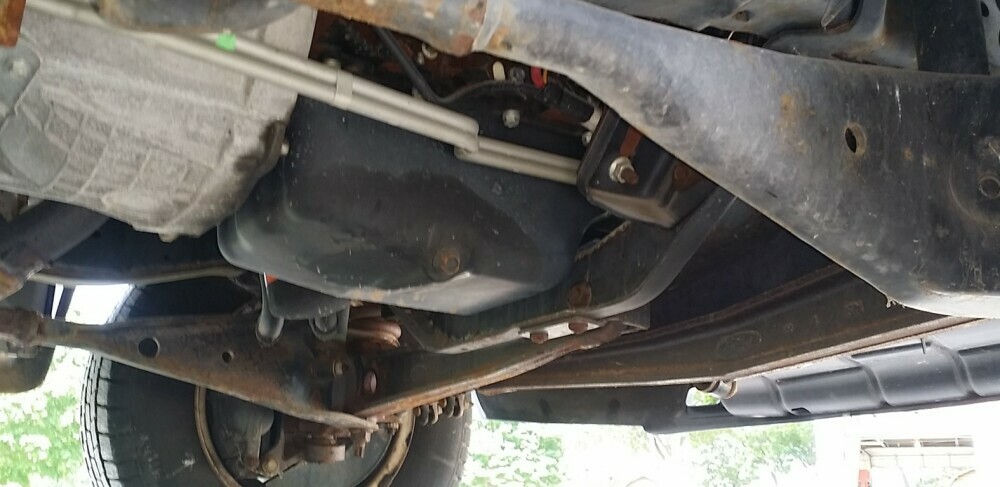
5. Look Underneath: Get on the ground and inspect the underside of the RV. Look for rust, damage, or signs of leaks.
Conducting the Interior Inspection
Once you’re satisfied with the exterior, it’s time to move inside. Here’s what to do:
1. Check for Water Damage: Look at the ceiling, walls, and floor for any signs of water damage, such as stains, soft spots, or warping.
2. Test Appliances: Turn on the refrigerator, stove, microwave, air conditioner, and heating system to ensure they work correctly.
3. Inspect the Plumbing: Run water through all faucets and check the toilet. Look under sinks and around the toilet for leaks.
4. Check the Electrical Systems: Test all interior and exterior lights and all electrical outlets. Use a multimeter to check the battery and ensure it’s holding a charge.
5. Examine the Furniture and Fixtures: Sit on the sofas, lie on the beds, and open and close all cabinets and drawers. Check for any damage or signs of wear.
Again, this is a summary of a much larger checklist you can access here!
Evaluating the Engine and Mechanical Components (for motor homes)
The engine and mechanical systems are critical if you’re considering a motorhome. Here’s how to inspect these areas:
1. Check Fluid Levels: Look at the oil, coolant, transmission fluid, and brake fluid levels. Make sure they’re at the proper levels and check for any signs of leaks. Consider a fluid analysis sample of all fluids currently in a used RV.
2. Inspect Belts and Hoses: Check the engine compartment for cracks, wear, or loose connections.
3. Start the Engine: Listen for unusual noises, such as knocking or squealing, and check the exhaust for excessive smoke.
4. Test the Brakes: Make sure the brakes respond well and don’t make any unusual noises.
5. Drive the RV: Take it for a test drive. Pay attention to how it handles any unusual vibrations and the responsiveness of the brakes and steering.
Conclusion: Making an Informed Decision
After you have completed your inspection, take some time to review your notes and photos. If you find any issues, consider their seriousness and whether you’re willing to invest in repairs. Don’t be afraid to negotiate the price based on your findings or walk away if the RV is not in the condition you expected.
If you want to check what the true value of the RV is you can use J.D. Powers website to find out the actual value.
Using an RV inspection checklist and a thorough, systematic approach, you can confidently evaluate any RV and make a smart, informed purchase. Happy RV shopping, and may your future travels be filled with adventure and joy!
To learn more about us, click here!
Please feel free to leave a comment or question before you check out the rest of our website.


Recent Comments