Wi-Fi Extenders And Mesh Networks For Better RV Internet

Wi-Fi Extenders and Mesh Networks: Enhancing RV Internet Coverage

Reliable internet matters a lot nowadays, especially if you’re living out of an RV for the long haul or setting off on extended getaways. Dead zones and weak signals can make working, streaming, or even checking your email a real challenge.

That’s where Wi-Fi extenders and mesh networks step in. These handy gadgets can give your RV’s internet a serious boost, helping you stay connected wherever you’re parked. This article shares my personal experience trying different setups, along with all you need to know to get started with improving RV Wi-Fi using extenders and mesh network systems.

RV parked in a forest with a Wi-Fi signal extending to the area around it

Why Internet Coverage is a Big Deal for RV Life

Internet access isn’t just about convenience when you’re spending lots of time in an RV. For remote workers, virtual students, and digital nomads, having a strong connection is super important. Even for those streaming shows, managing routes, or keeping connected with family, a poor signal can cause plenty of headaches.

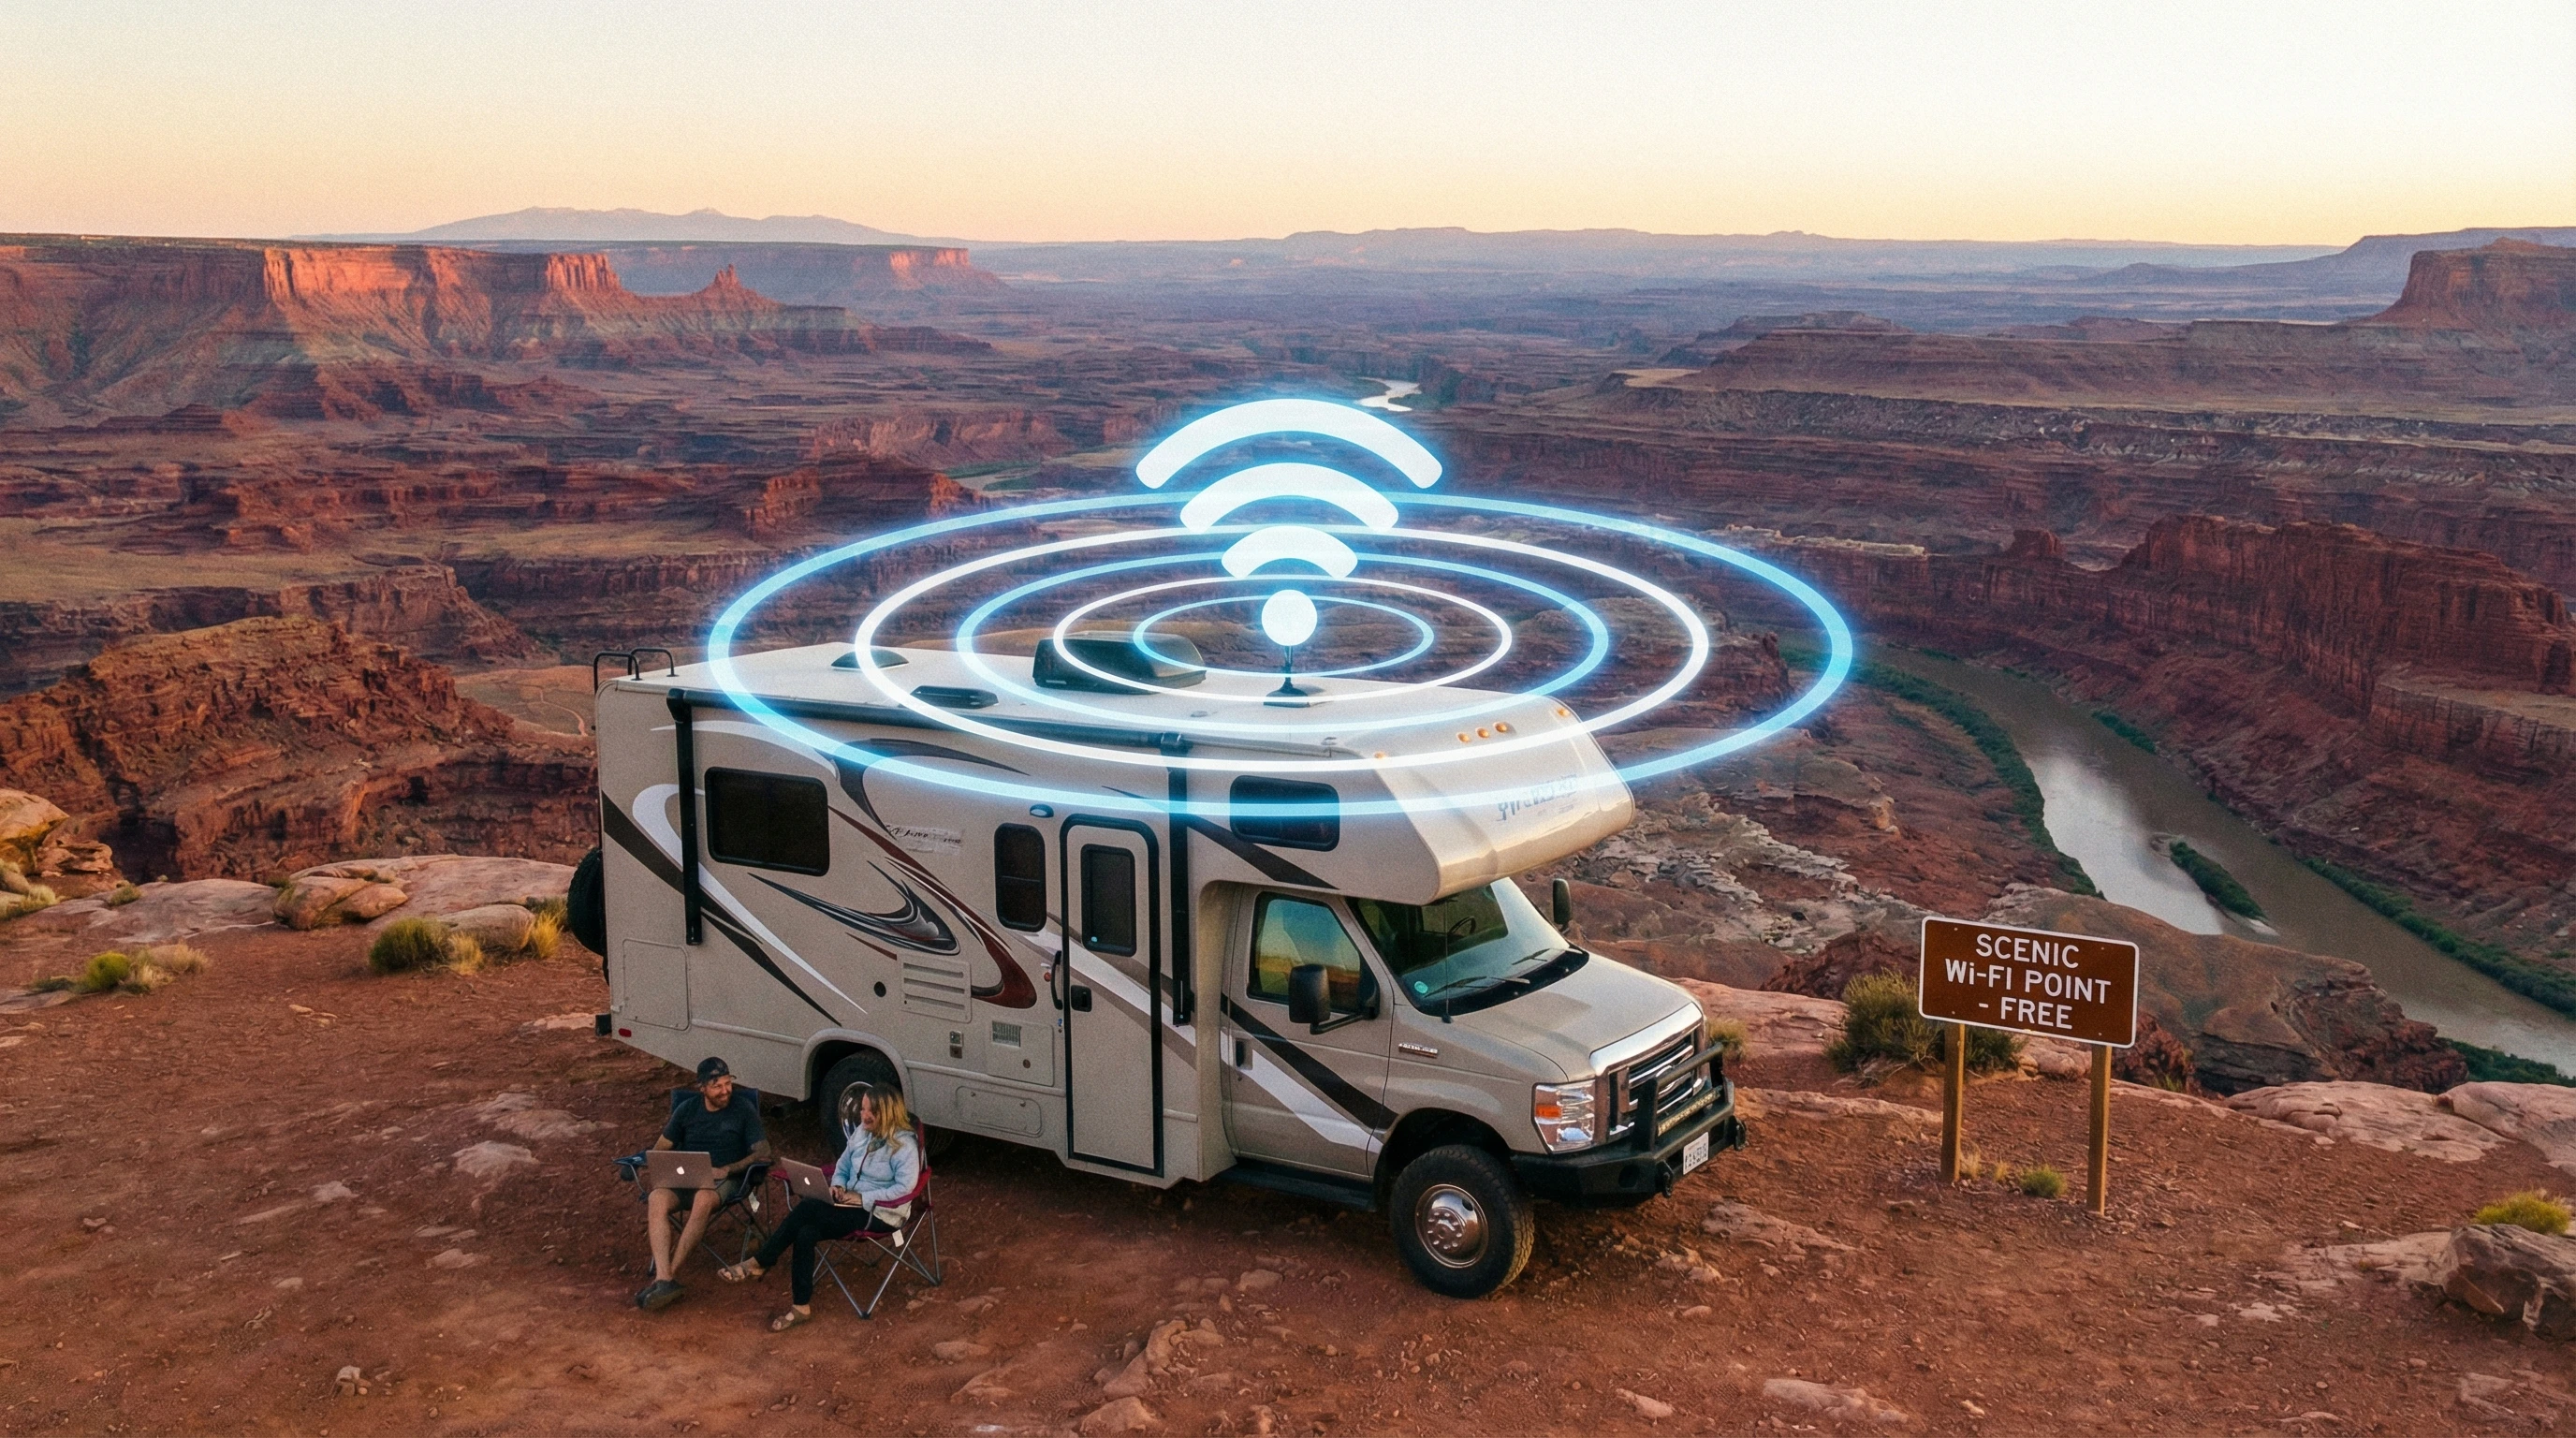
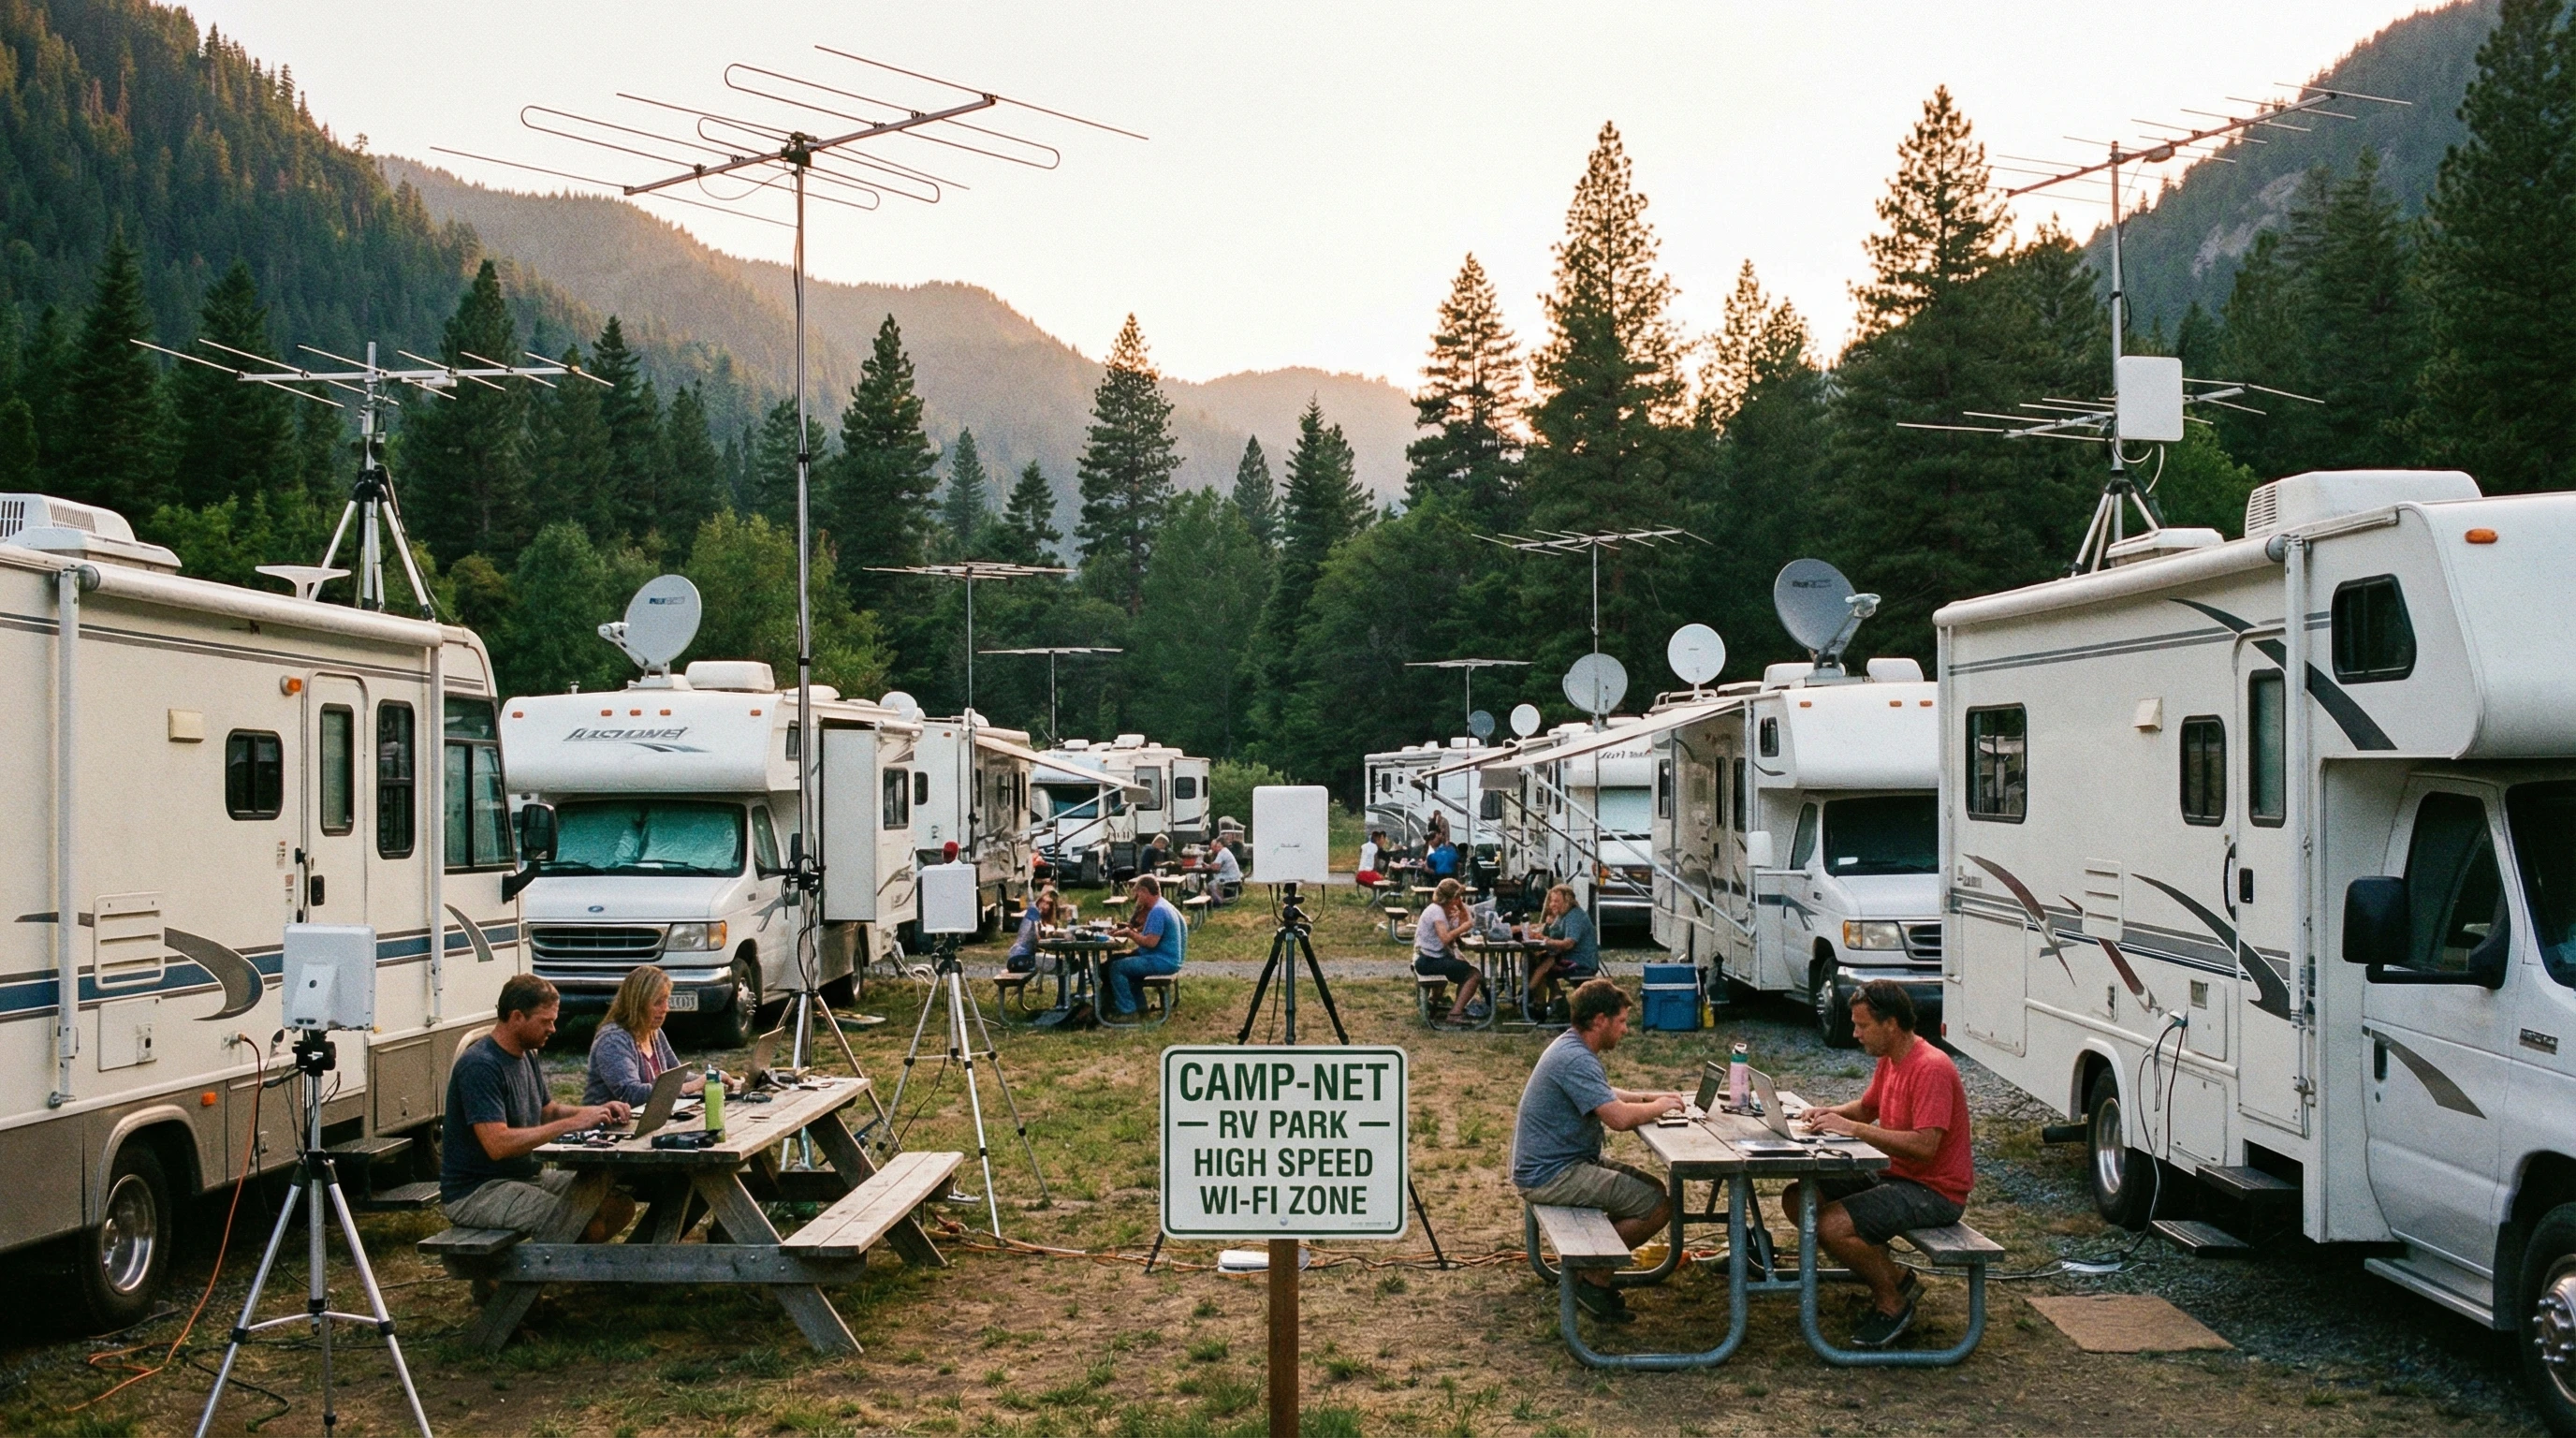
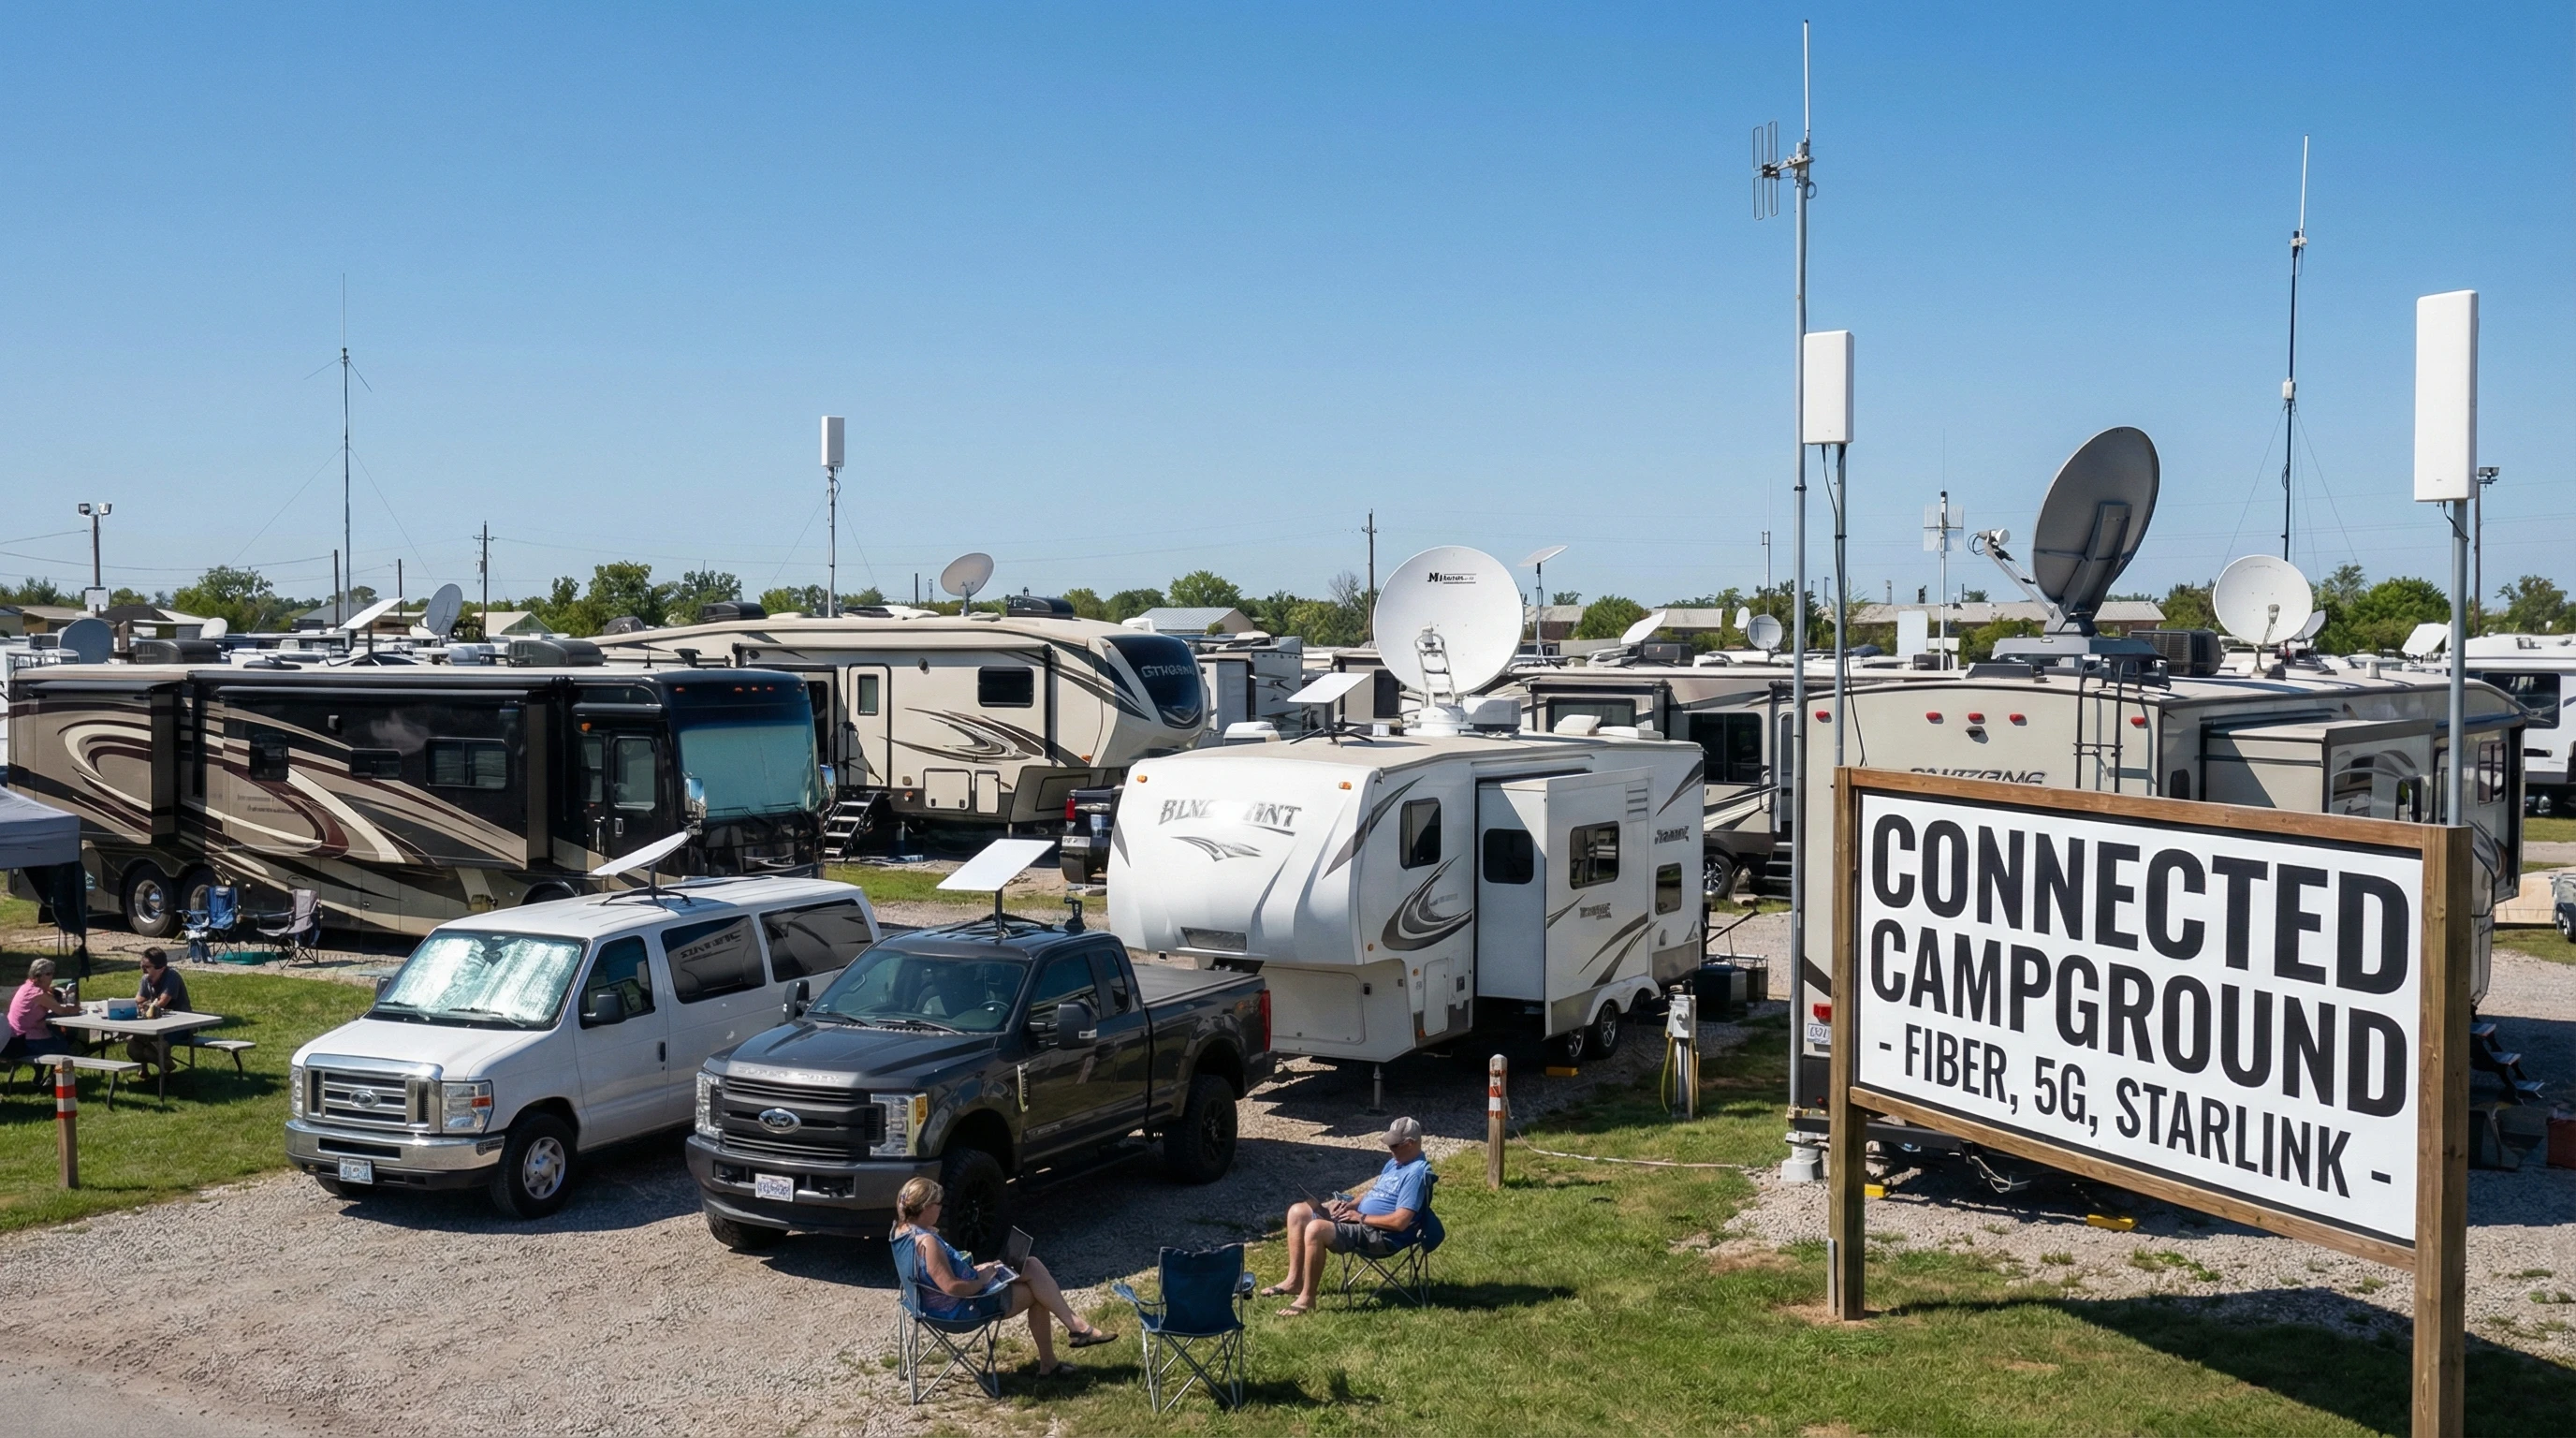
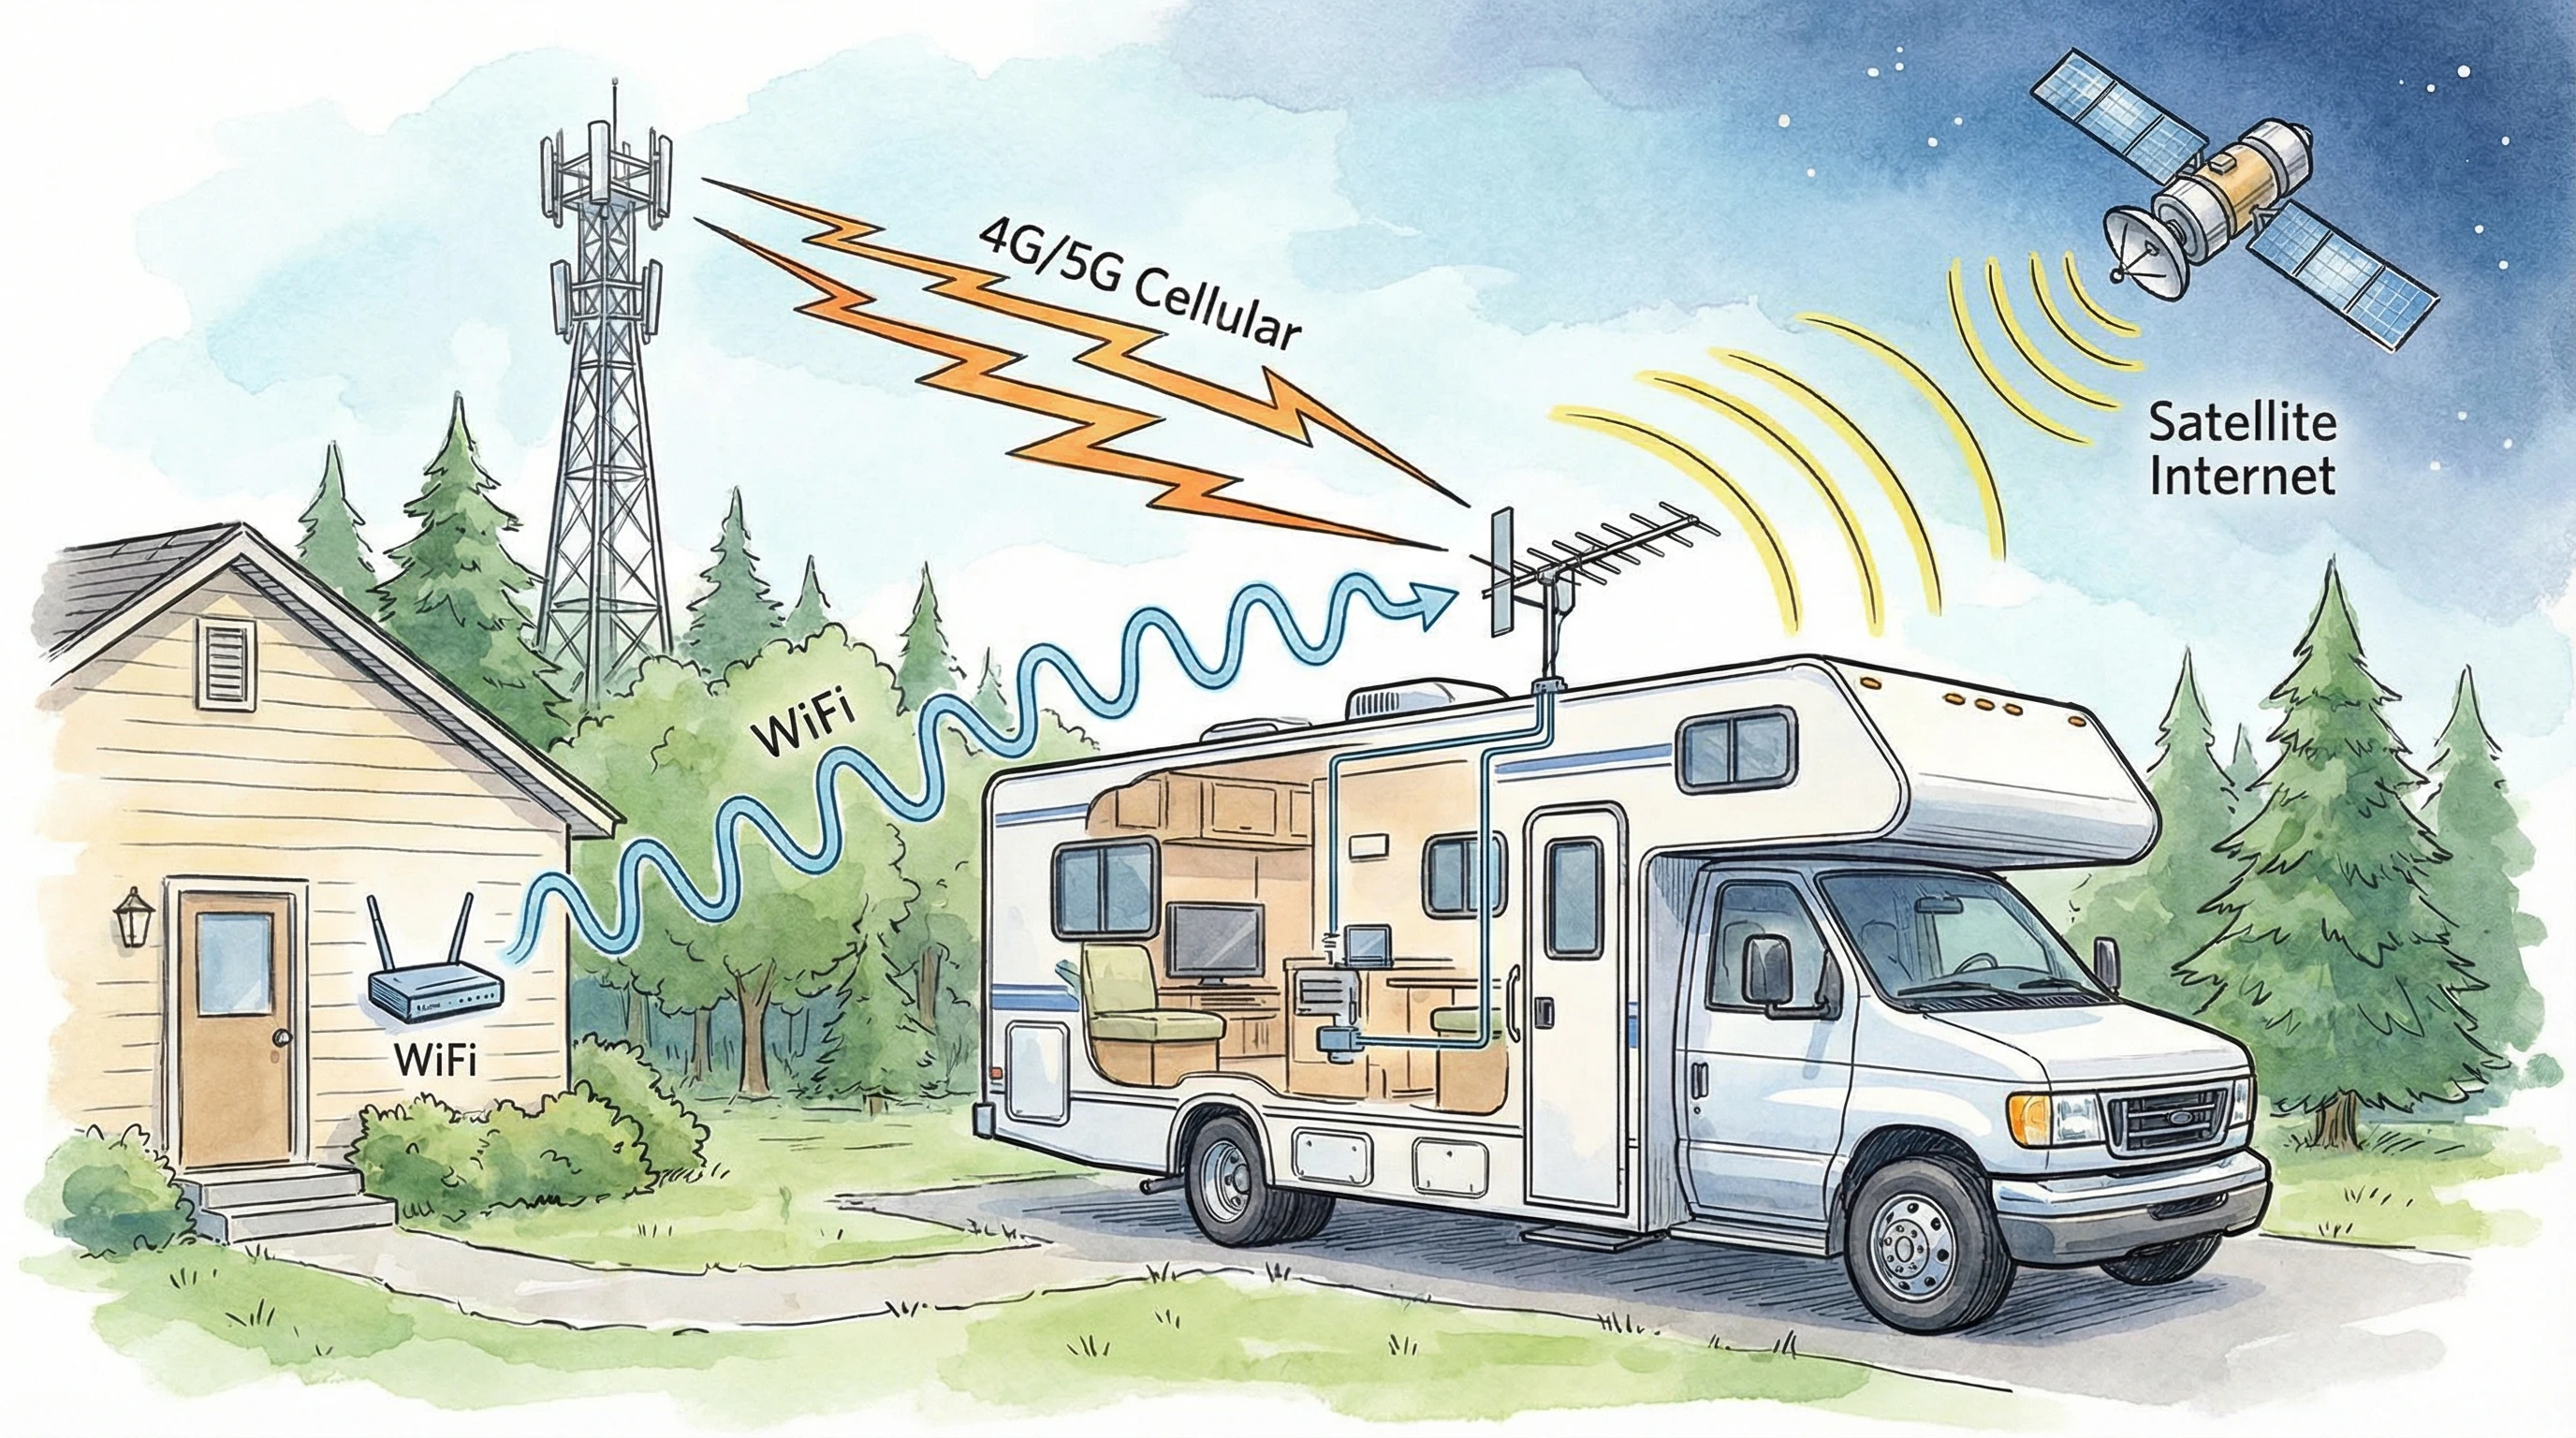
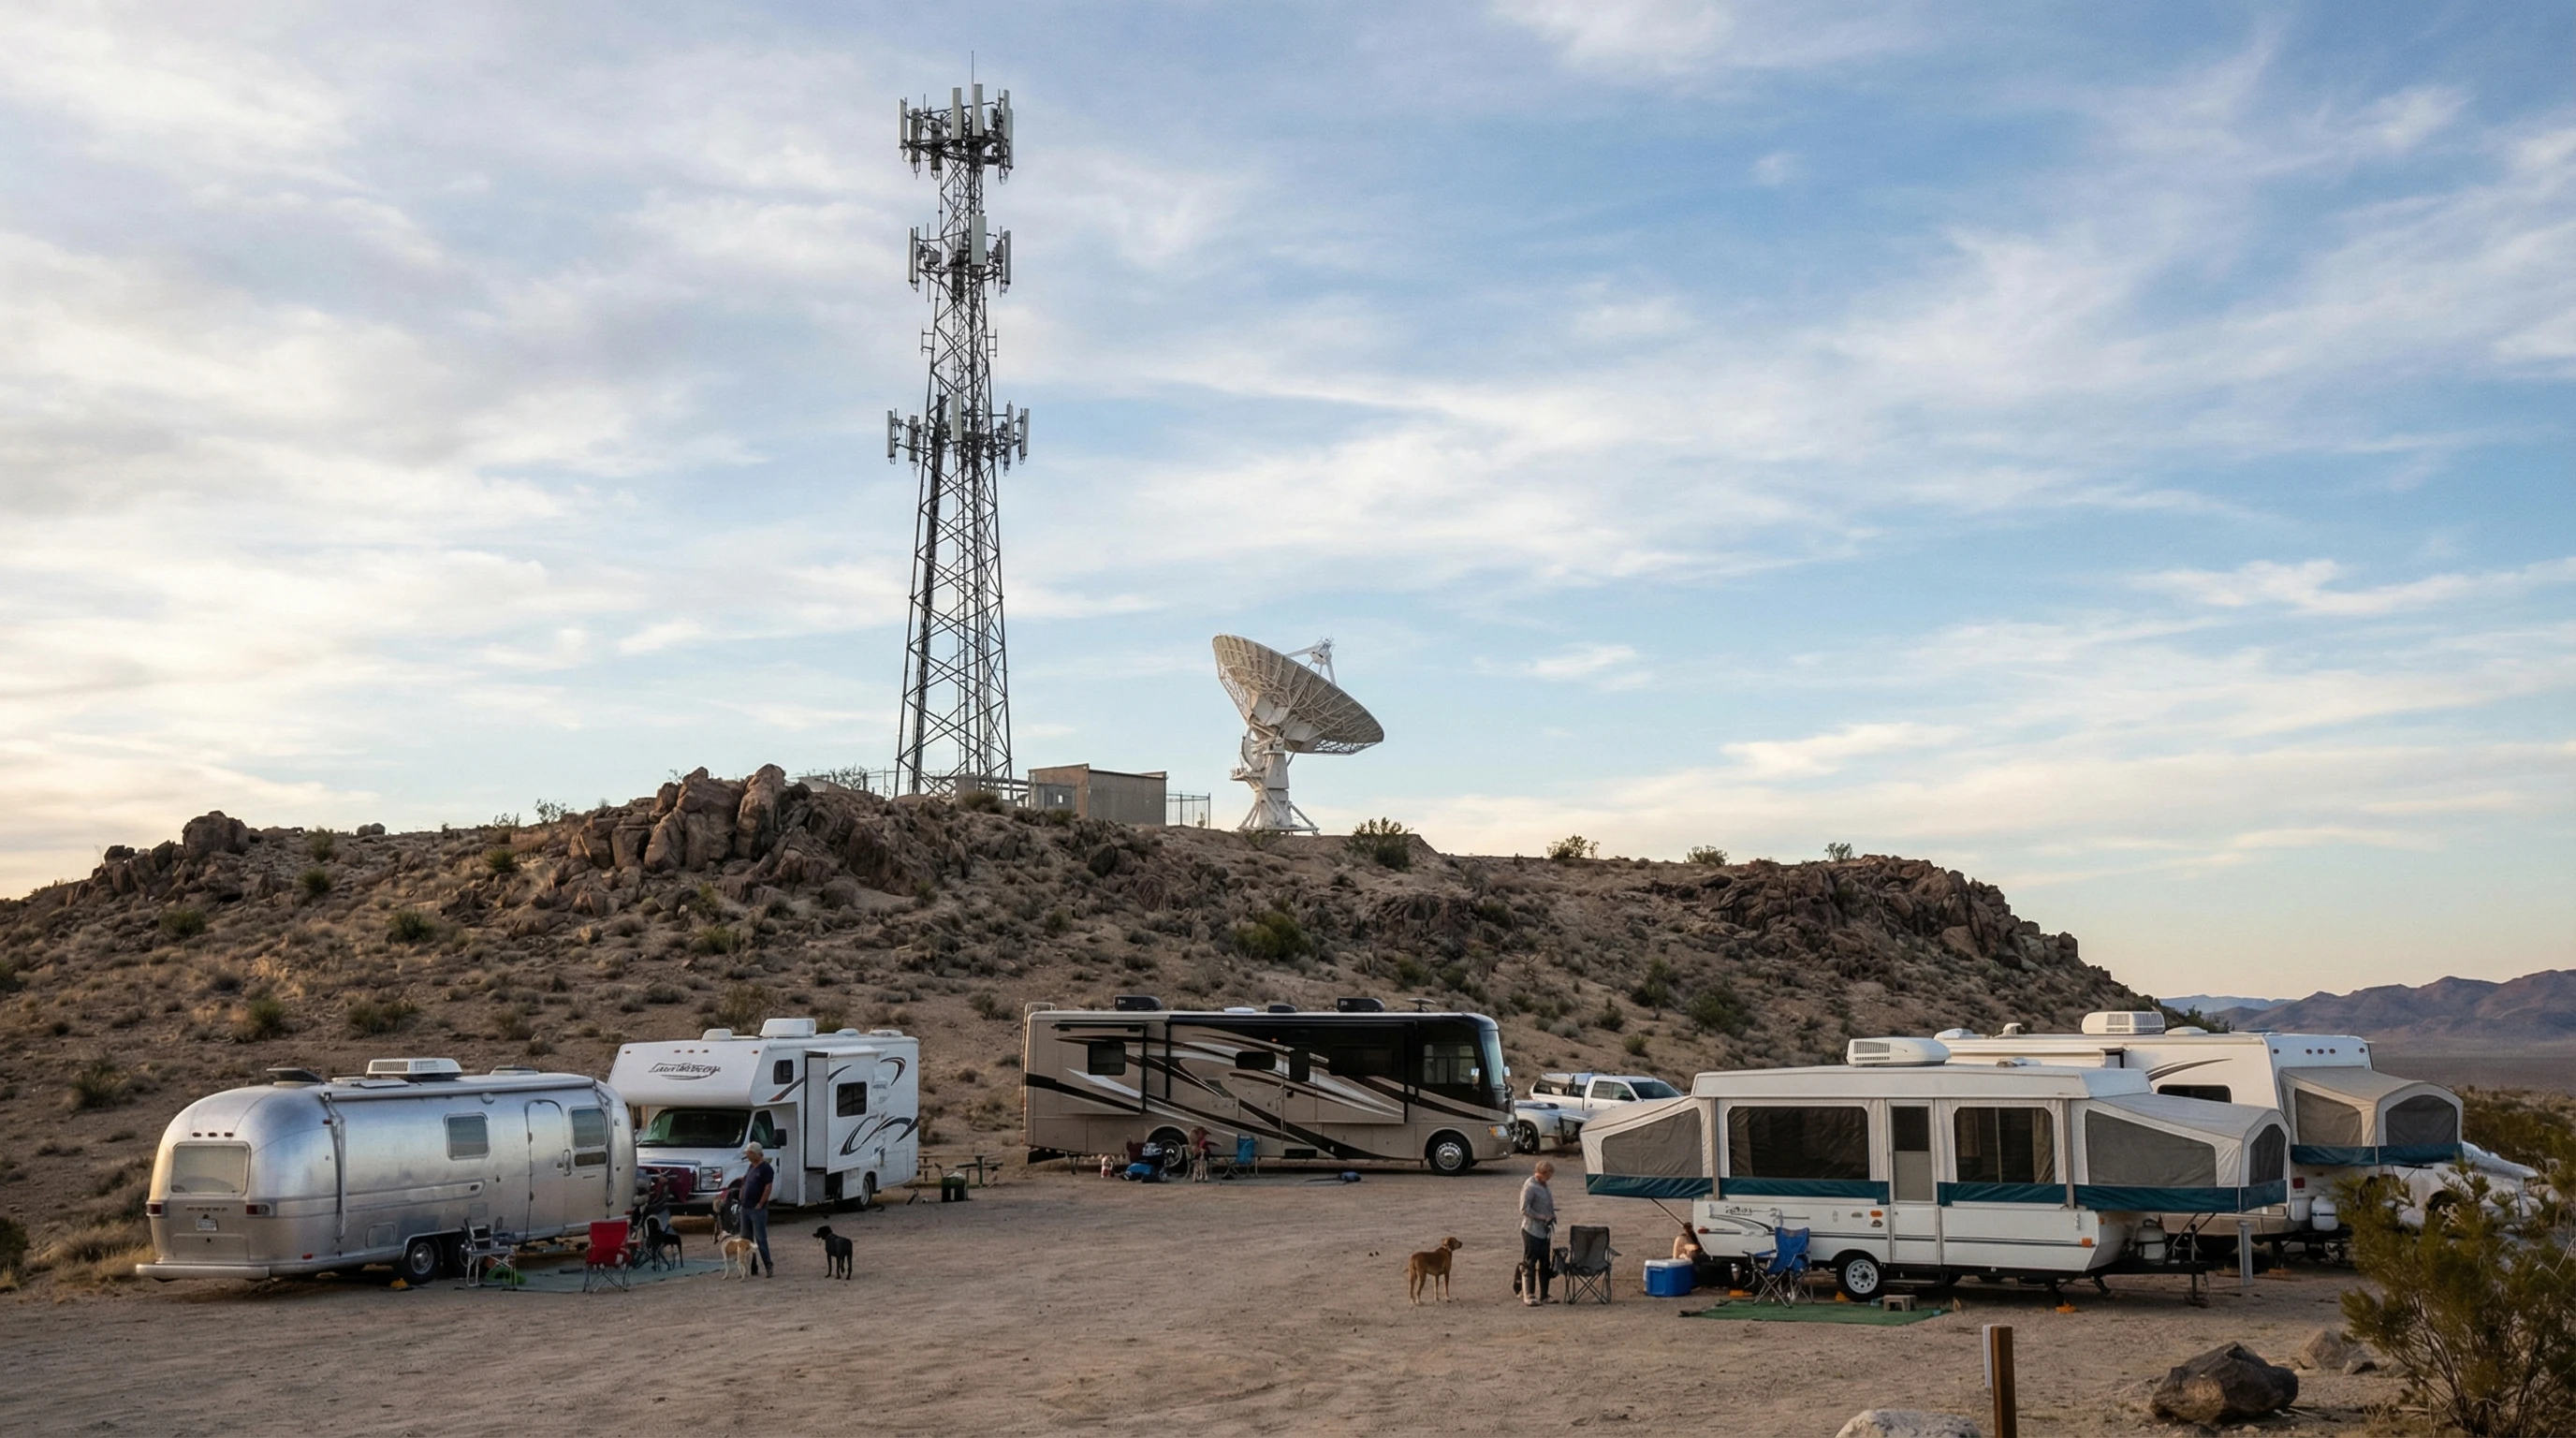
Most RV parks and campgrounds advertise free Wi-Fi, but in my experience, the speeds and reliability are hit or miss. If you’re parked at the far edge or if too many folks log on, speeds drop quickly. Even your RV can block the signal, especially if you aren’t close to the main hotspot. Trees, weather, and physical obstacles also weaken the signal, making indoor coverage a struggle.

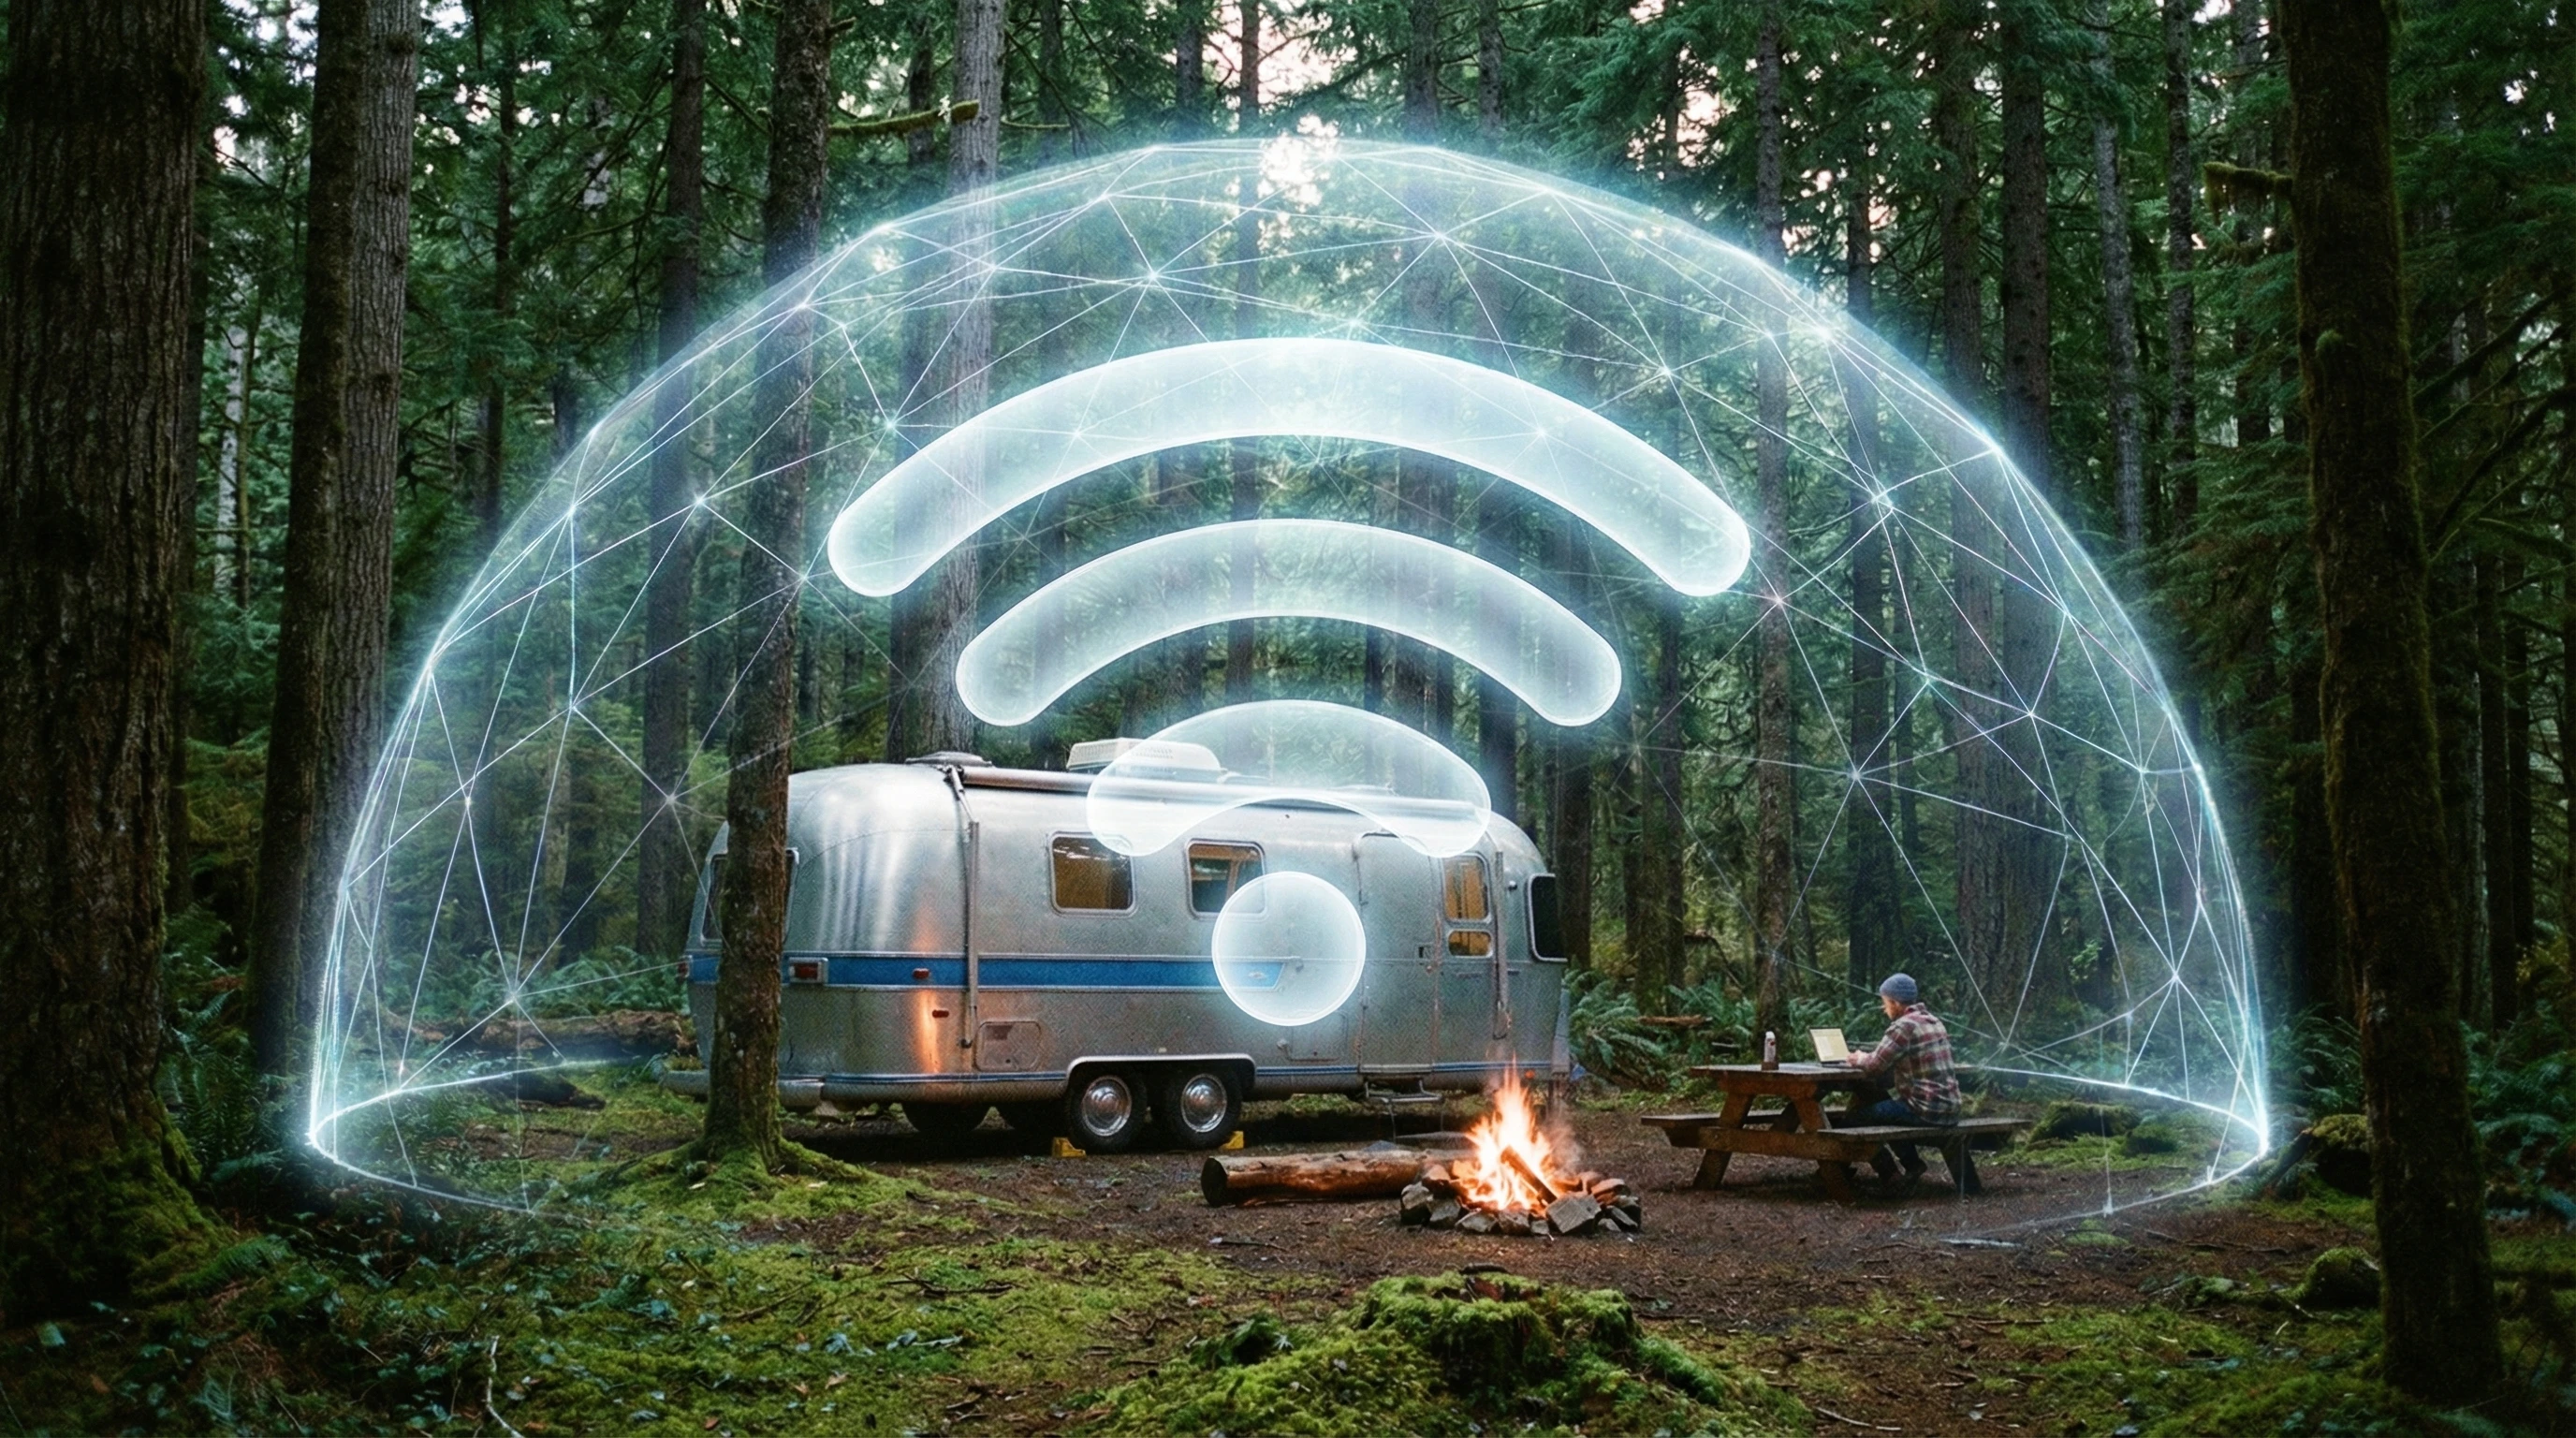
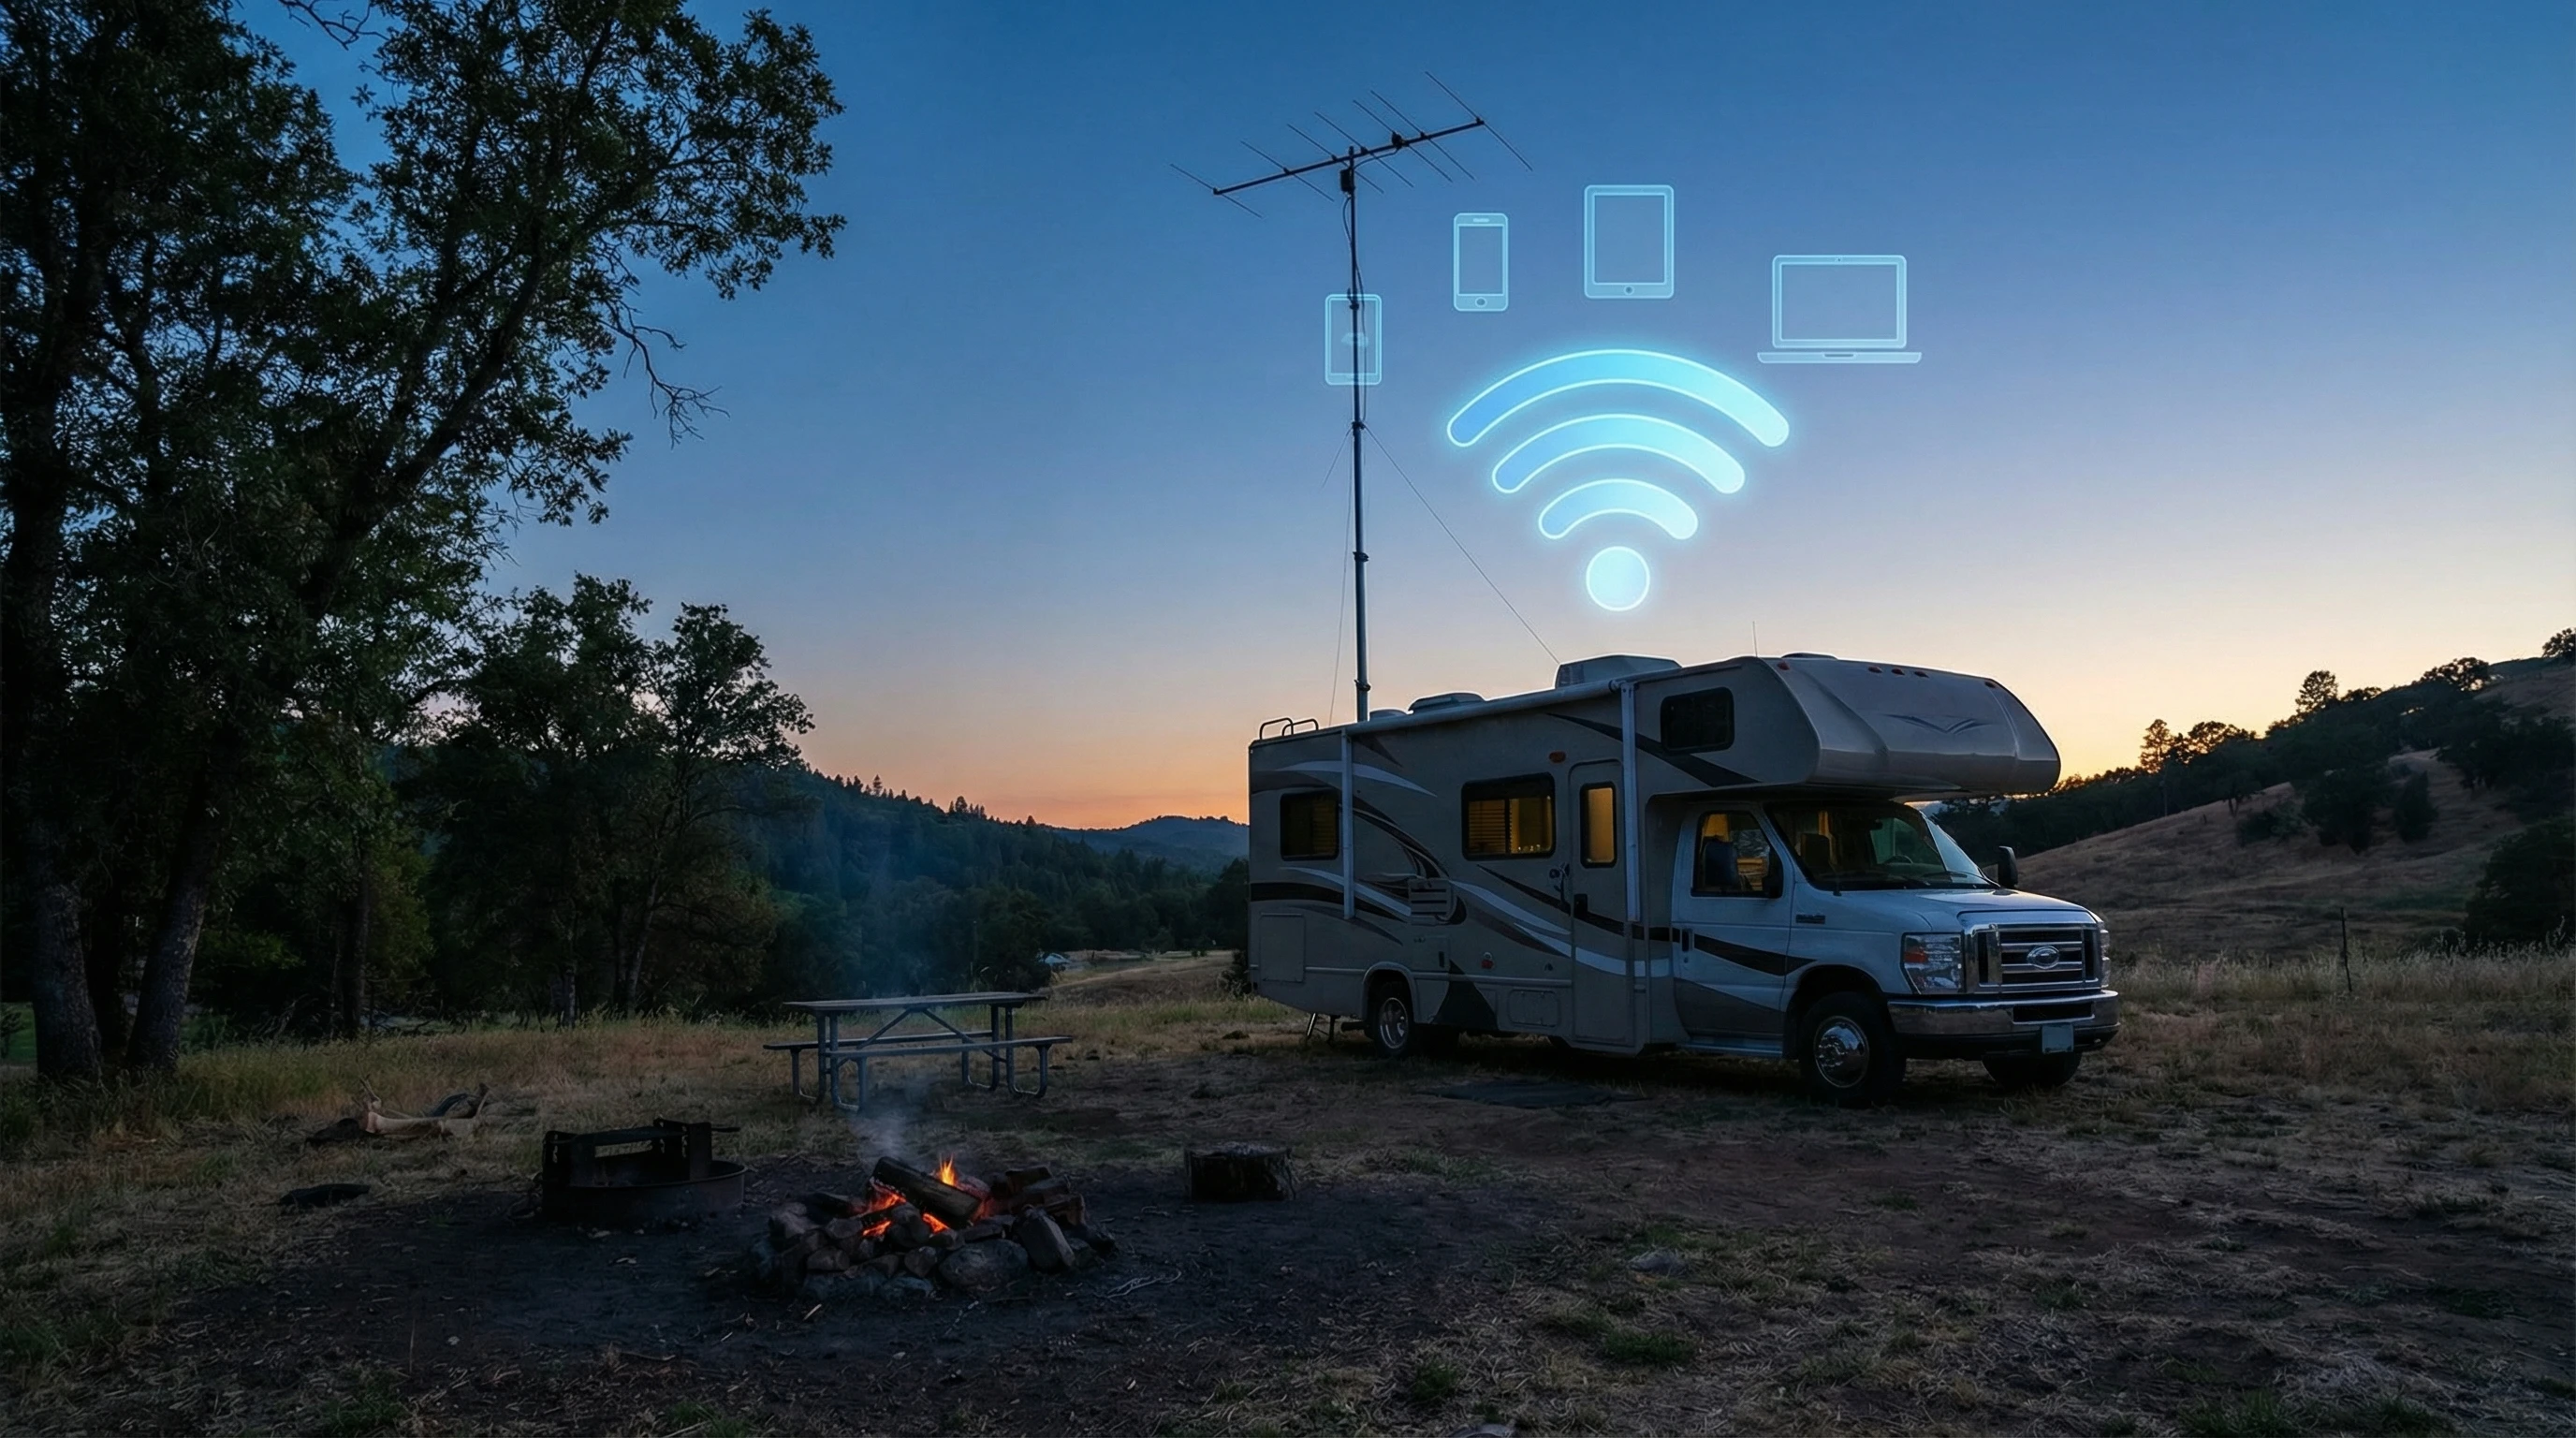
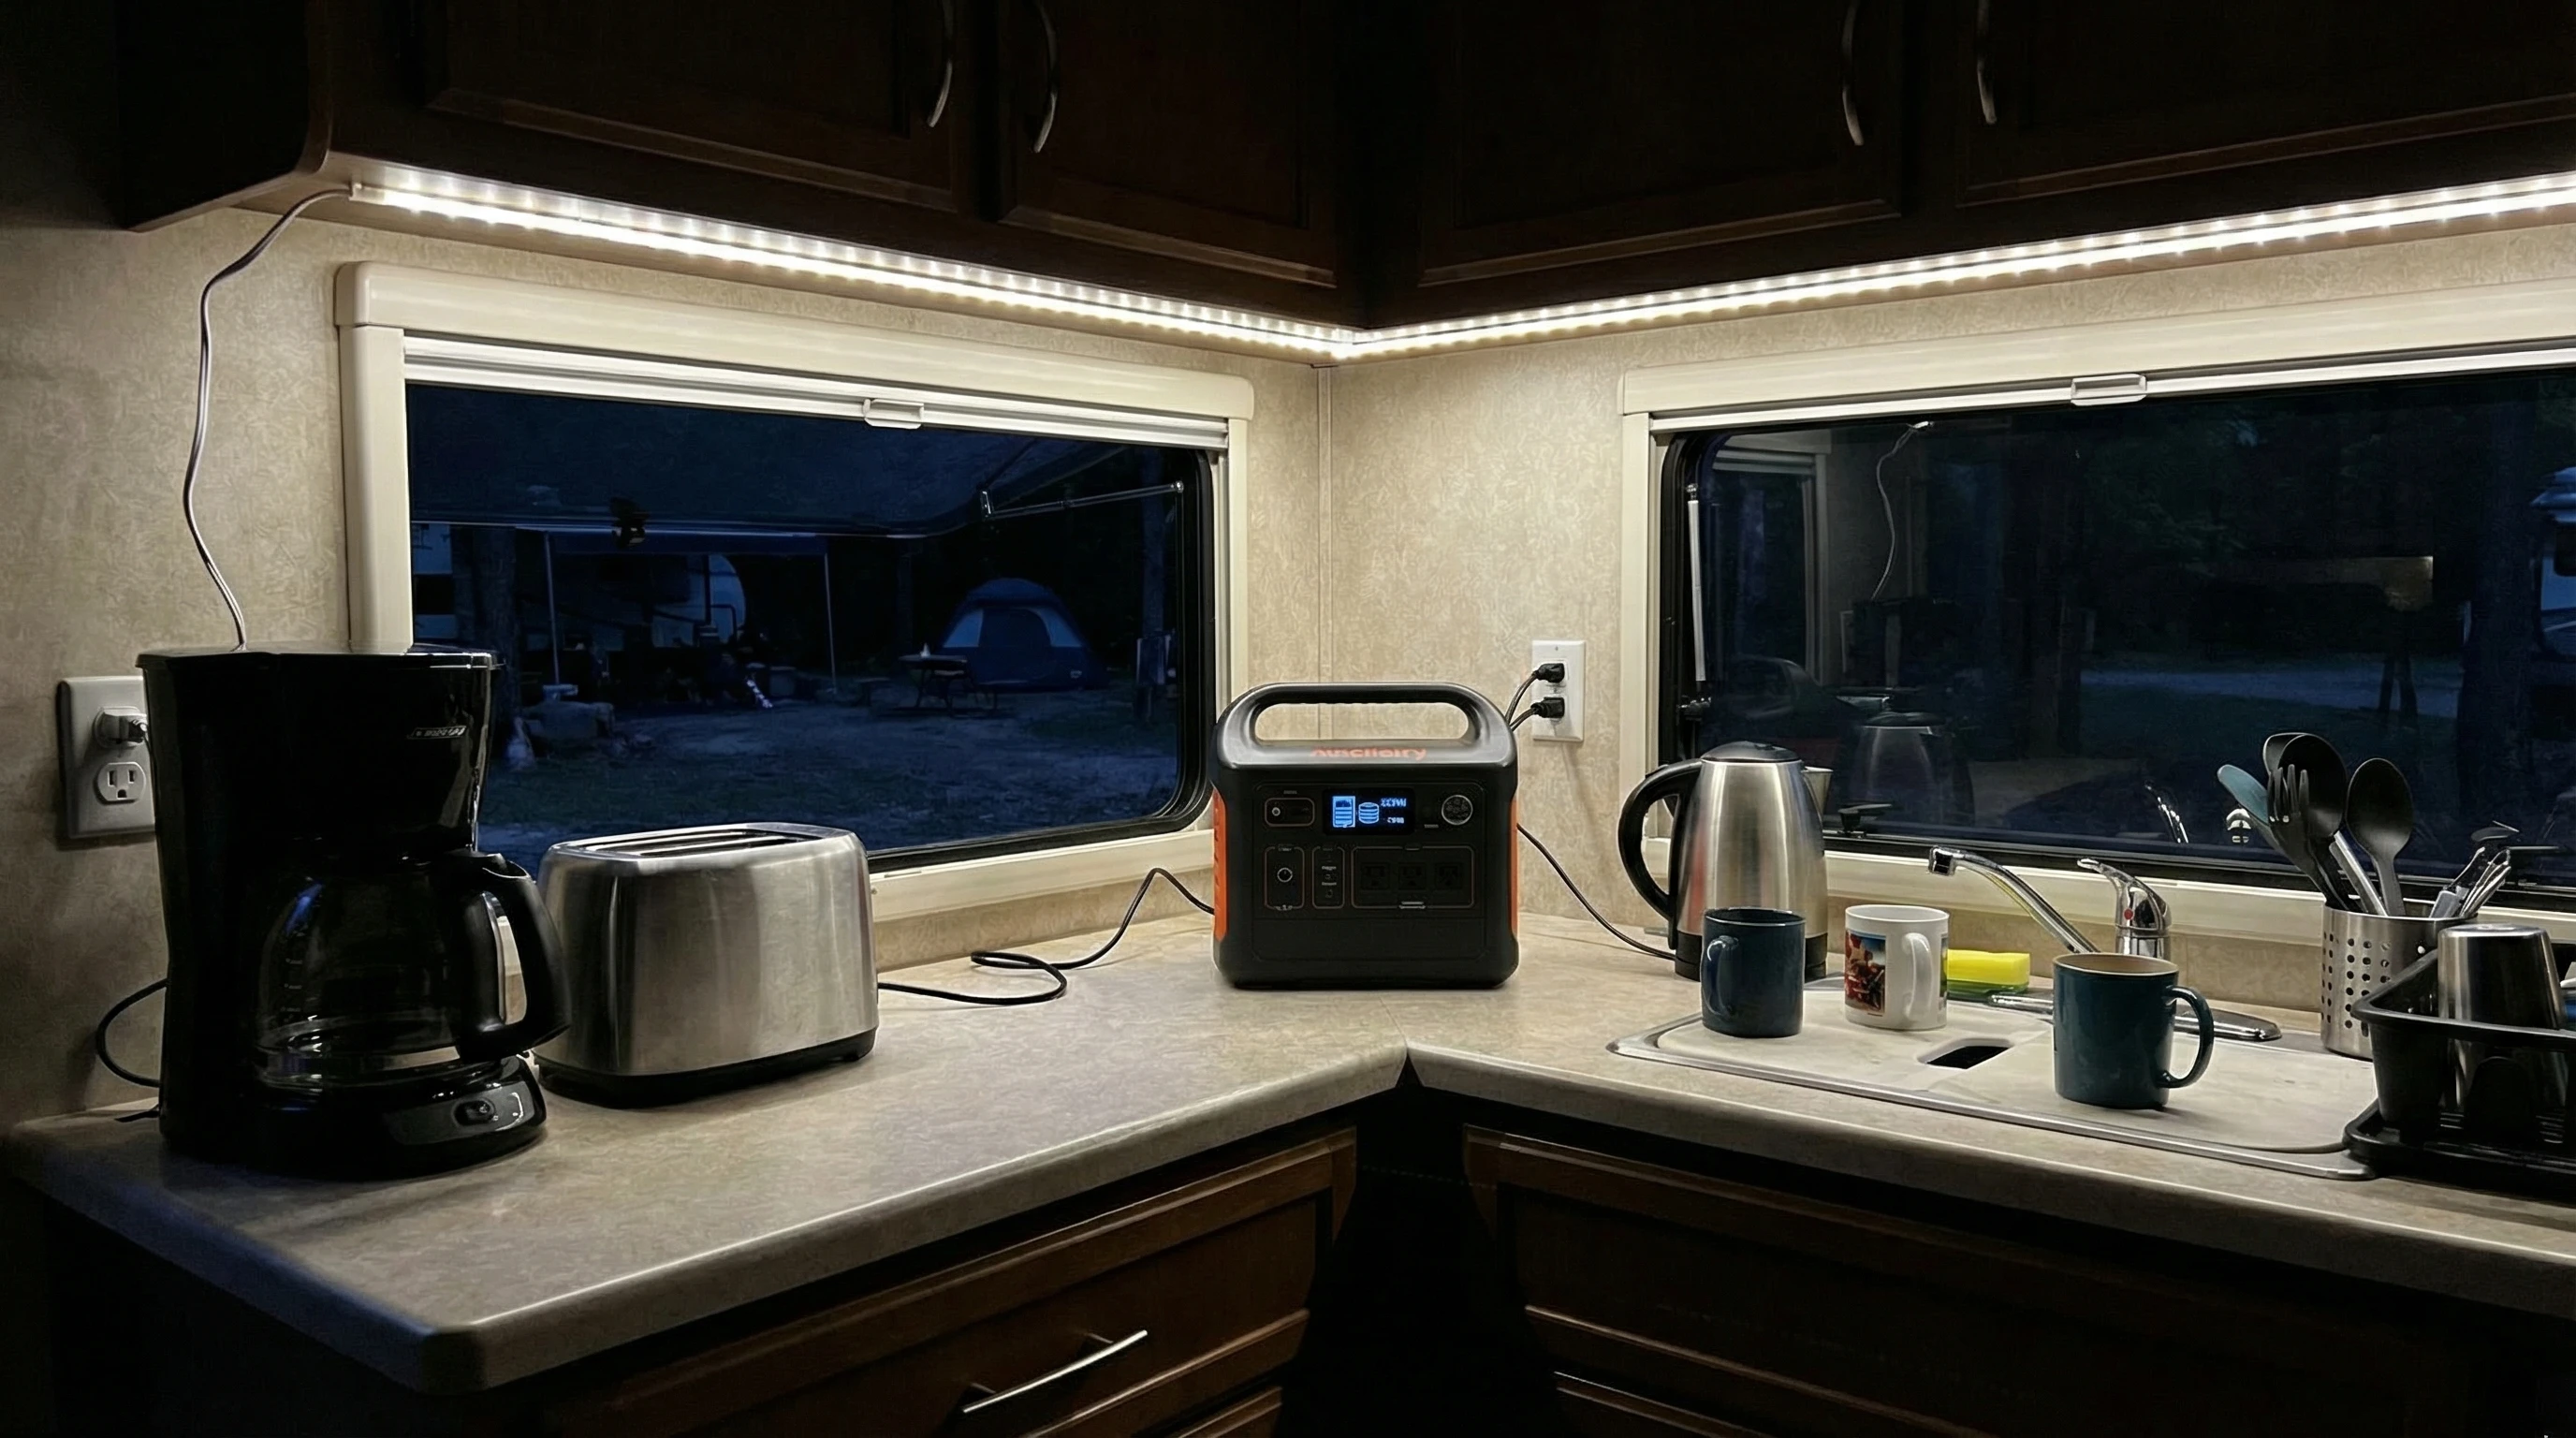
Wi-Fi extenders and mesh networks are tech solutions I’ve put to the test to fill in those coverage dead zones. These tools pump up weak signals and stretch coverage across a bigger area. So, instead of balancing your laptop on the steps for one measly bar, you can relax inside and get solid speeds for work or play. For travelers relying on campground Wi-Fi or sharing a paid connection, using the right gear makes RV internet life way less stressful.

Understanding Wi-Fi Extenders and How They Work

Wi-Fi extenders, also called boosters or repeaters, grab an existing wireless signal and rebroadcast it to make the network usable where it’d normally be too weak. These gadgets are favorites among RVers thanks to their easy setup and minimal tech fuss.

The concept is straightforward. Suppose the campground router is at the main office, and your RV is parked at the rear. A Wi-Fi extender set up halfway between grabs the weak signal and relays it inside your RV. Suddenly, you’re connected reliably and can actually work indoors instead of clustering at a picnic table closer to the router.

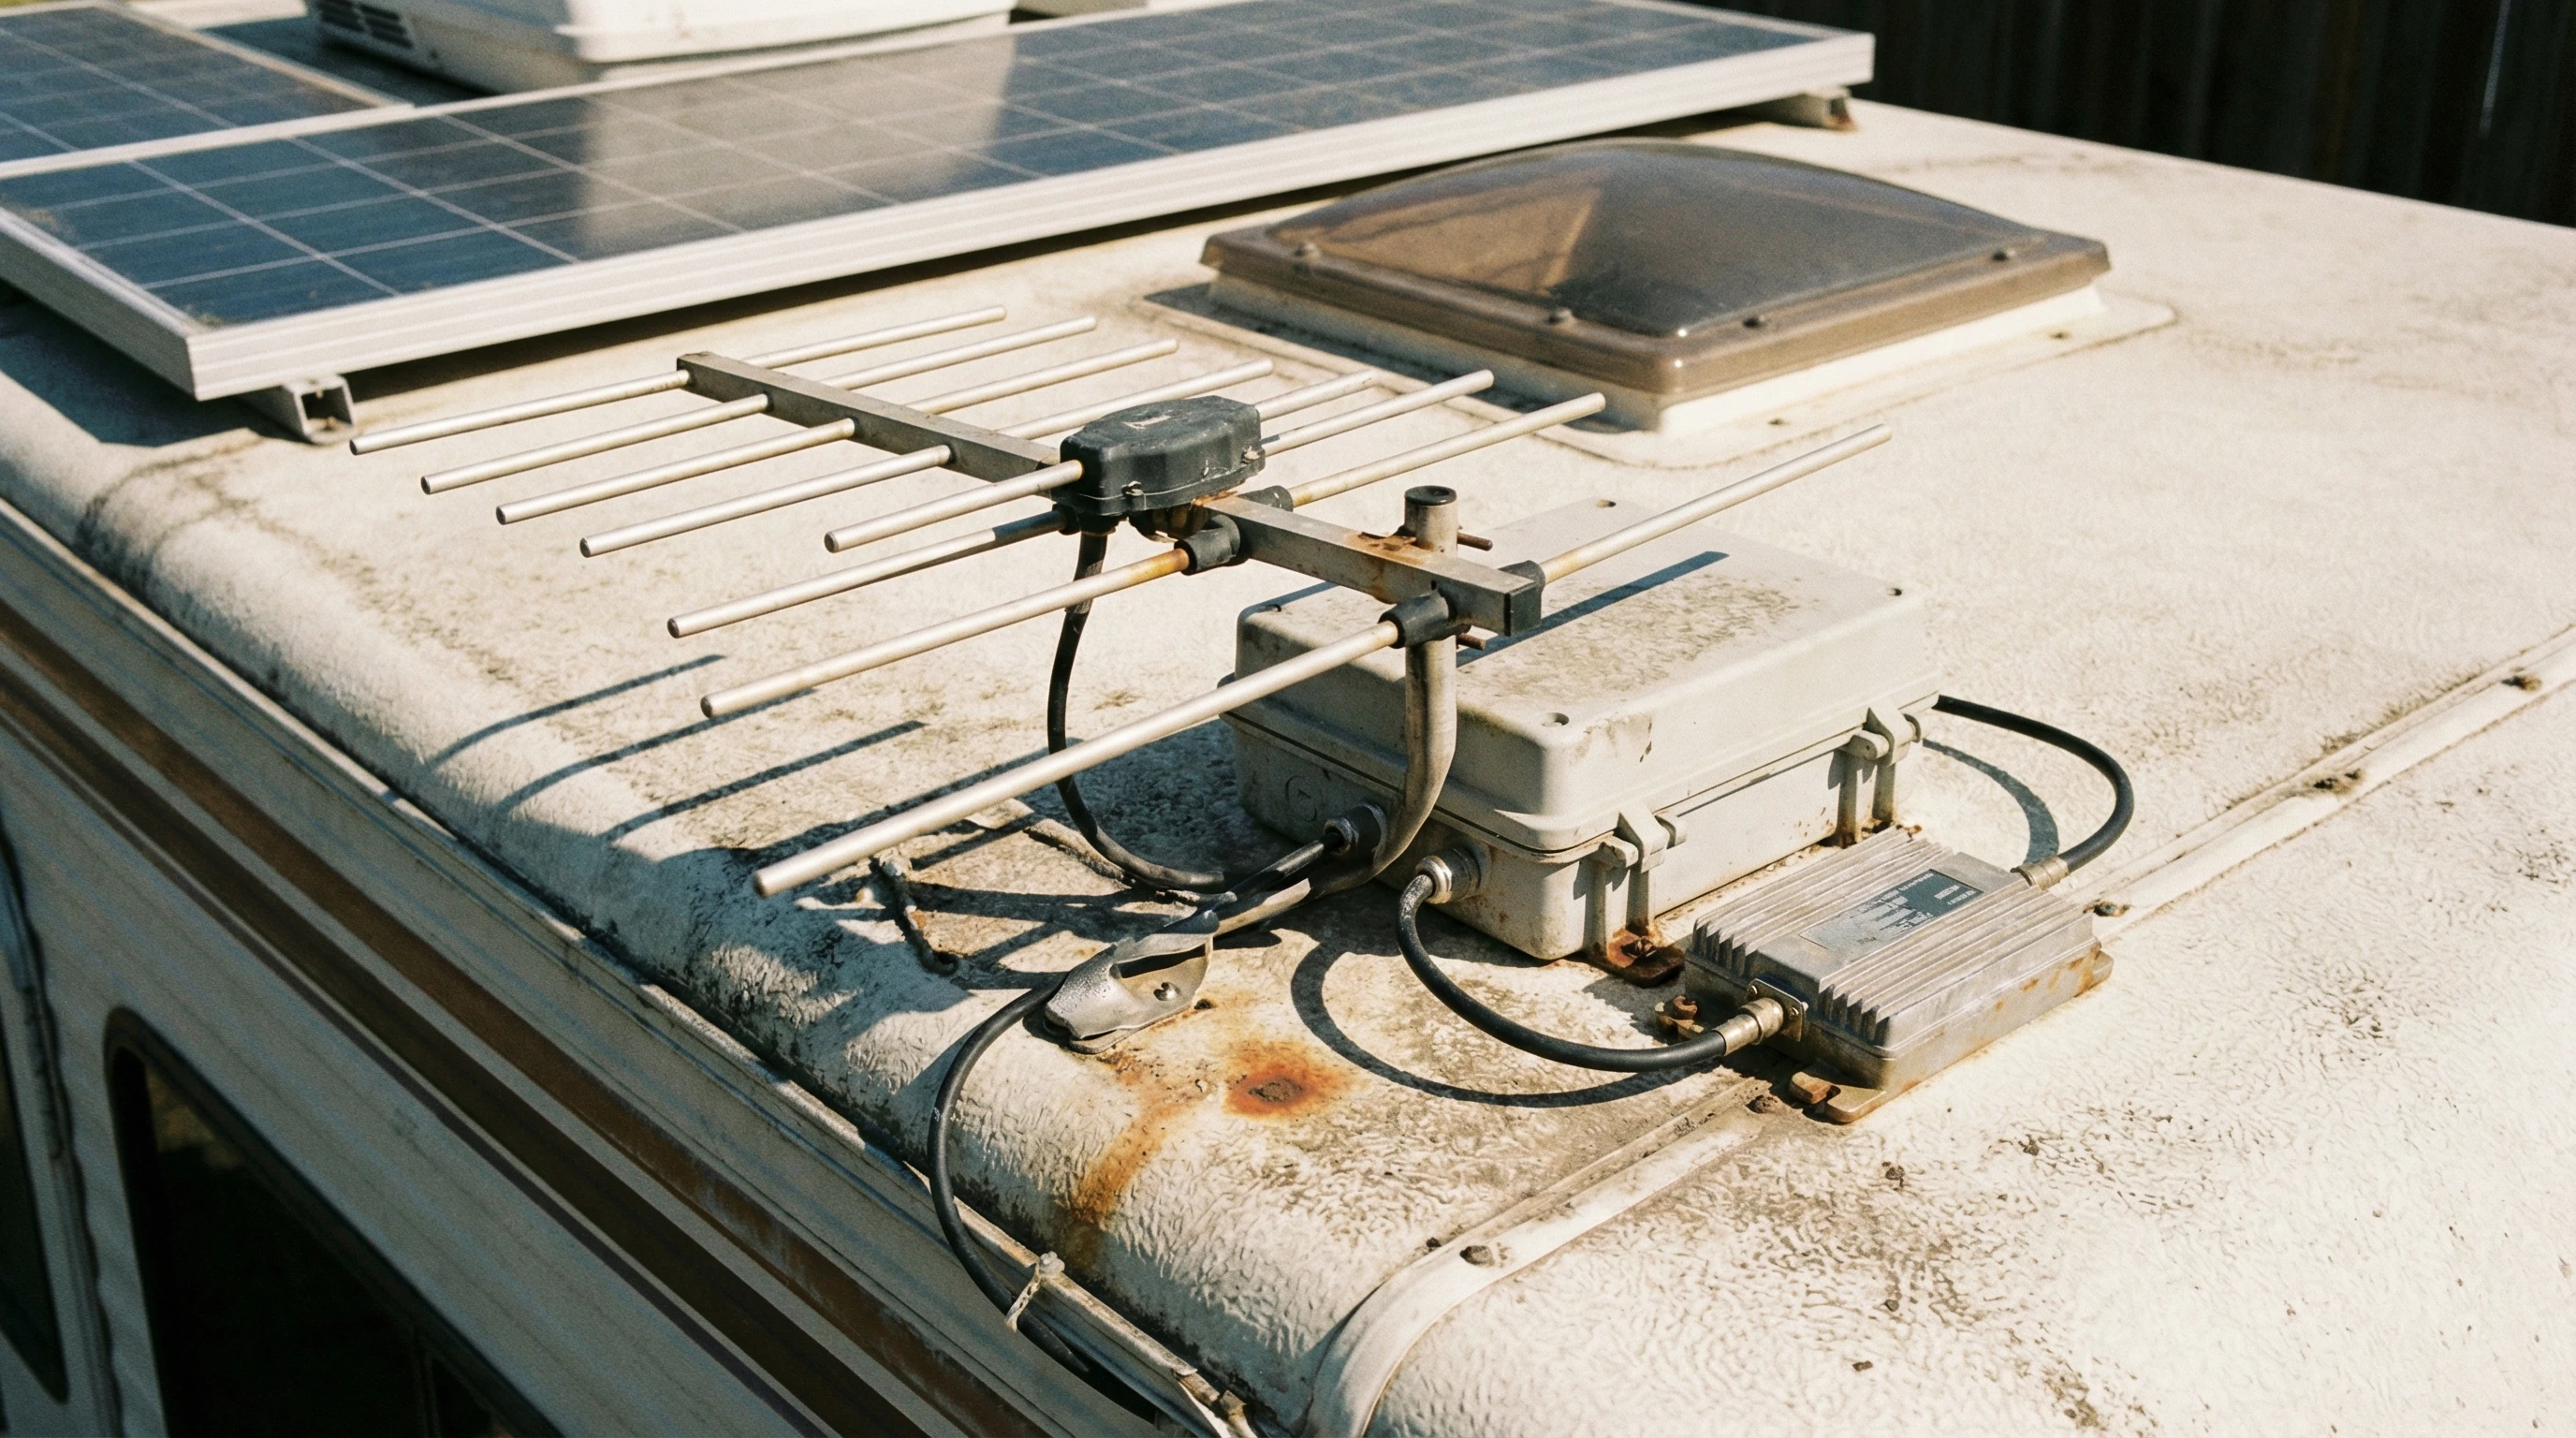
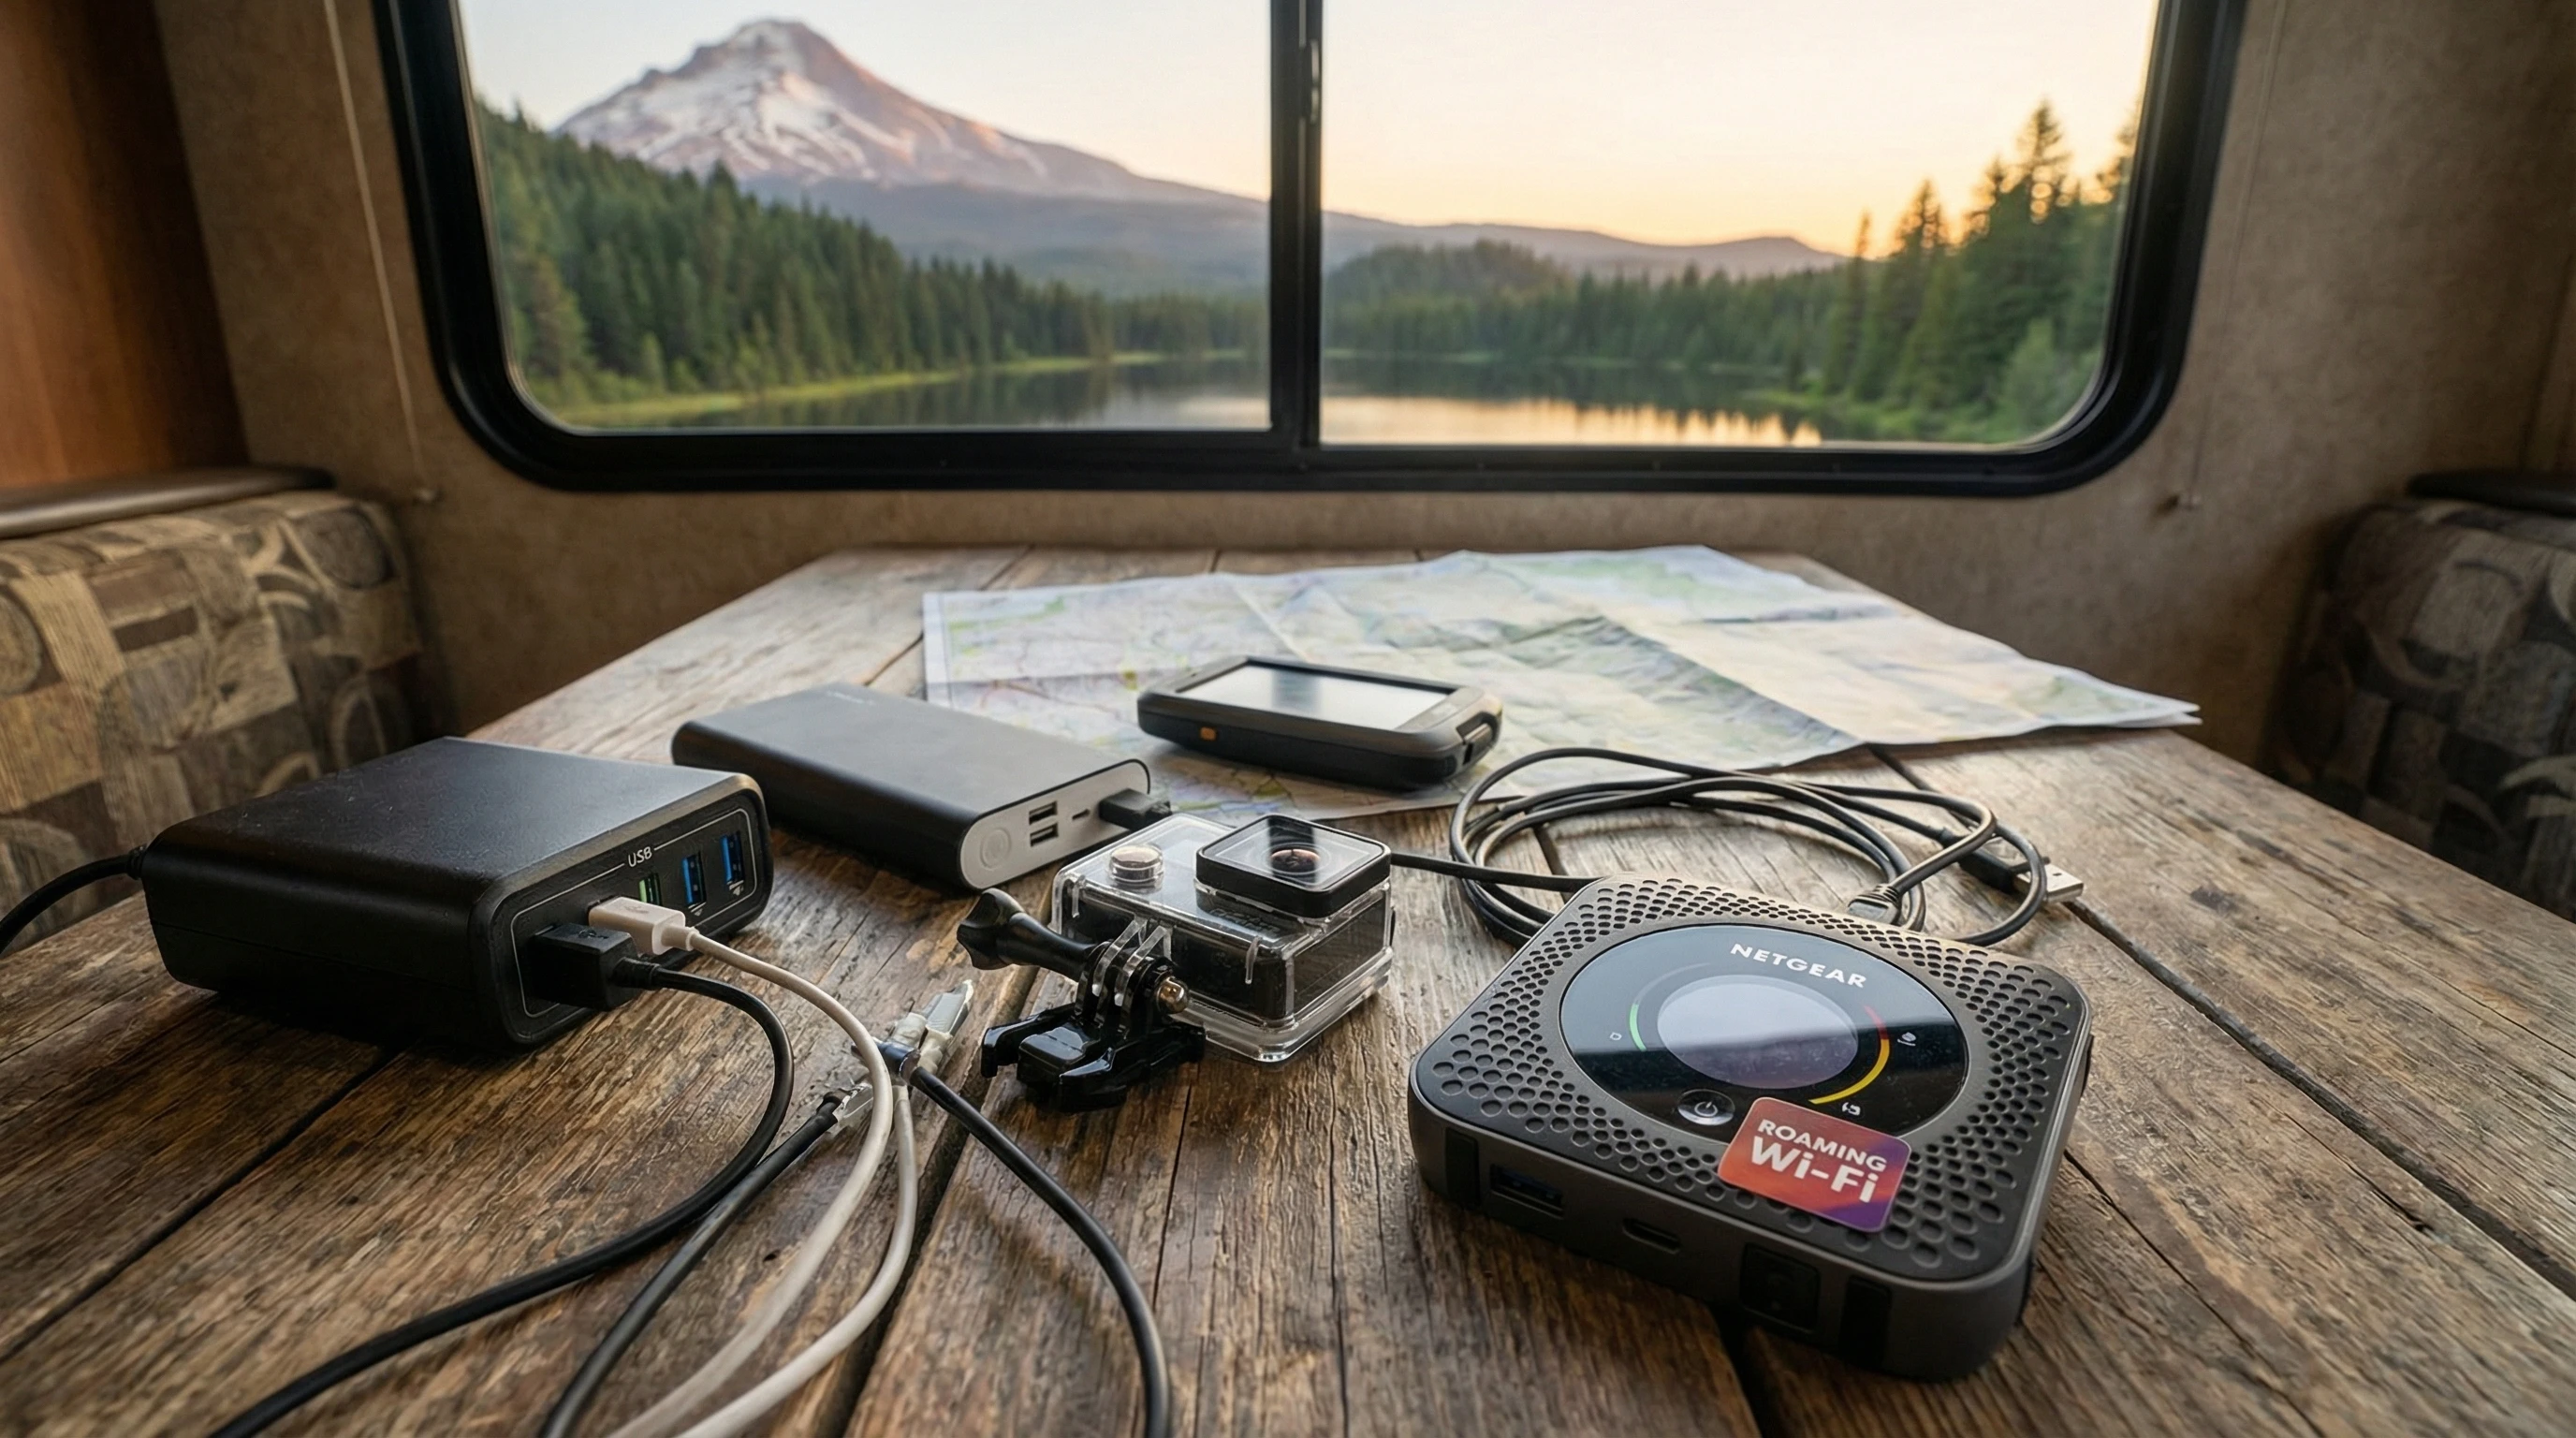
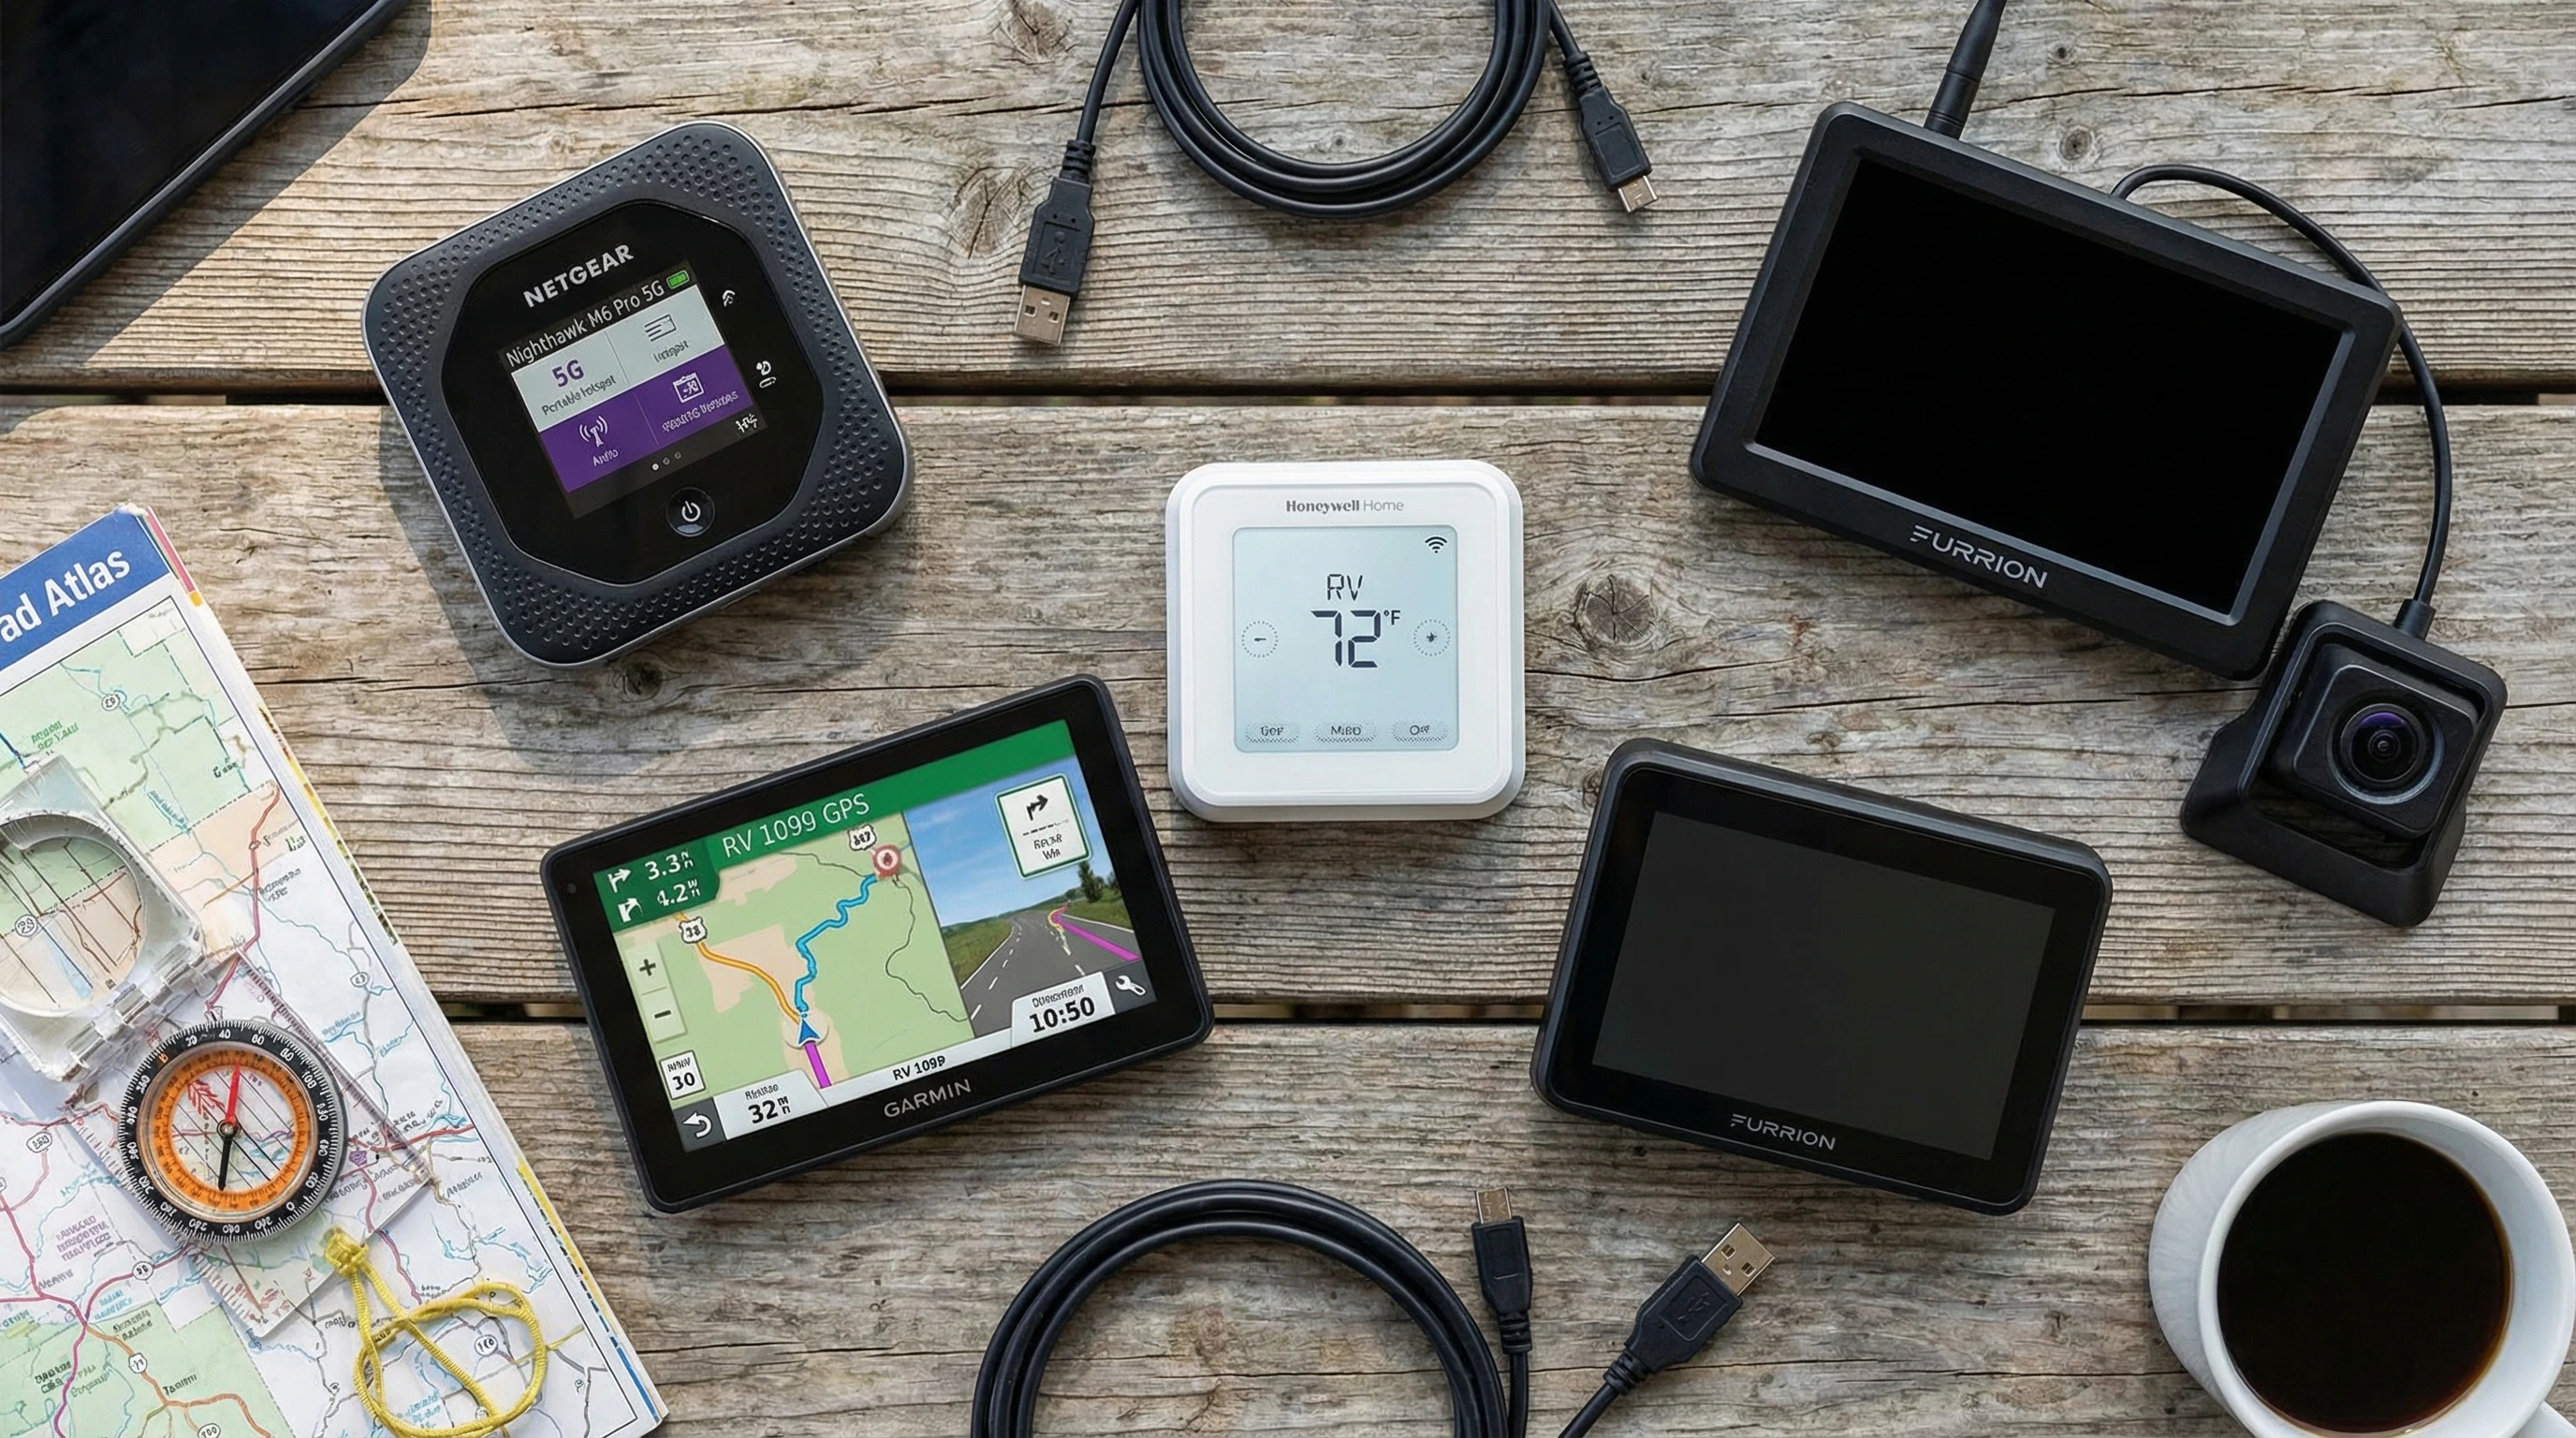
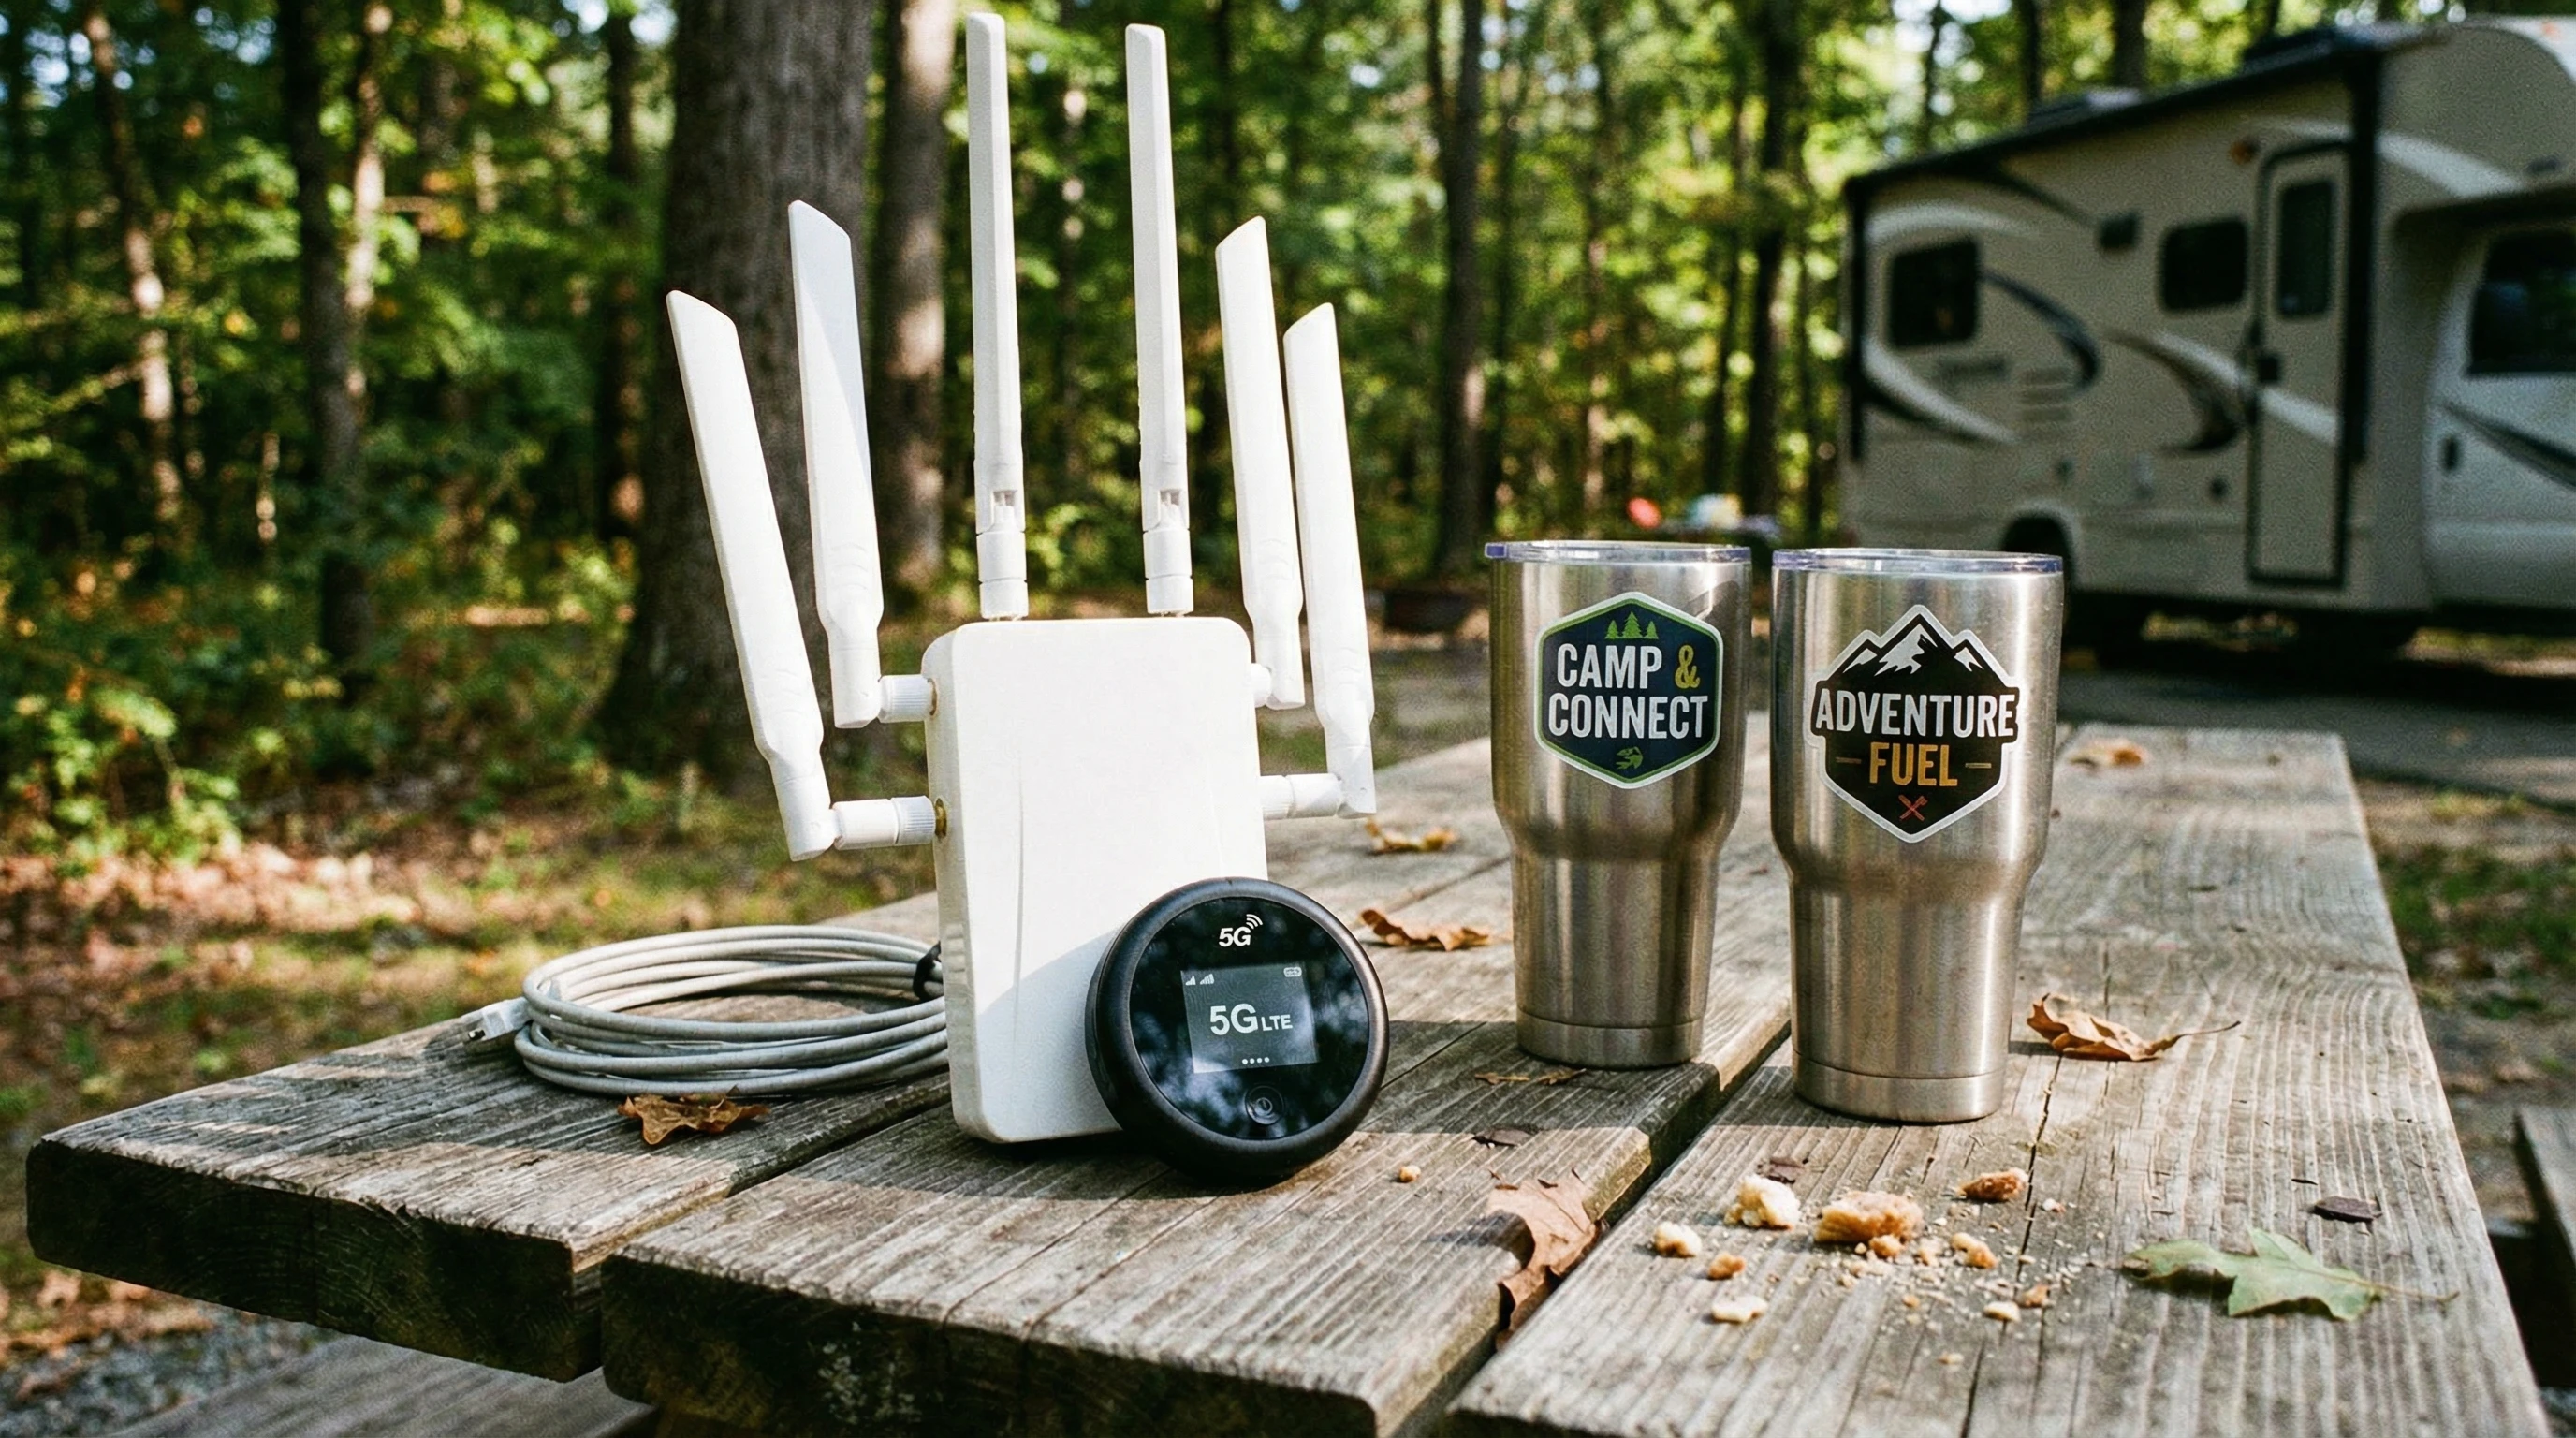
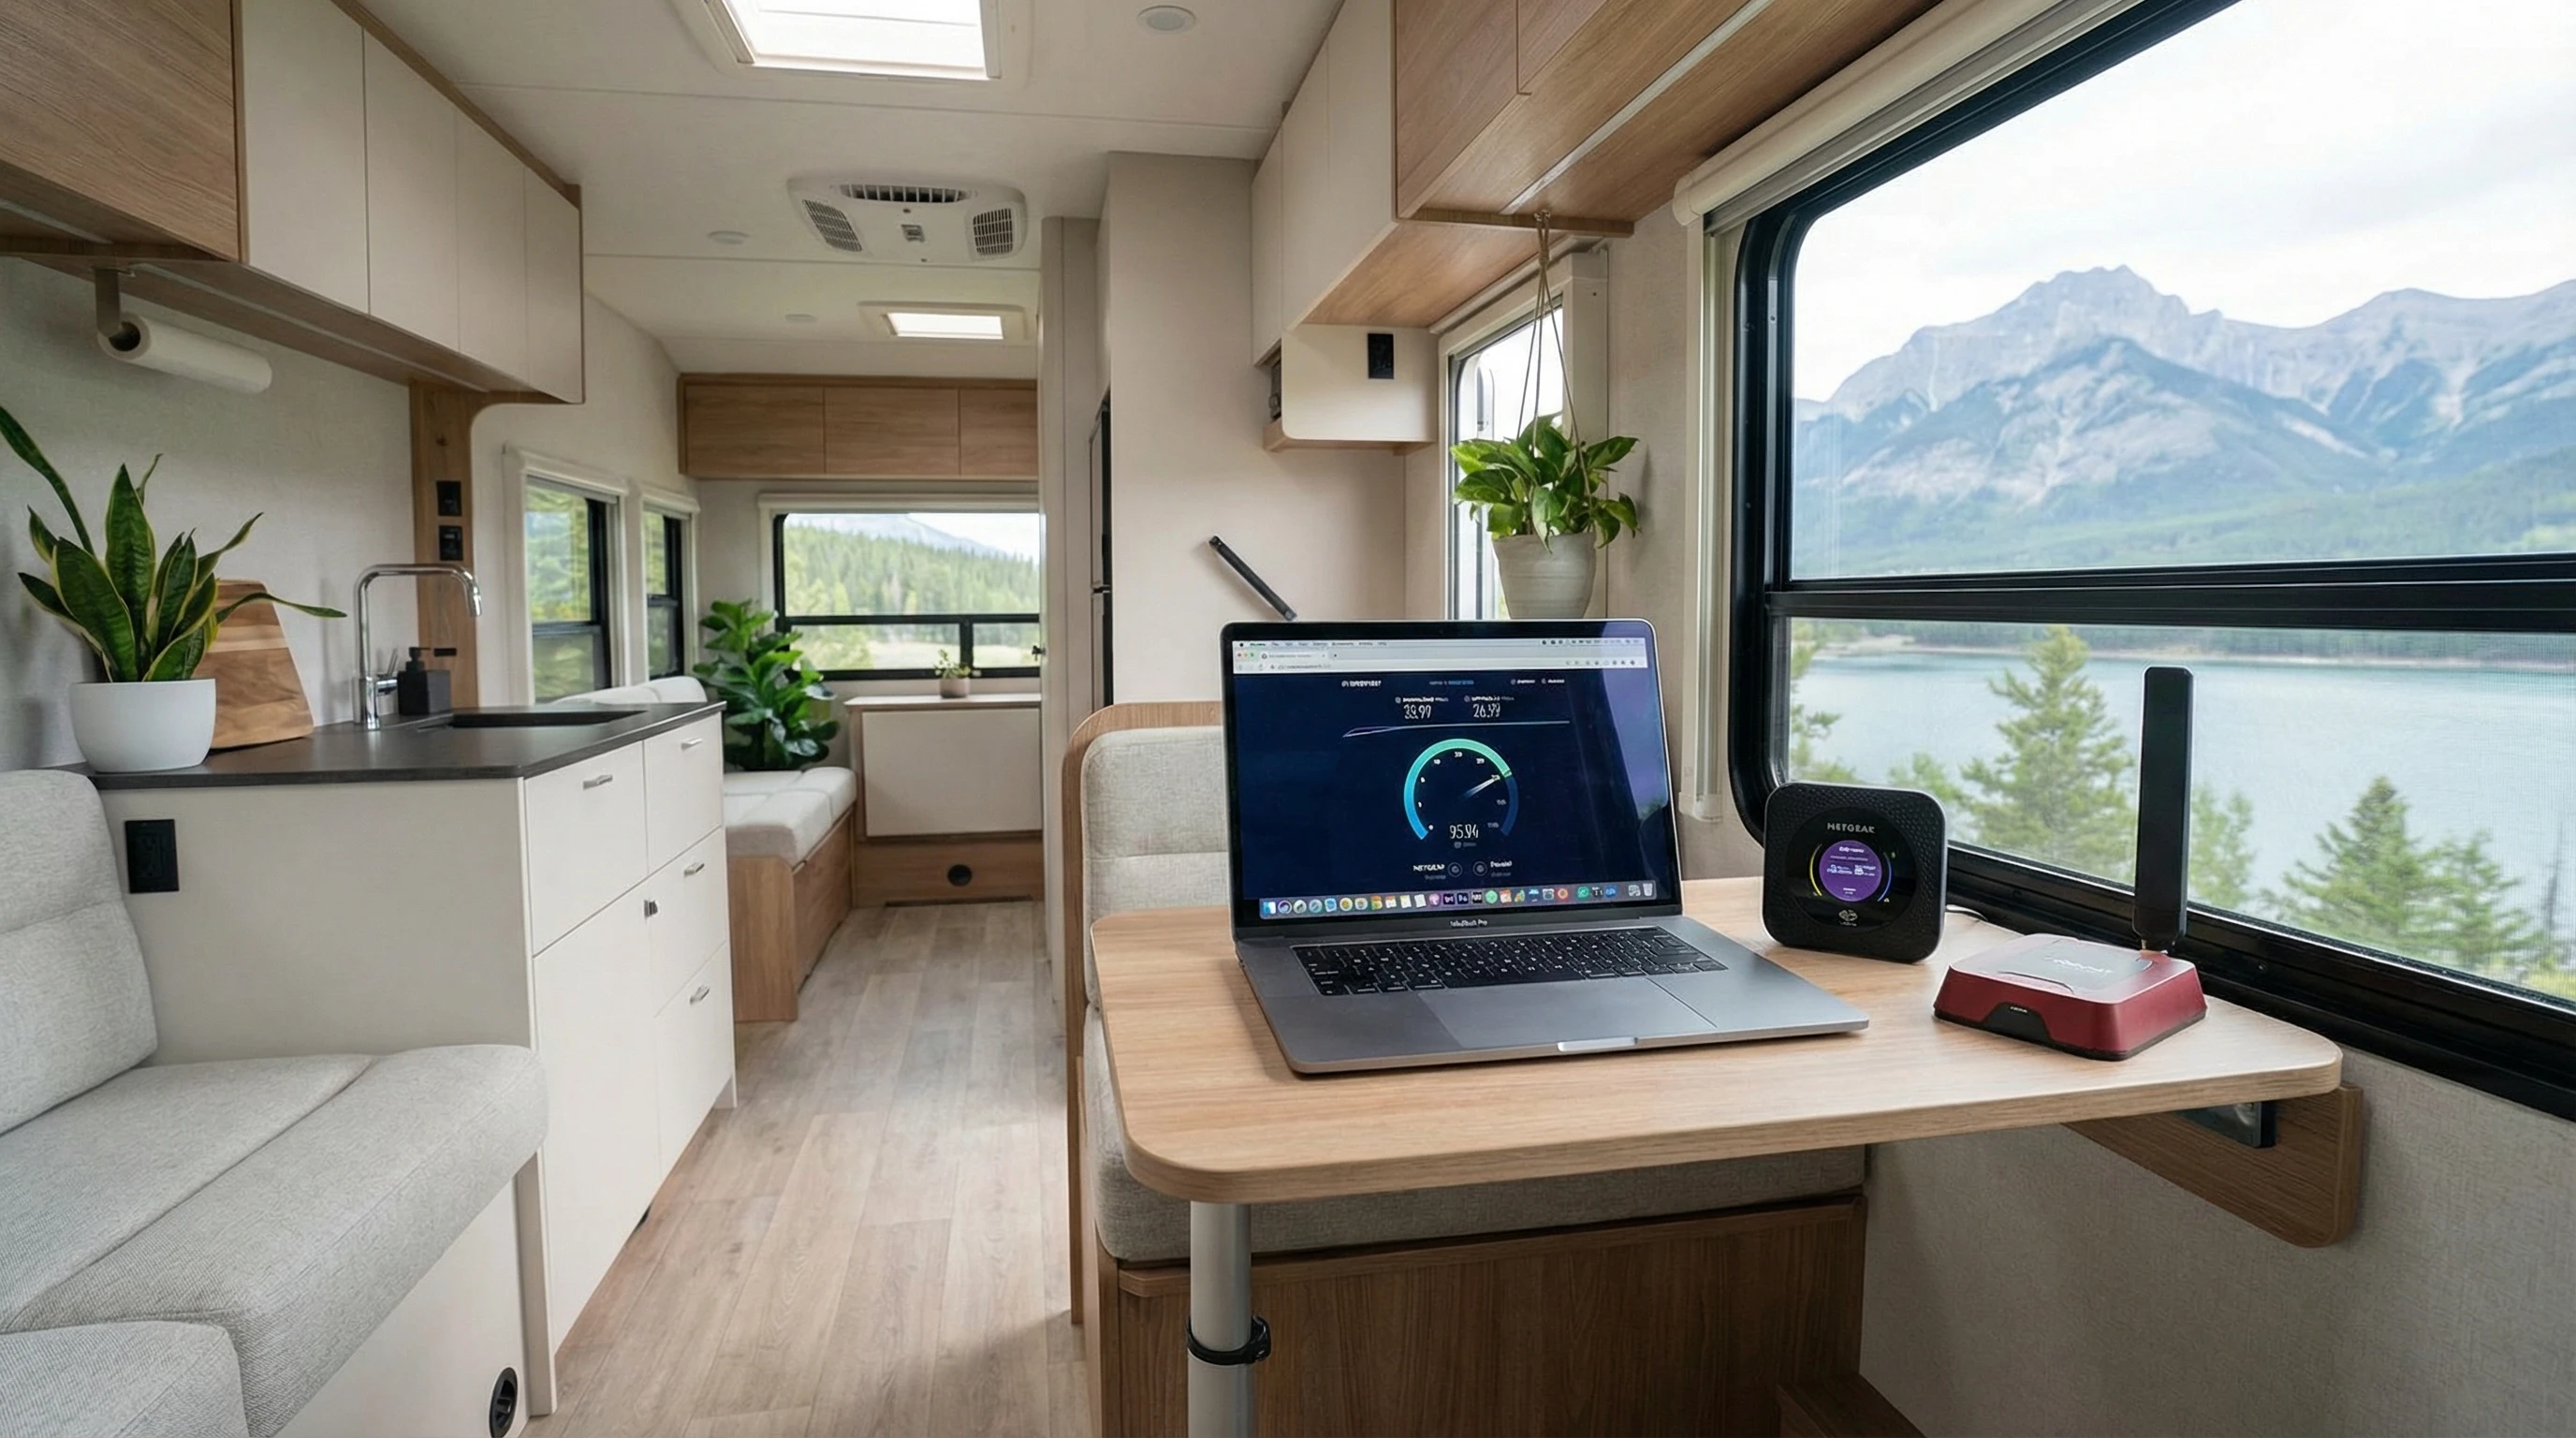
You’ll find extenders that plug into a power outlet, as well as models using USB or Ethernet. I’ve tried lower-priced and more expensive options, honestly, even a simple extender can noticeably help. Many have antennas that focus the signal directionally. Some are weatherproof for outdoor use, which is a bonus if you camp in remote sites or open, dusty parks.

Some Wi-Fi extenders offer dual-band support, meaning they boost 2.4GHz (more range, but slower) as well as 5GHz (speedier, but sometimes doesn’t reach as far) signals. This works great when multiple people or devices need to log on. Just remember: extenders increase range, but might cut your speeds a tad since they relay the signal. If your source is already weak or overloaded, things can still slow down in busy hours.

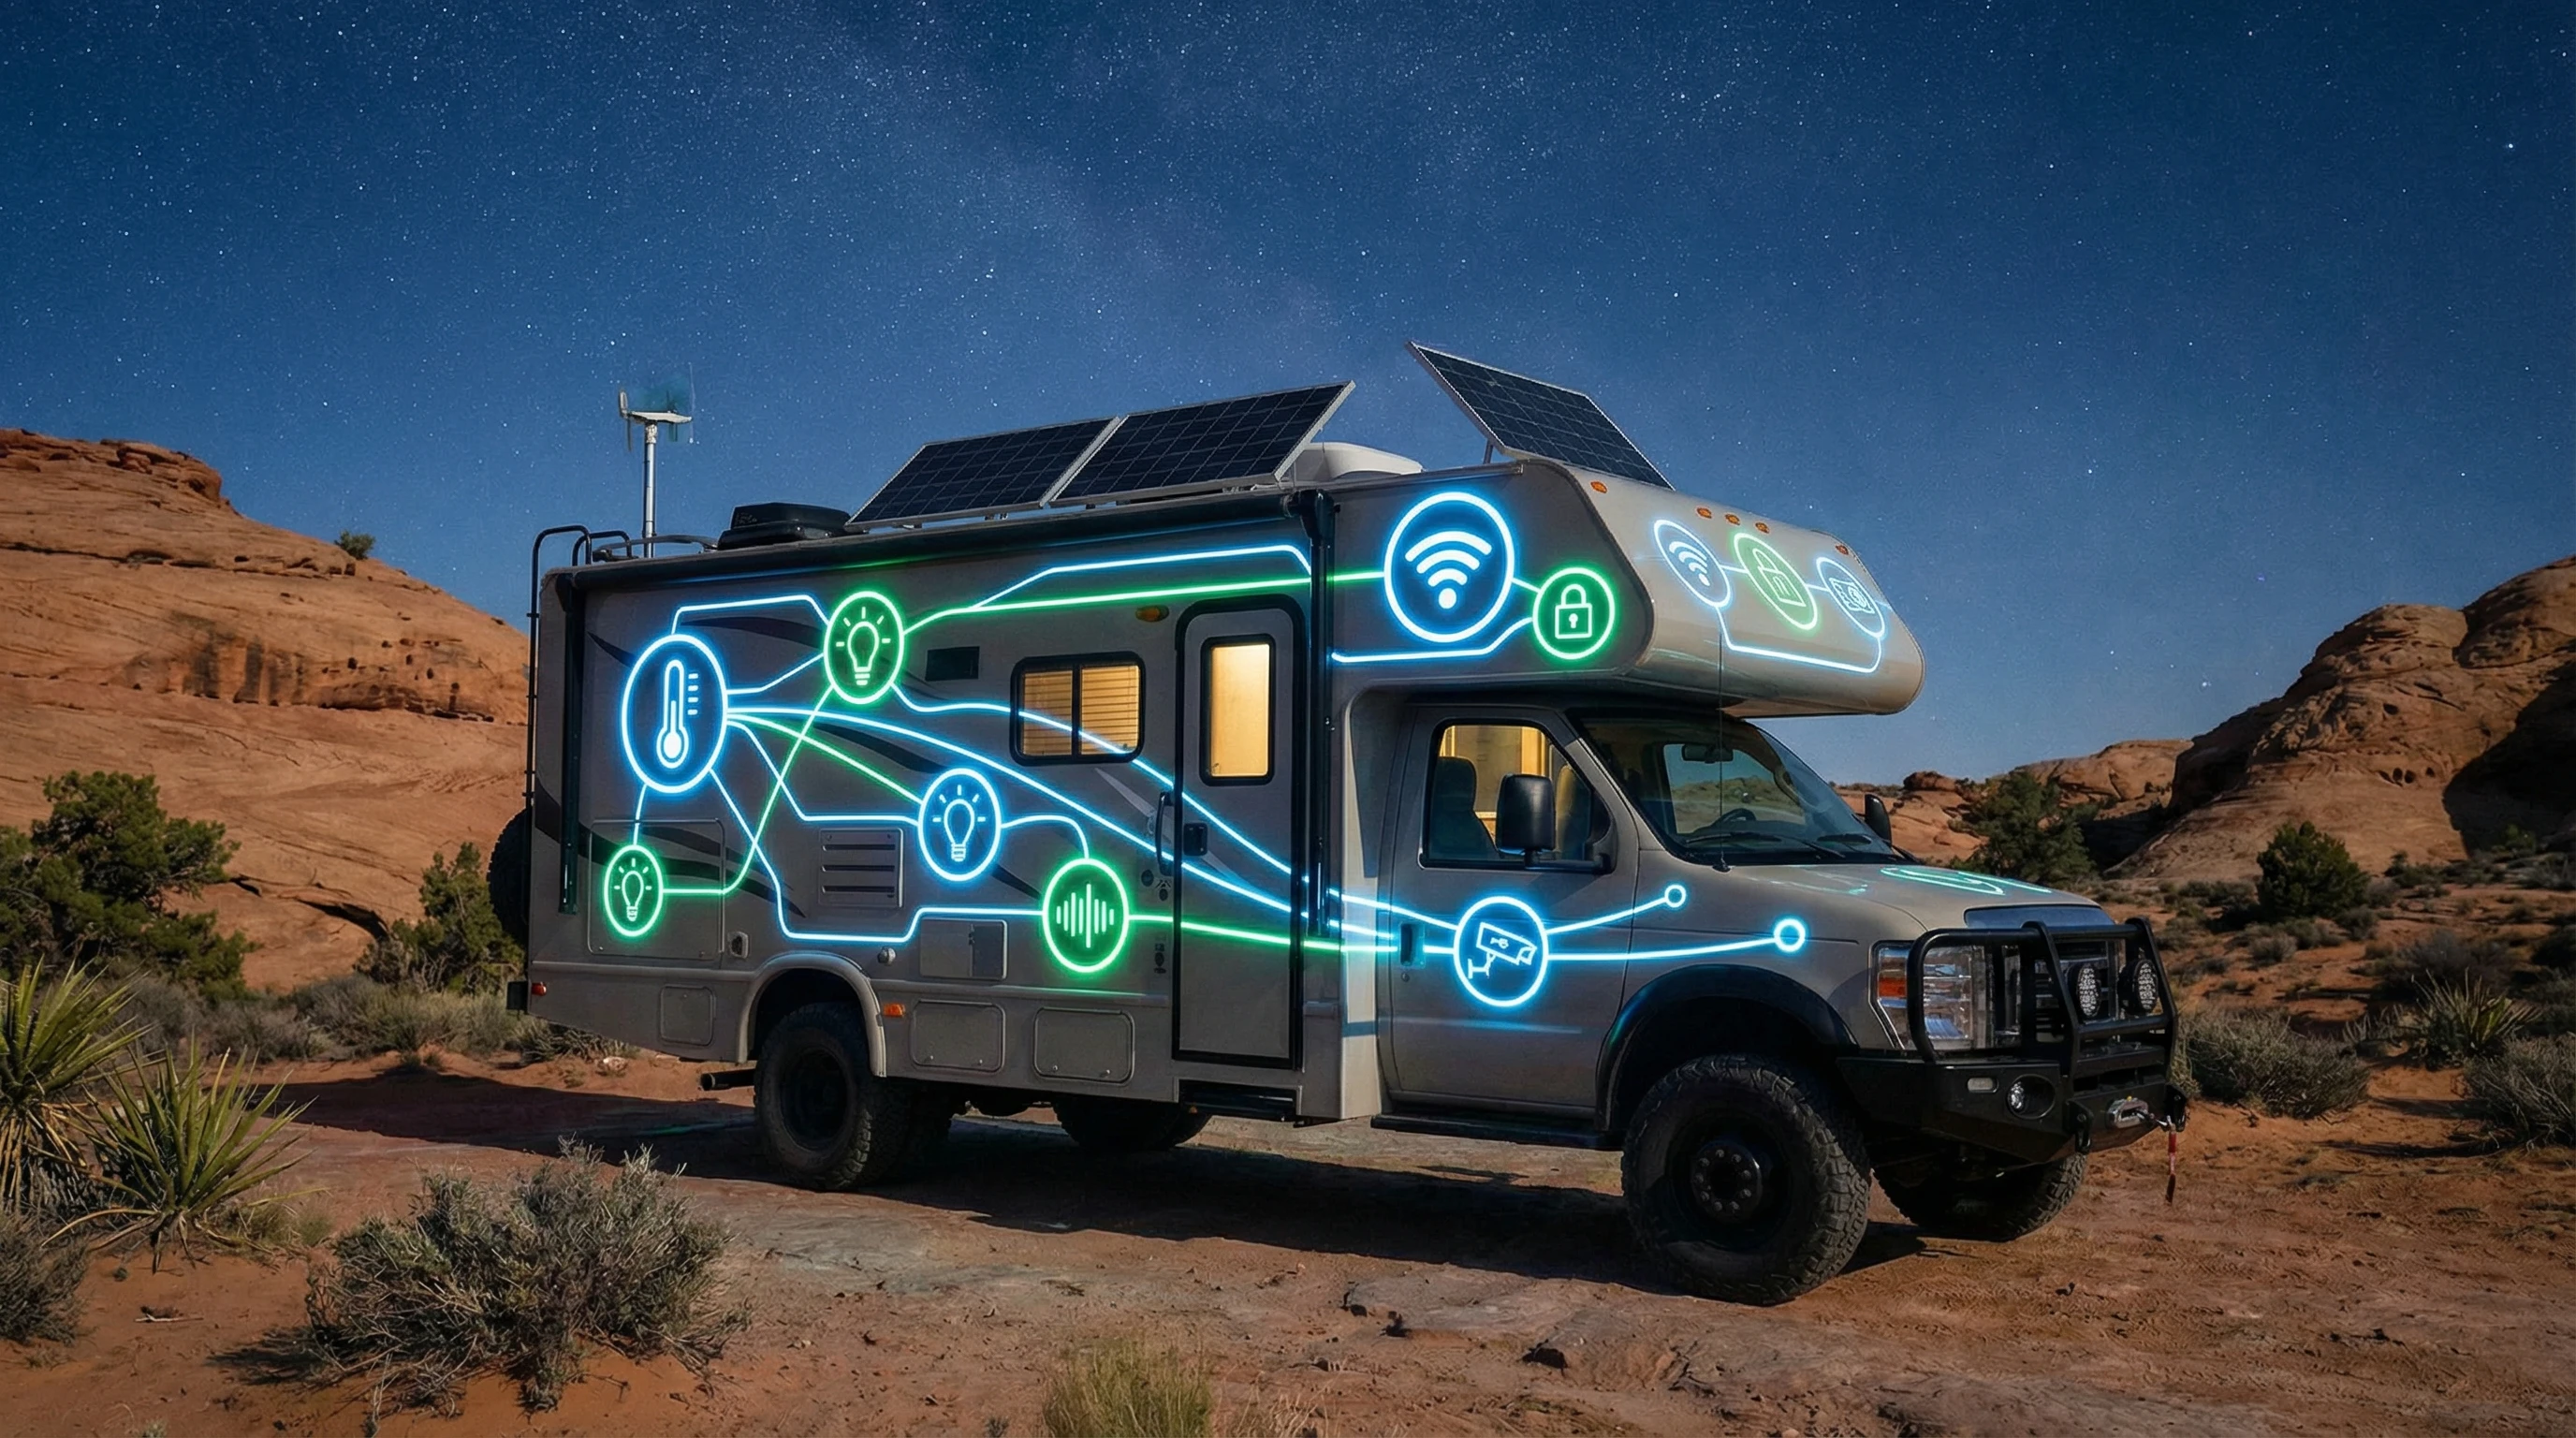
What Makes Mesh Networks Different (and Sometimes Better)

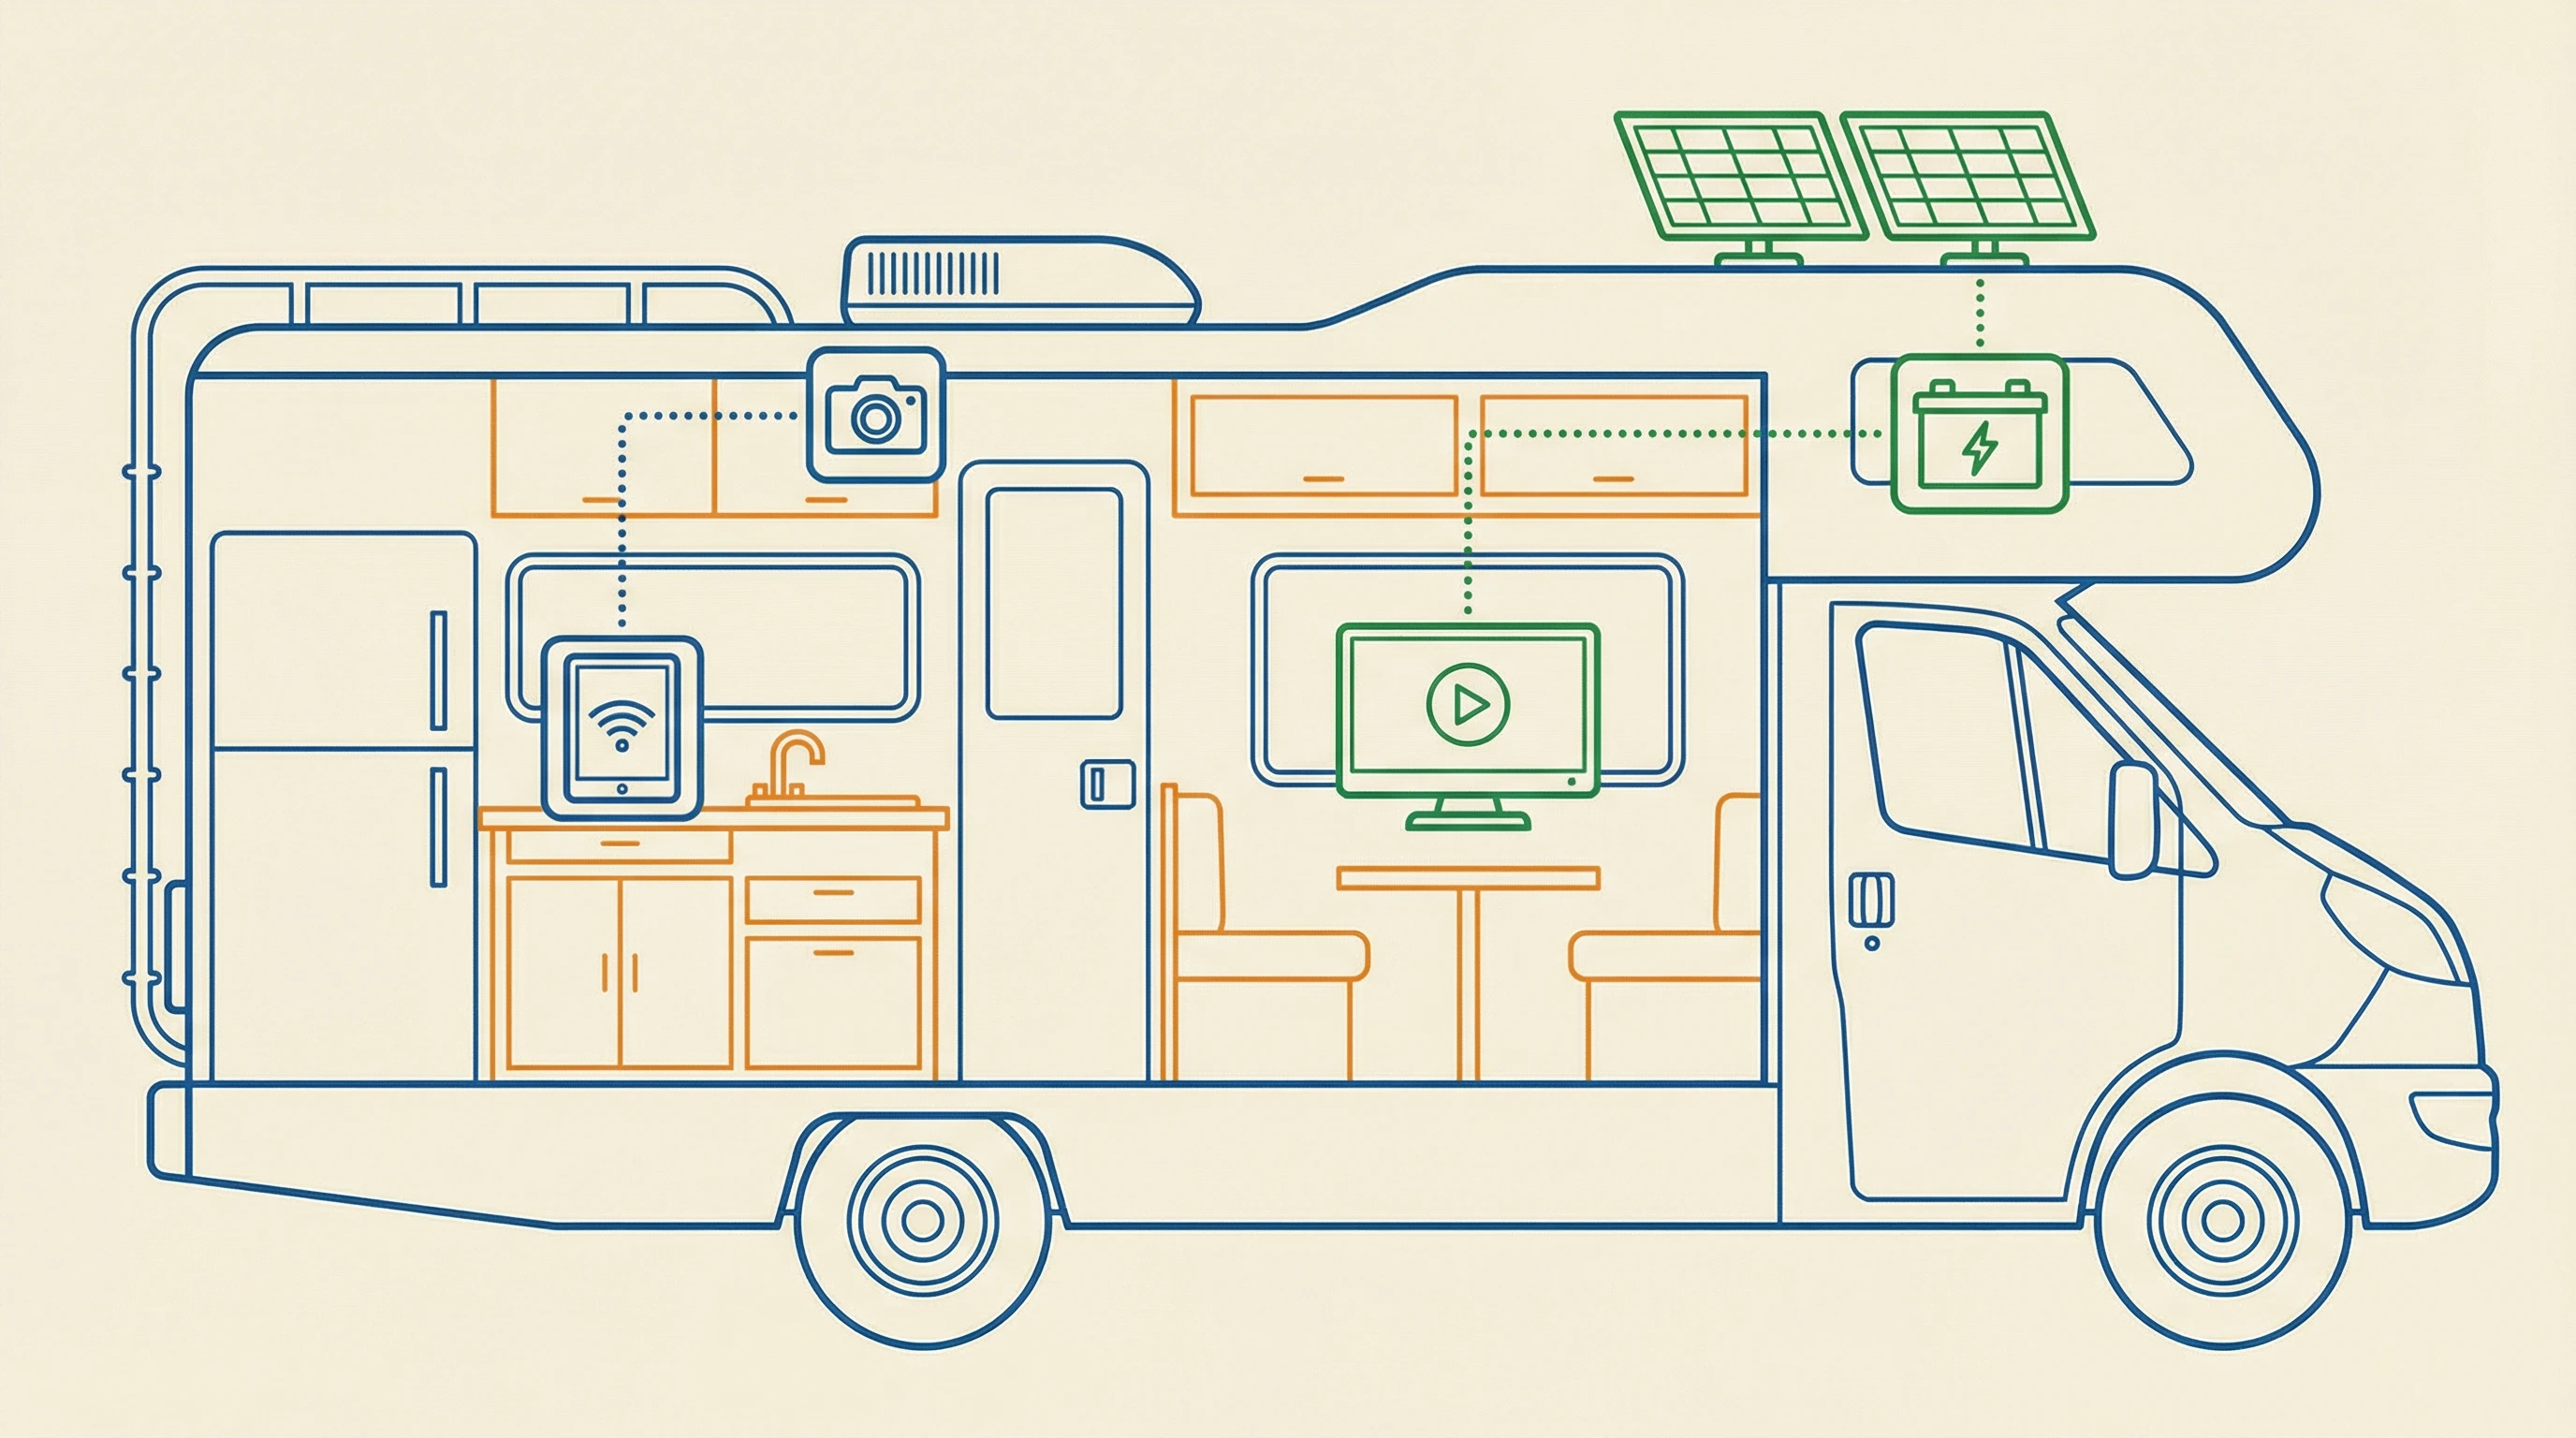
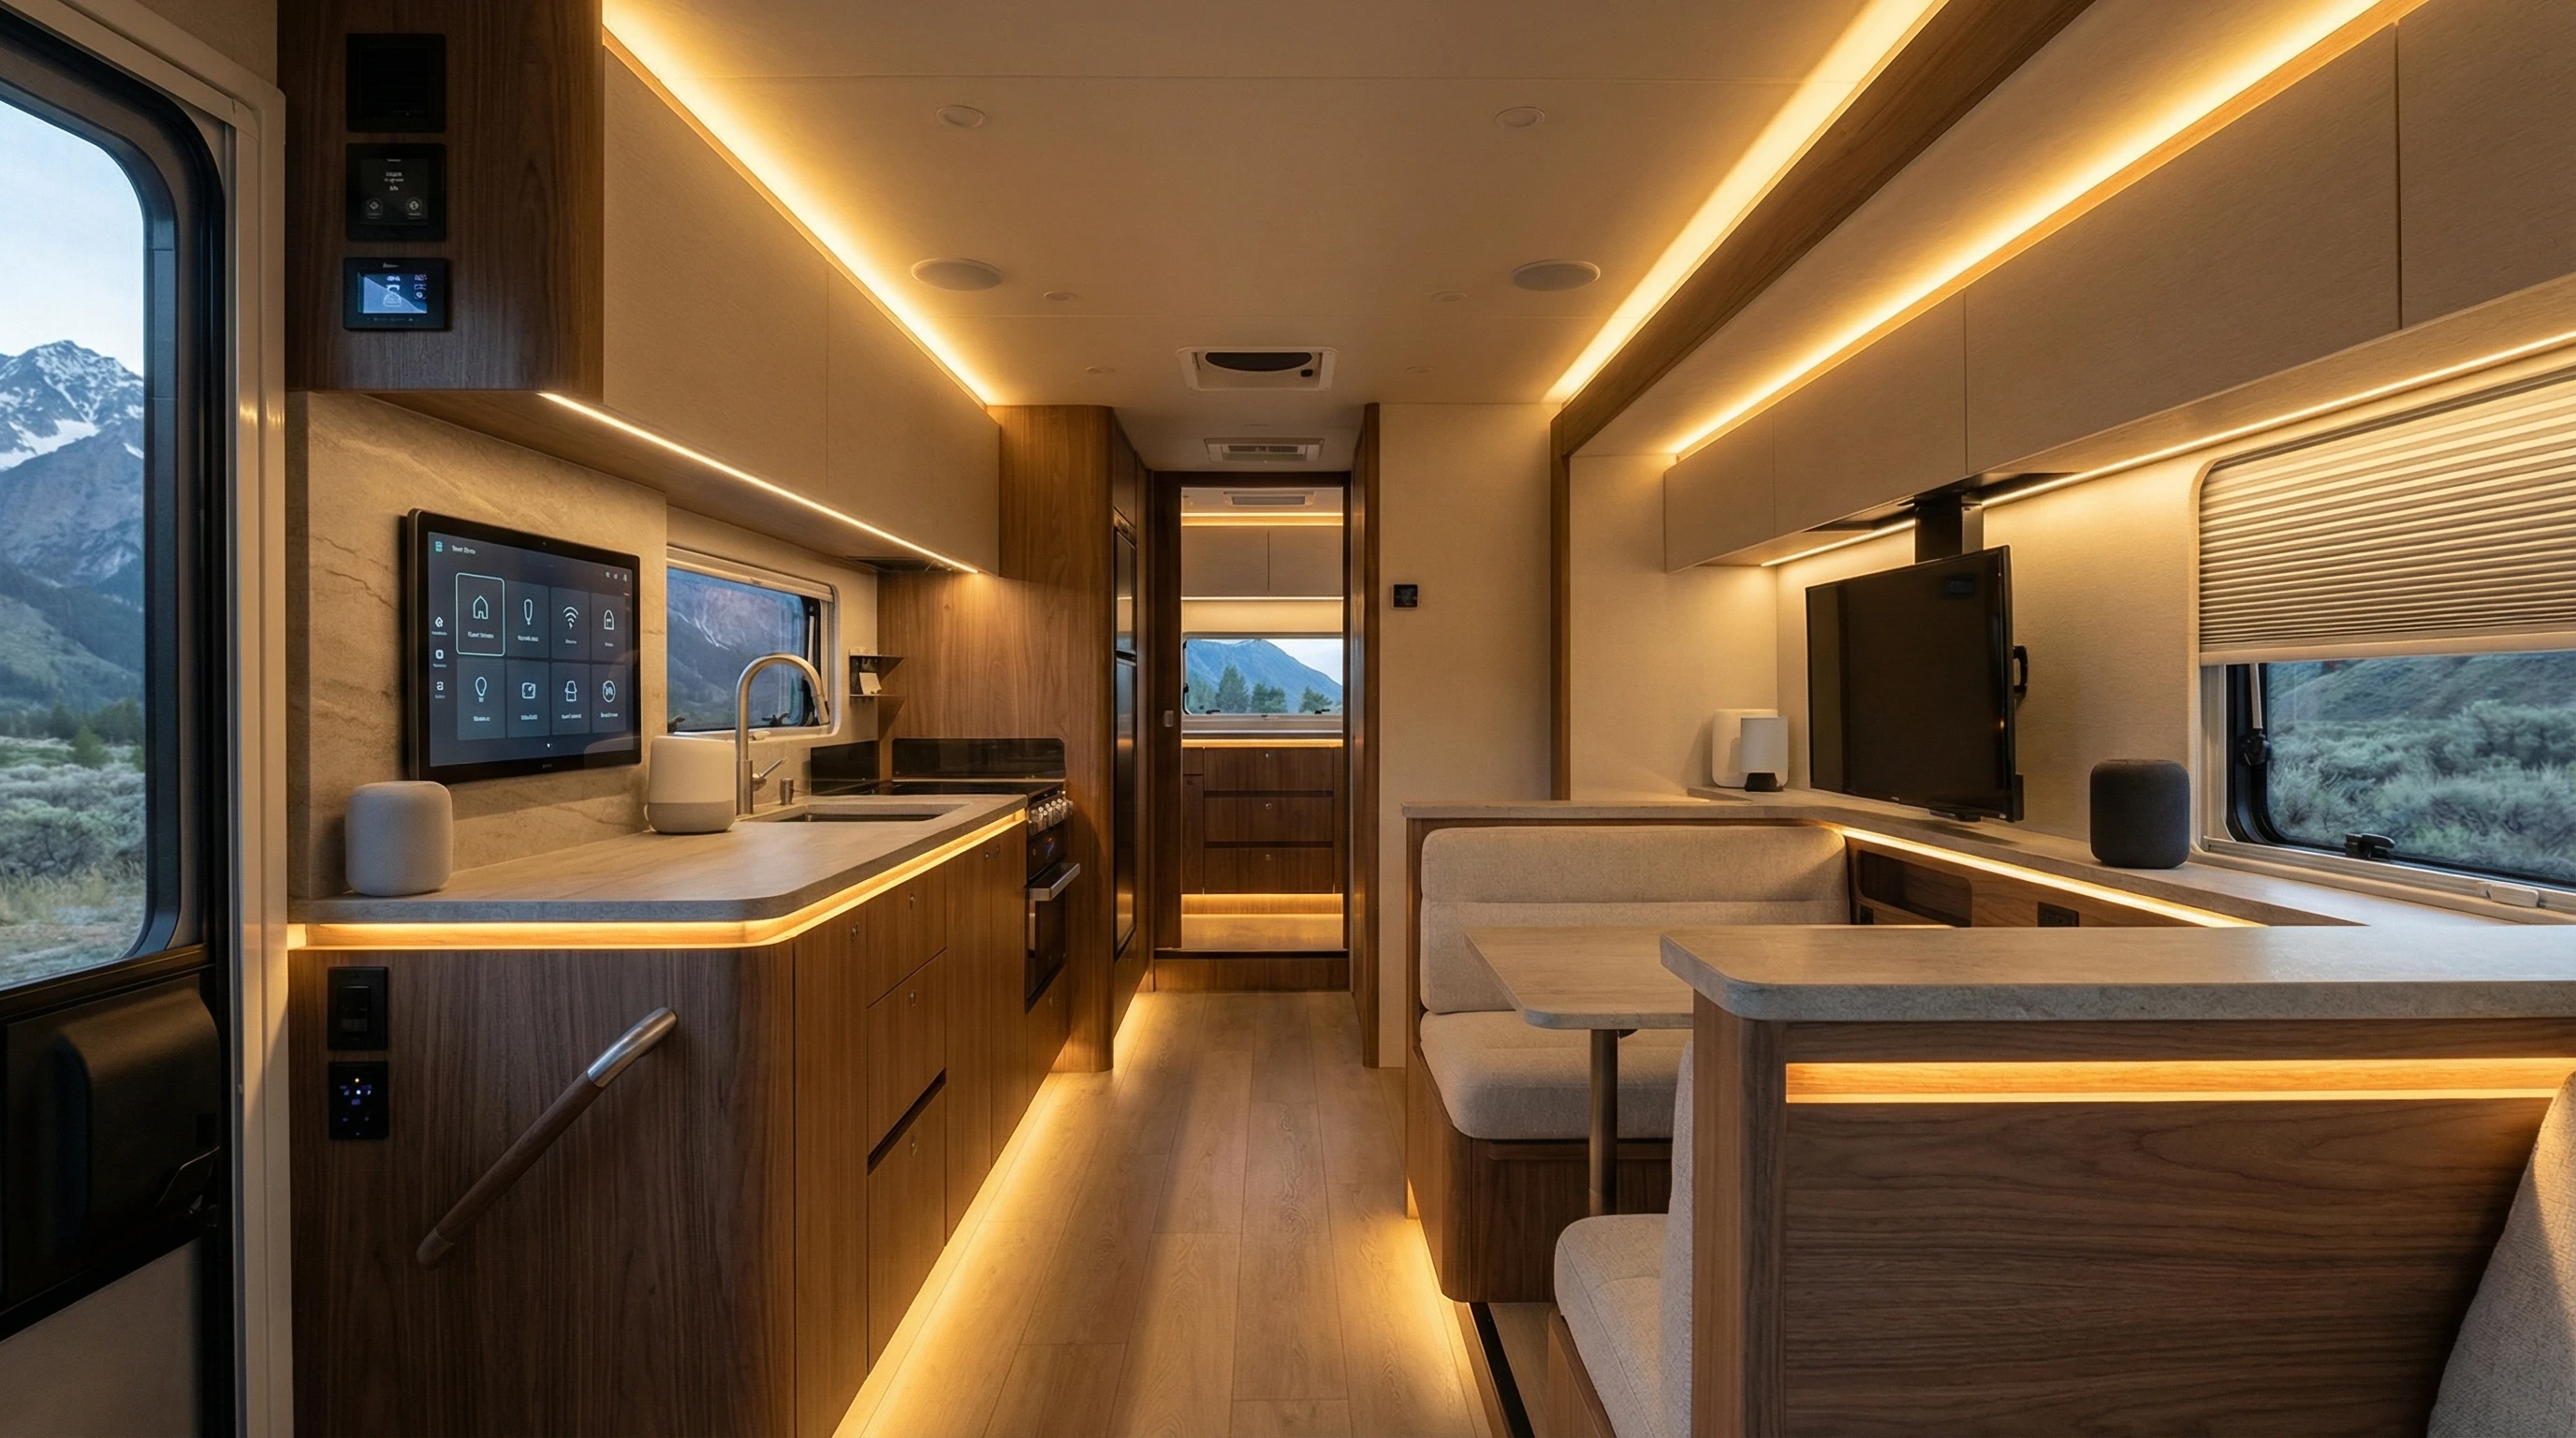
Mesh Wi-Fi is a newer tech showing up in plenty of RV setups, especially for folks who crave the best online experience. Mesh systems include a main router and one or more satellites (nodes) that build a seamless Wi-Fi bubble across your living space. Unlike a single extender setting up a separate hotspot, mesh networks let you wander around and stay on the same network with no hiccups.

The main router connects to your internet source—this could be the park’s wired connection, a cellular hotspot, or even satellite service. The satellites then spread the signal throughout your RV (and, sometimes, around it). I’ve seen mesh networks do a better job covering corners and those frustrating dead zones where Wi-Fi usually vanishes, like bedrooms tucked in the back or the picnic bench outside your camper.

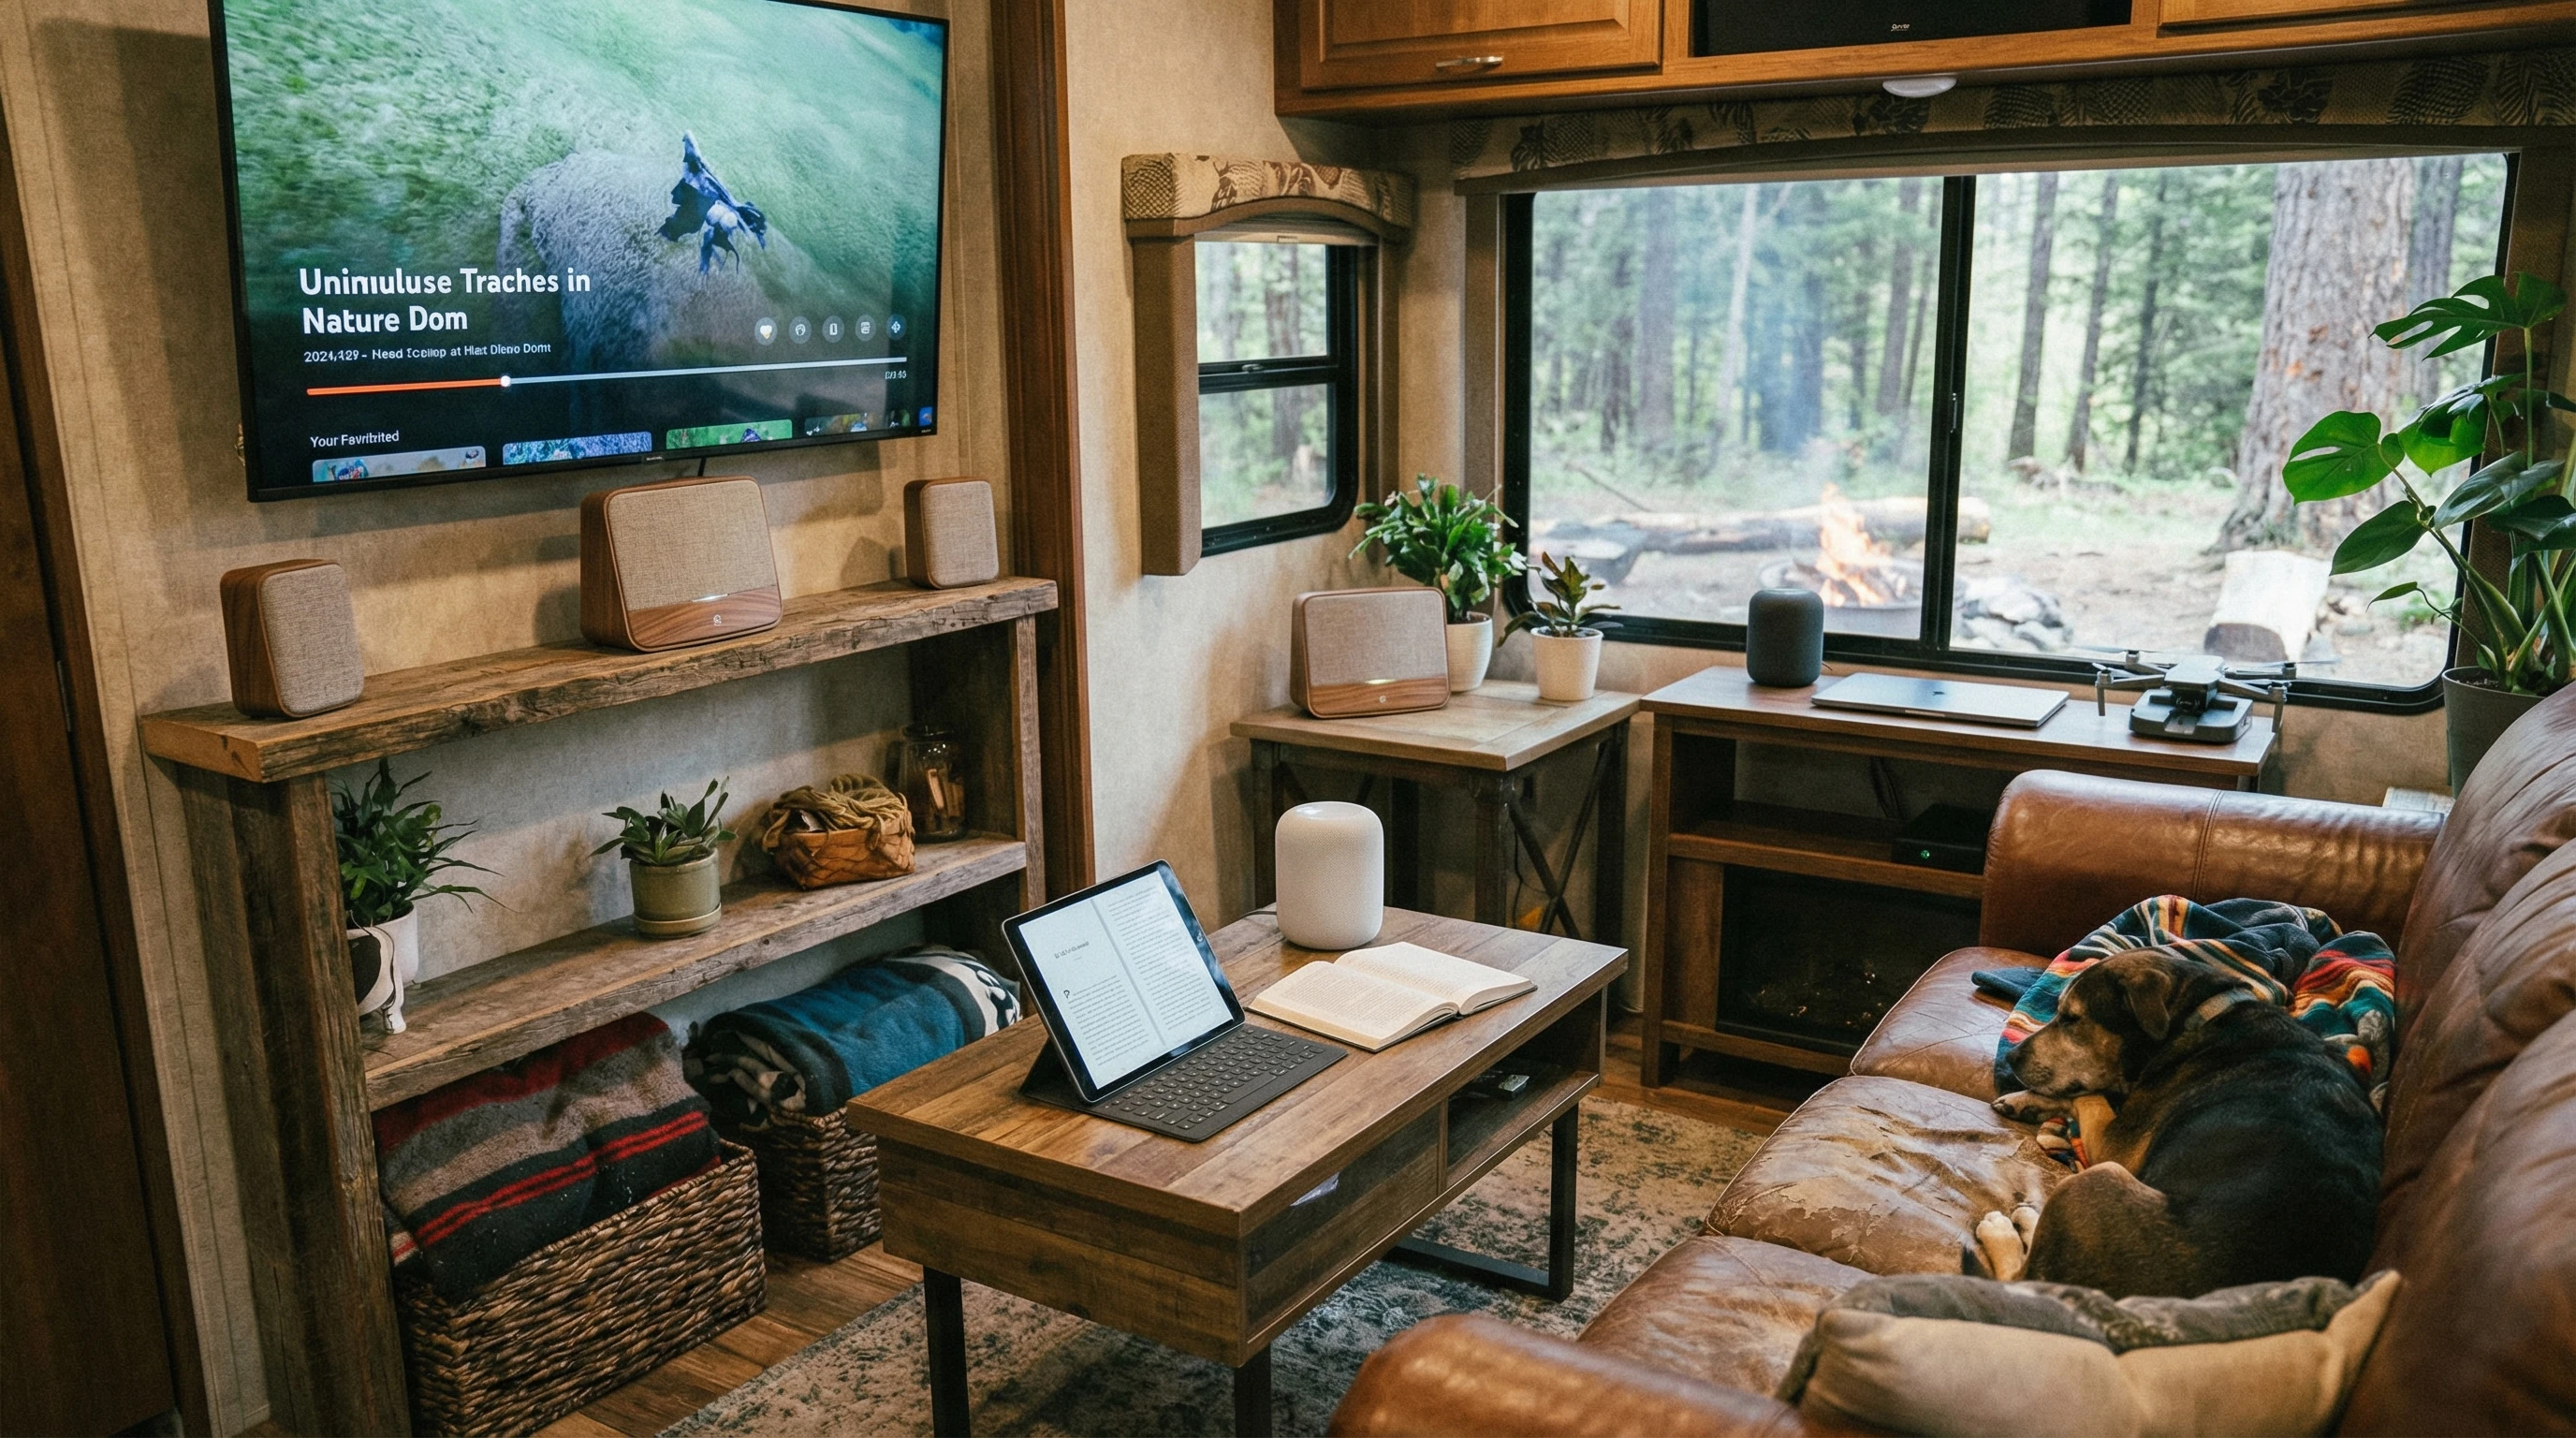
Mesh networks are built for lots of device connections at once, which is especially helpful for families with tablets, smart TVs, game consoles, and gadgets to spare. Setup is usually quick: sync with an app, plug in the satellites, and you’re ready. Major RV mesh brands like Google Nest, Netgear Orbi, and TPLink Deco make it even easier by auto-updating software, saving you headaches down the line.

One definite perk: with a mesh system, your speeds are more balanced no matter where you are inside. It isn’t foolproof, but for most, it means streaming movies in bed or holding video chats by the campfire without disconnects. Mesh setups also bring easy guest networks and tougher security compared to basic Wi-Fi extenders.

A Quick Guide: Boosting Your RV’s Internet Coverage

Sharpening up your RV’s network doesn’t have to be difficult. Here are the basic steps I follow whenever I set up for a trip or a new campground:

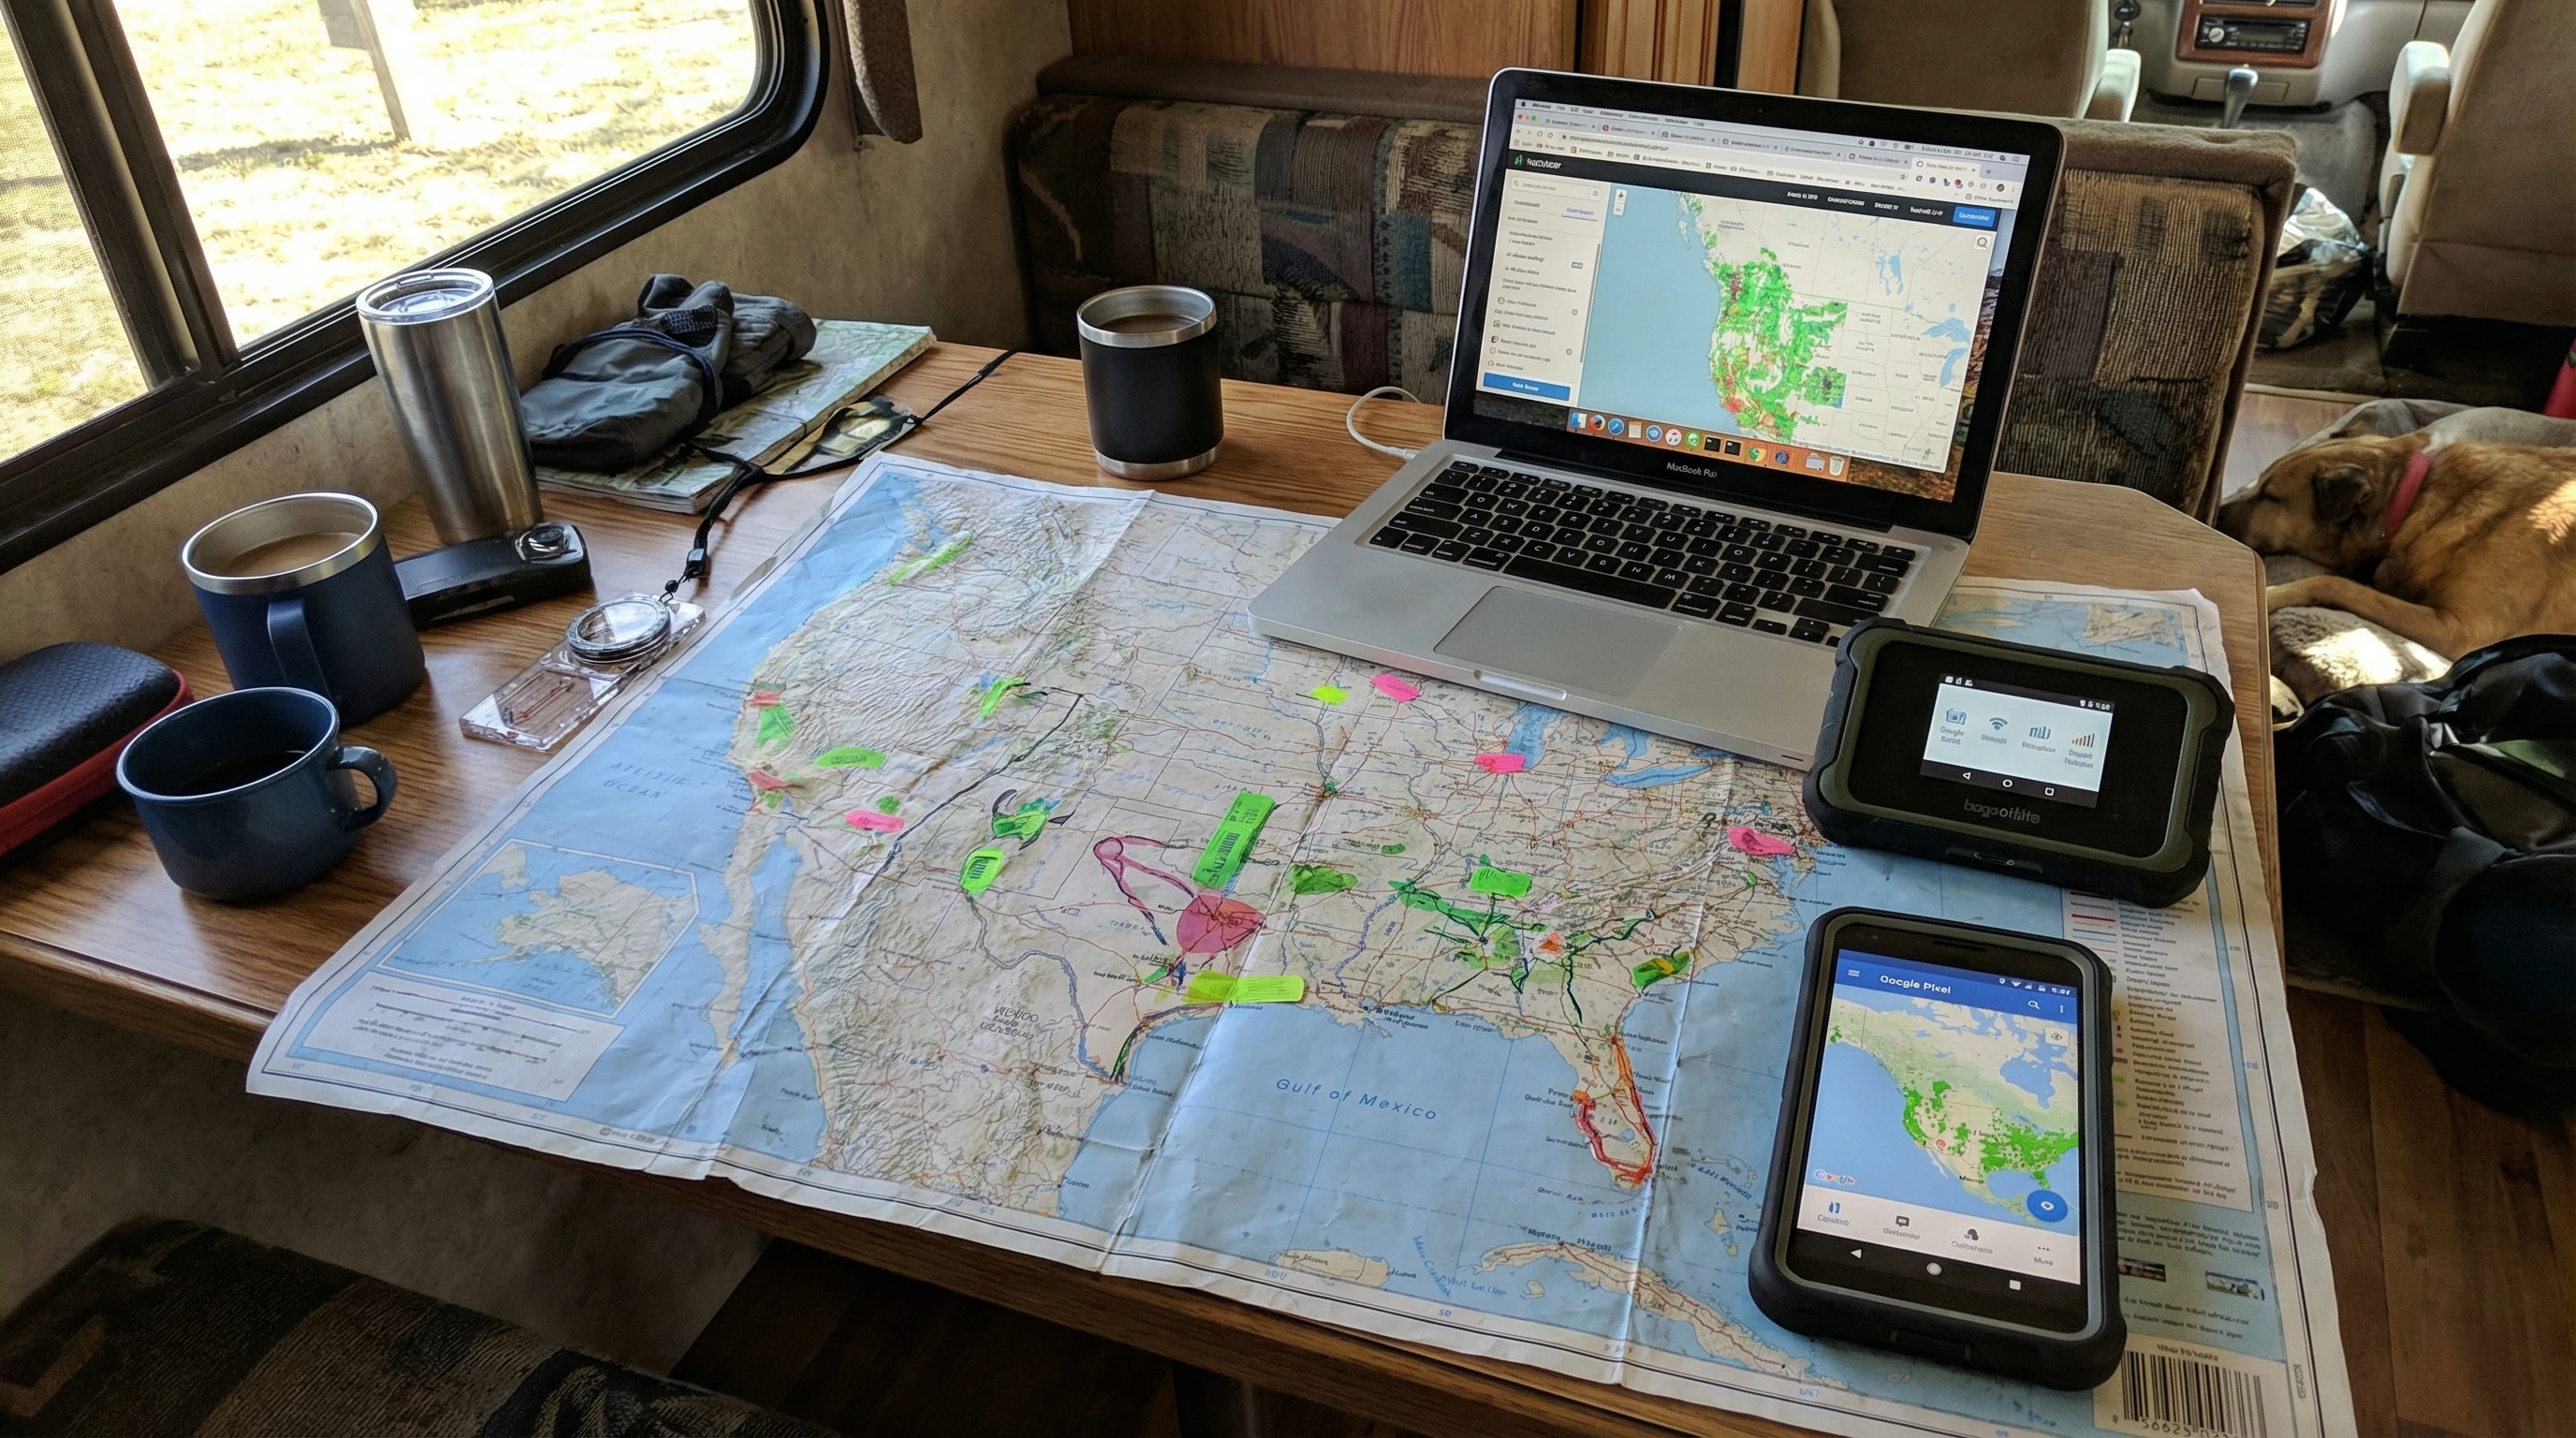
  1. Check Your Signal: Use your phone or laptop to size up how strong the Wi-Fi is, both outside and inside. You’ll know right off if you need an extender or a full mesh network for full coverage.
  2. Find the Best Spot: Put your extender or mesh router as close as possible to the signal source—by a window or a side of the RV that faces the park’s access point works well.
  3. Get Plugged In: For extenders, follow the setup instructions (most walk you through with an easy app wizard). Mesh networks require connecting the primary unit to your internet source, then spreading the nodes throughout the RV.
  4. Walk Test and Adjust: After setup, walk the RV with your device. If spots still struggle, move your extender or add another node. Repeat until coverage is solid everywhere inside.
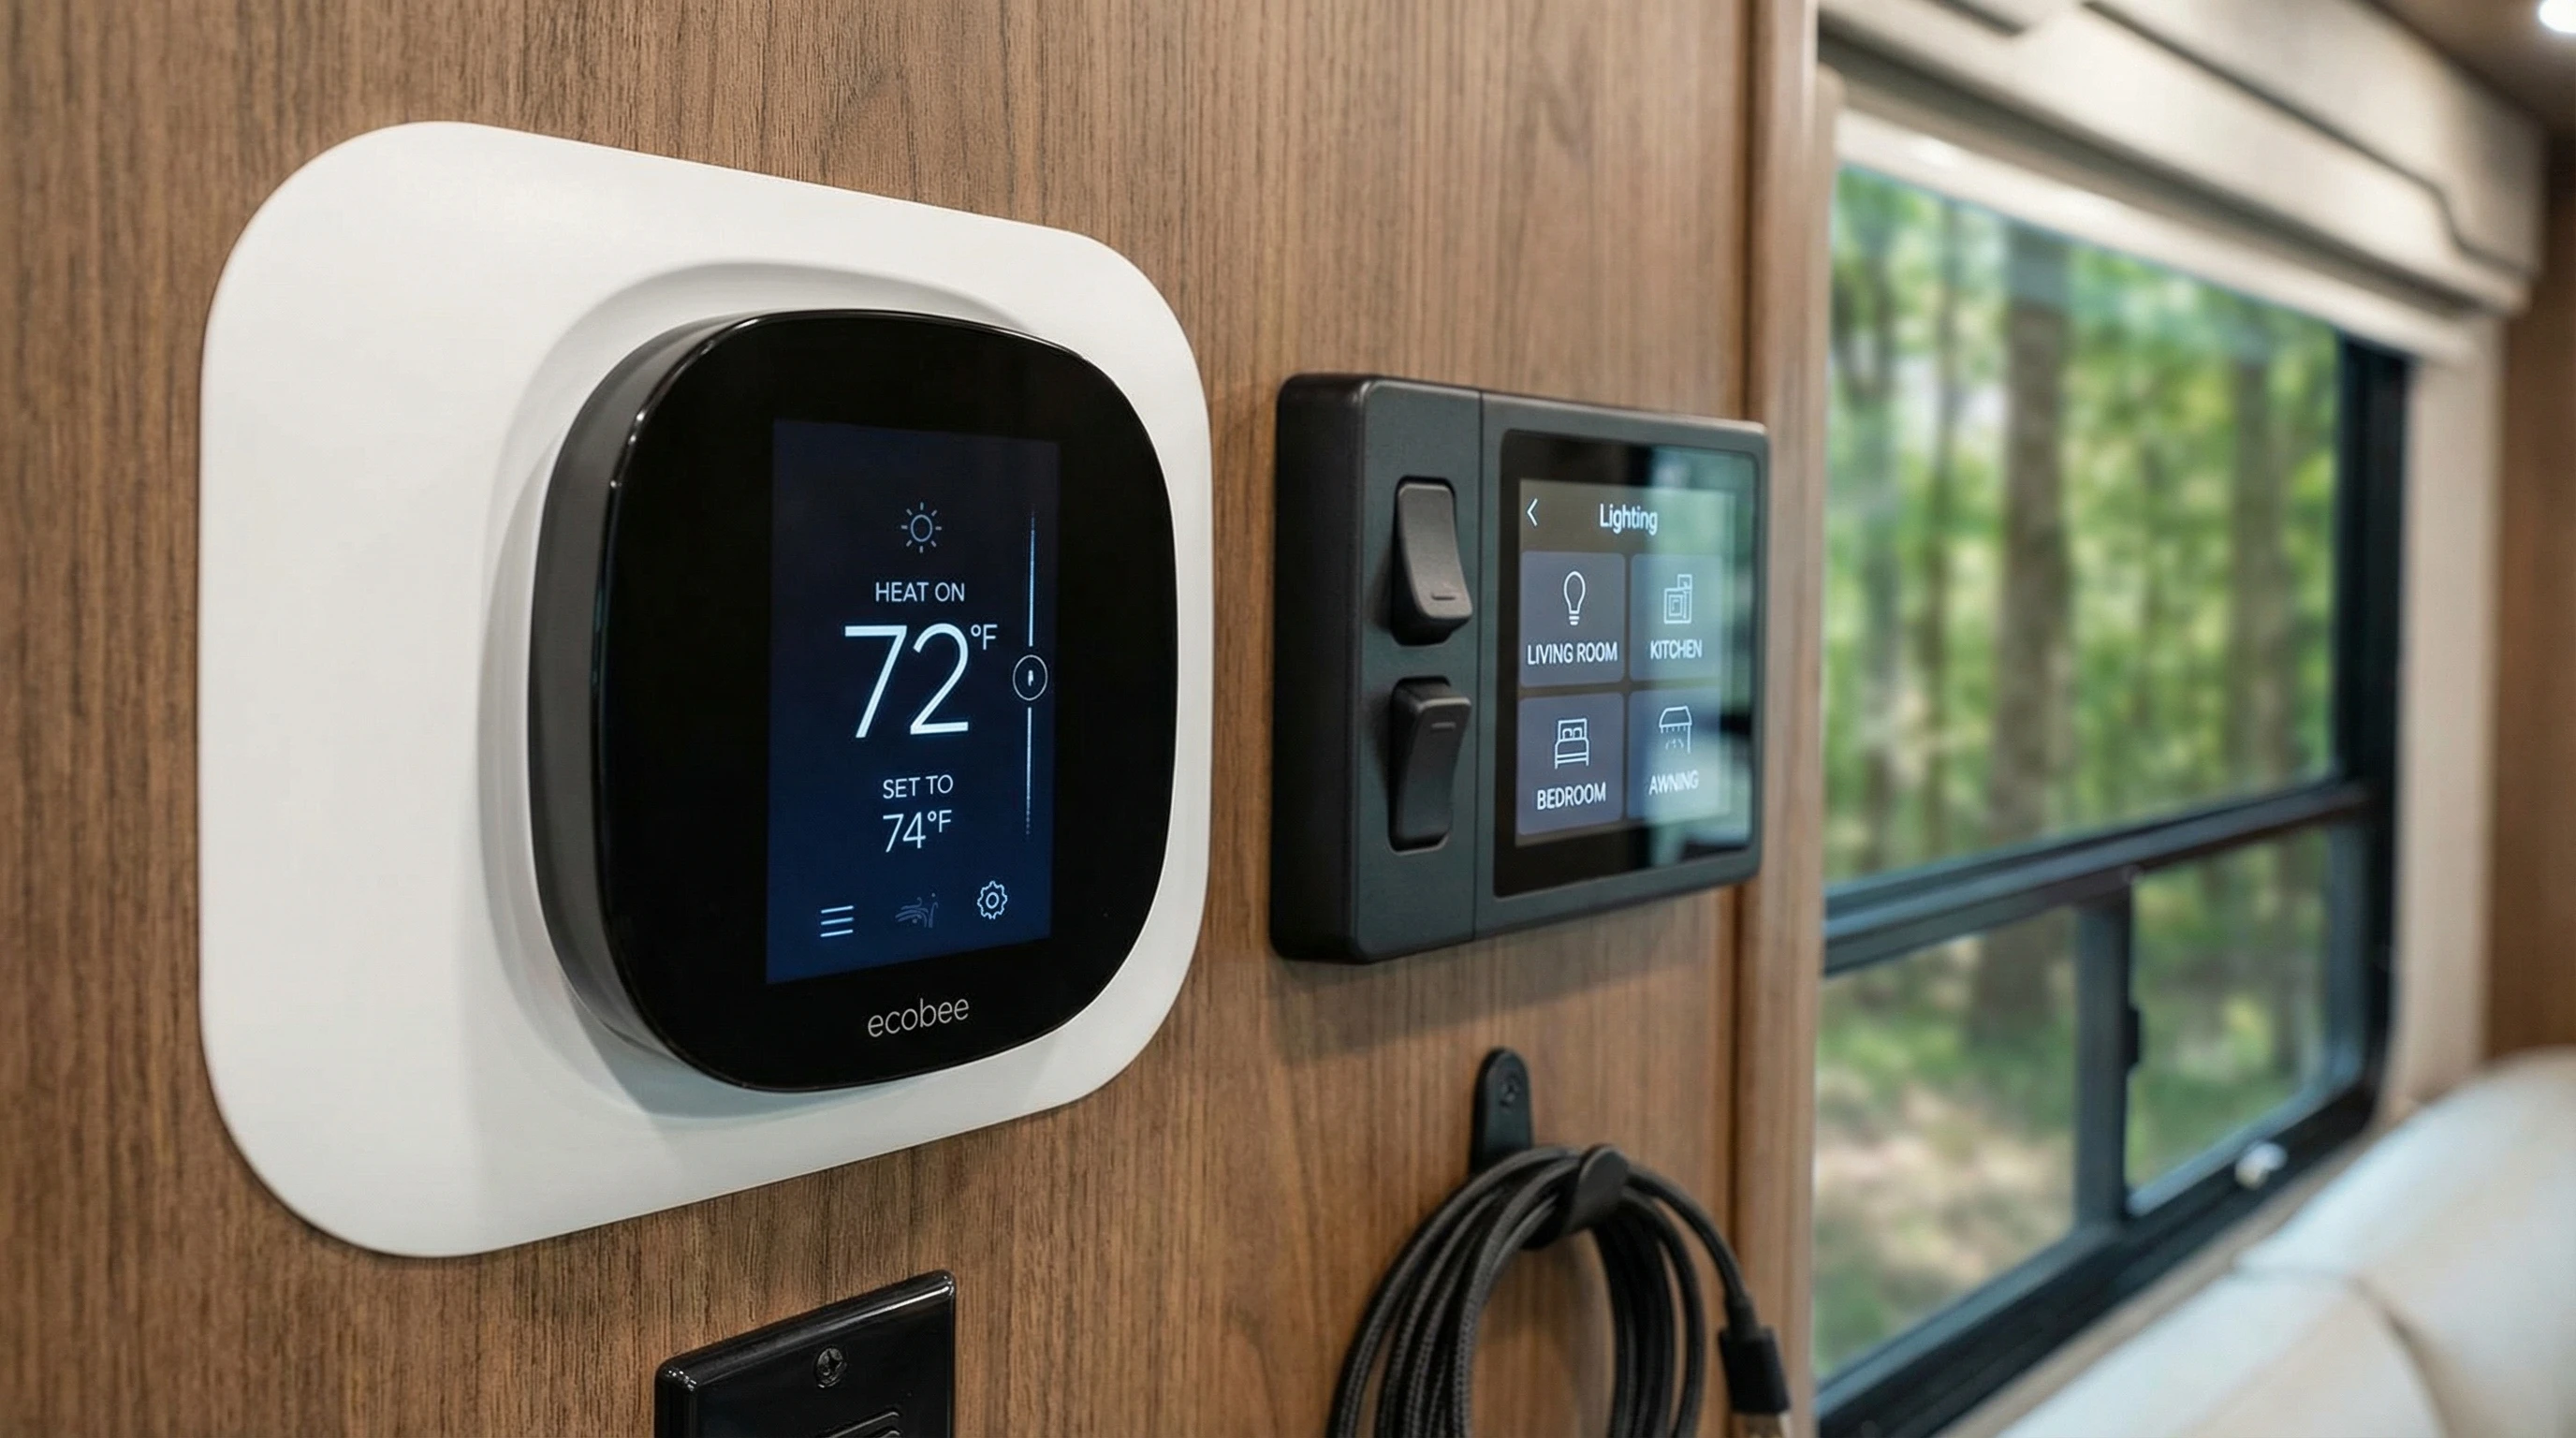
  5. Secure Everything: Change those default usernames and passwords. For mesh, set up guest networks and run any available updates.

With these steps, you can work, play, or download from just about anywhere you’re parked. Even video calls out in the sticks become possible, provided your main internet source keeps up.

Mesh Wi-Fi devices inside a cozy RV living area

Things to Think About Before Buying RV Wi-Fi Gear

Shopping for Wi-Fi extenders and mesh gear isn’t quite like picking out equipment for a house. RV life means cramped spaces, bumps in the road, and needing coverage in all sorts of places. Here’s my checklist when considering new gear:

  • Compact Size: Stick with small, light devices that fit easily wherever you’ve got room. Big models just get in the way.
  • Power Options: Some extenders need normal outlets, others use USB or a 12V RV supply. Make sure you buy one that matches your rig.
  • Simple Setup: Go for gear with apps or clear guides. If complicated menus drive you nuts, avoid those models.
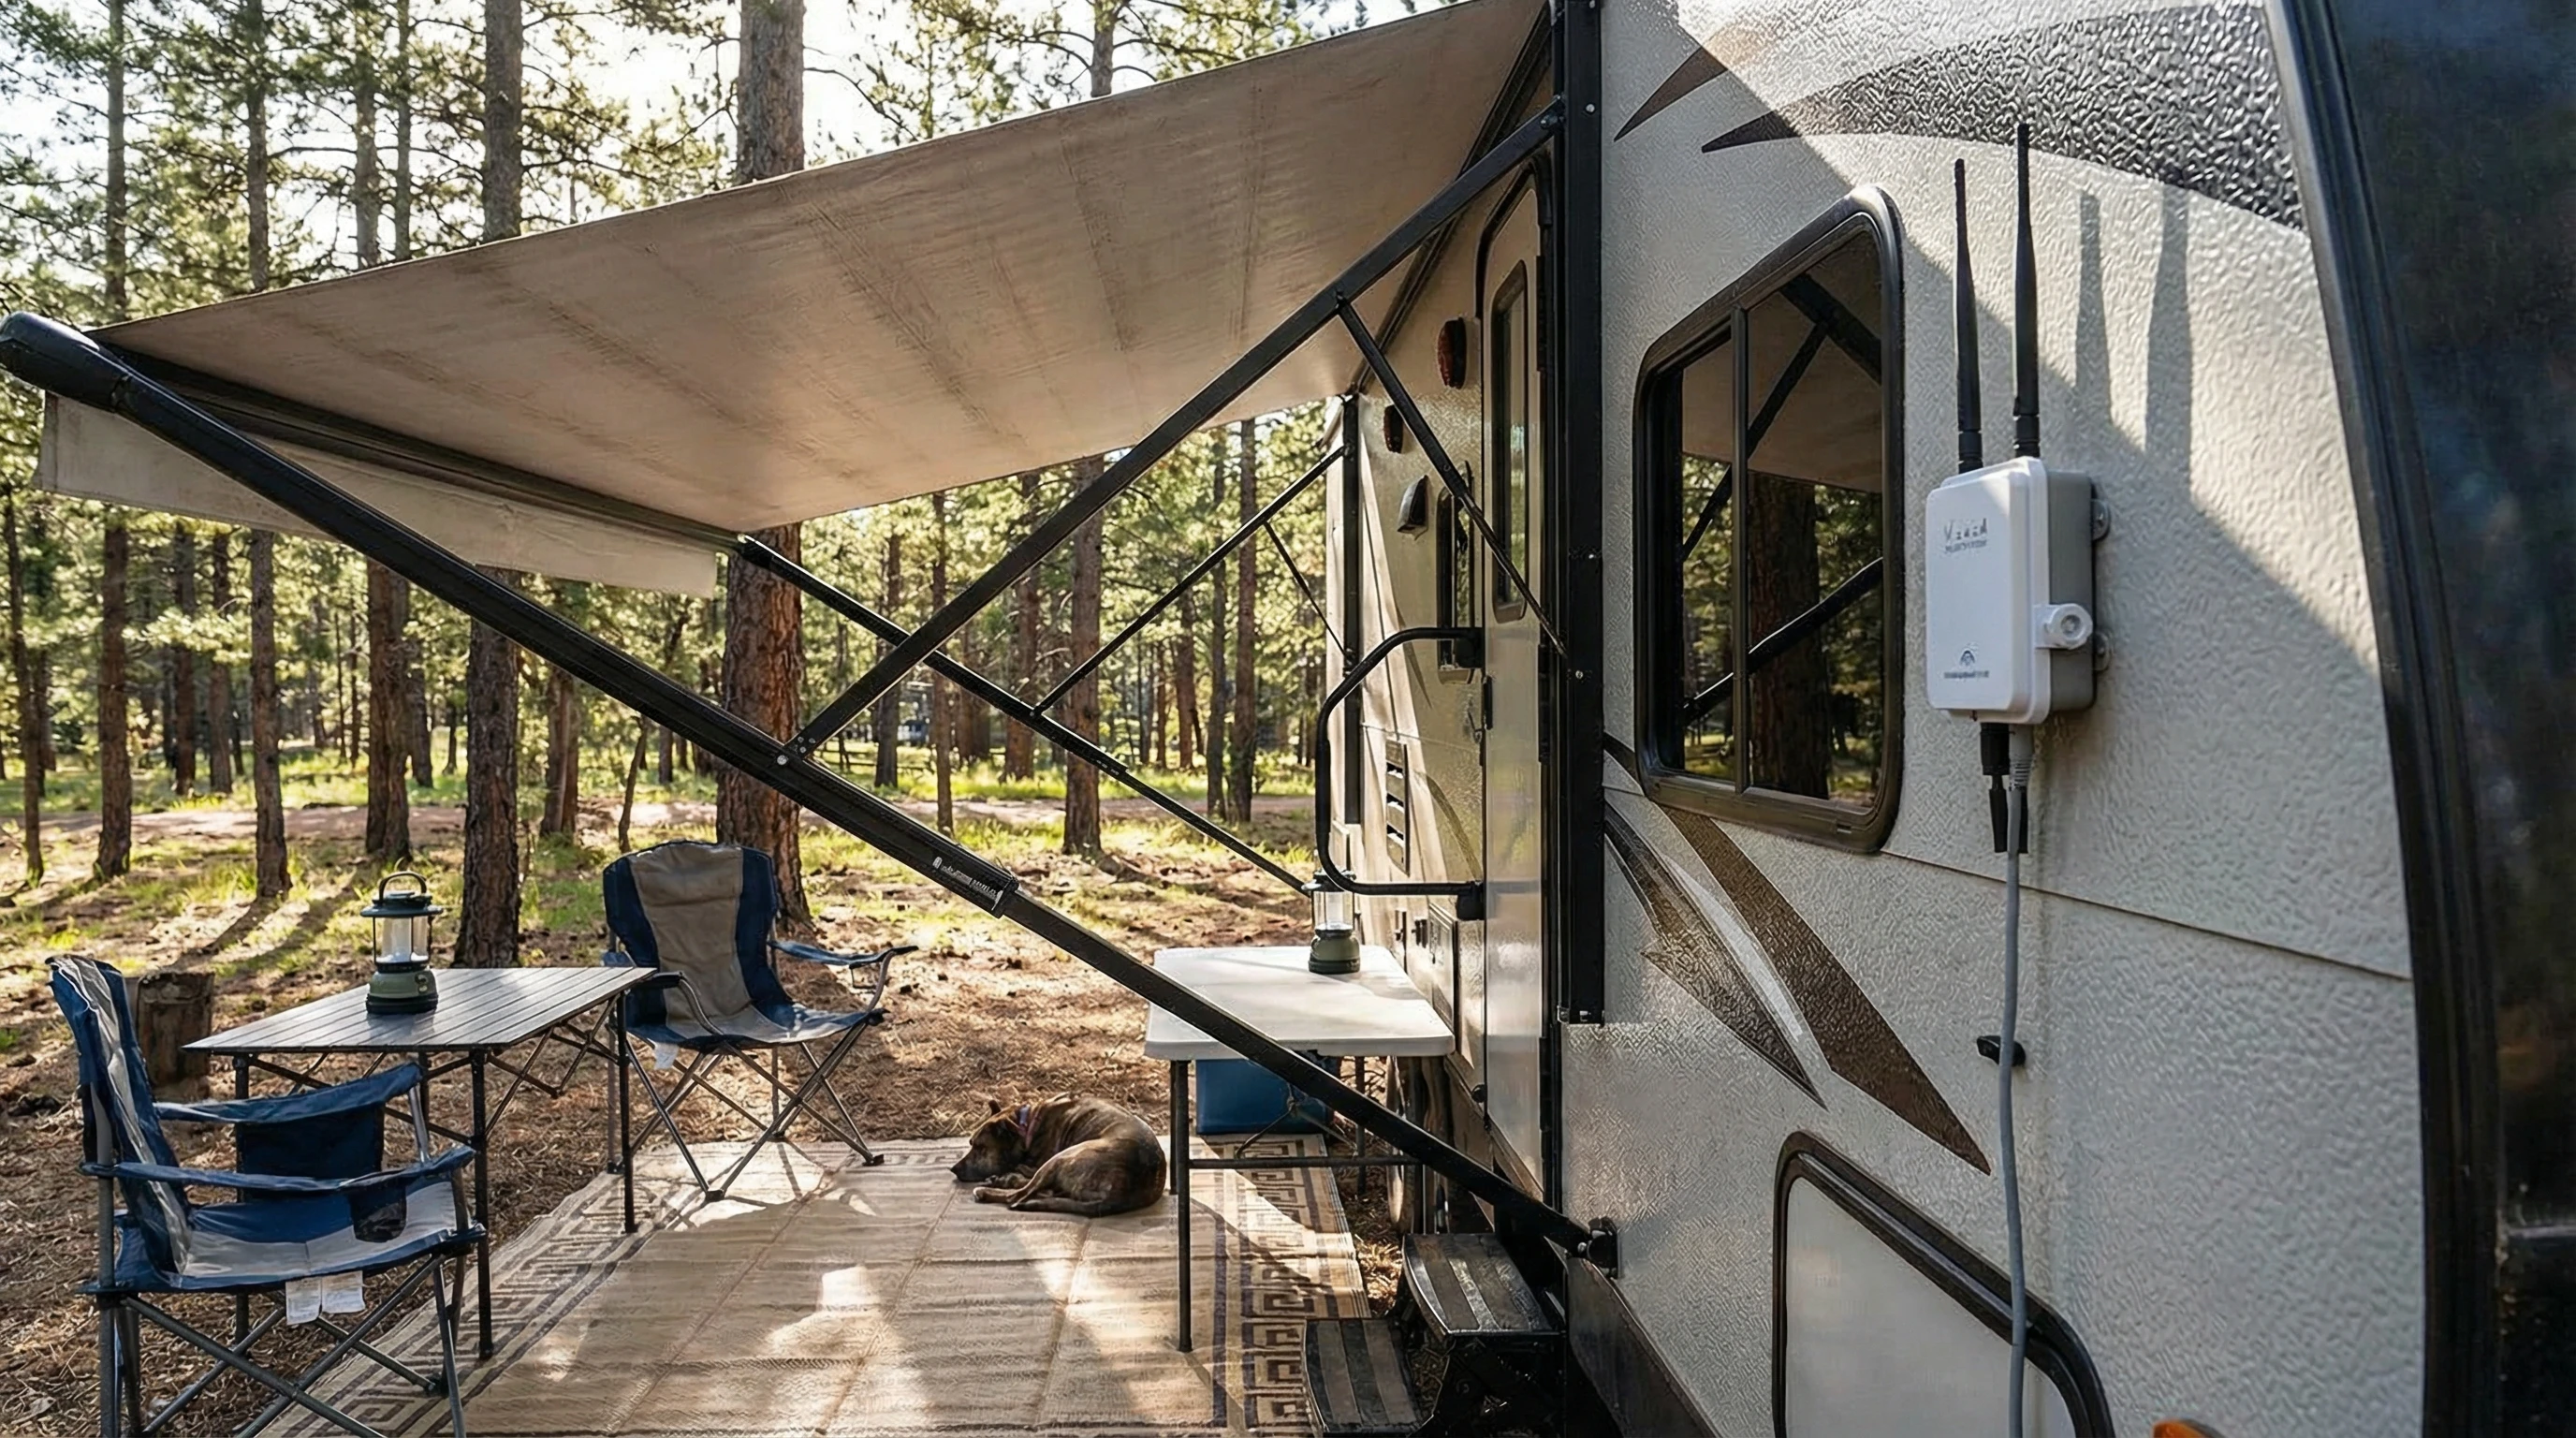
  • Weatherproofing: If you want an outside extender, look for weather-rated gadgets. I protect mine from rain, but a rugged one has saved me stress.
  • Automatic Updates: Brands that update firmware on their own keep you safer, without extra hassle.

Looking over online reviews really helps. Other RVers’ feedback lets you know if a device works great in small spaces, stands up to rough travel, or if extending kills your speed. Ask around in RV forums or social groups for real talk on various setups.

Common Problems (and Simple Fixes)

Even with solid gear, RV Wi-Fi can give you trouble. Thick walls, foil insulation, or interference from microwave ovens slow things down. If things get spotty:

  • Move the extender or mesh node close to a window.
  • Turn off other electronic gadgets that can interfere.
  • Run firmware updates often for smoother performance.
  • If on public Wi-Fi, cut down device count during busy times for better speed.

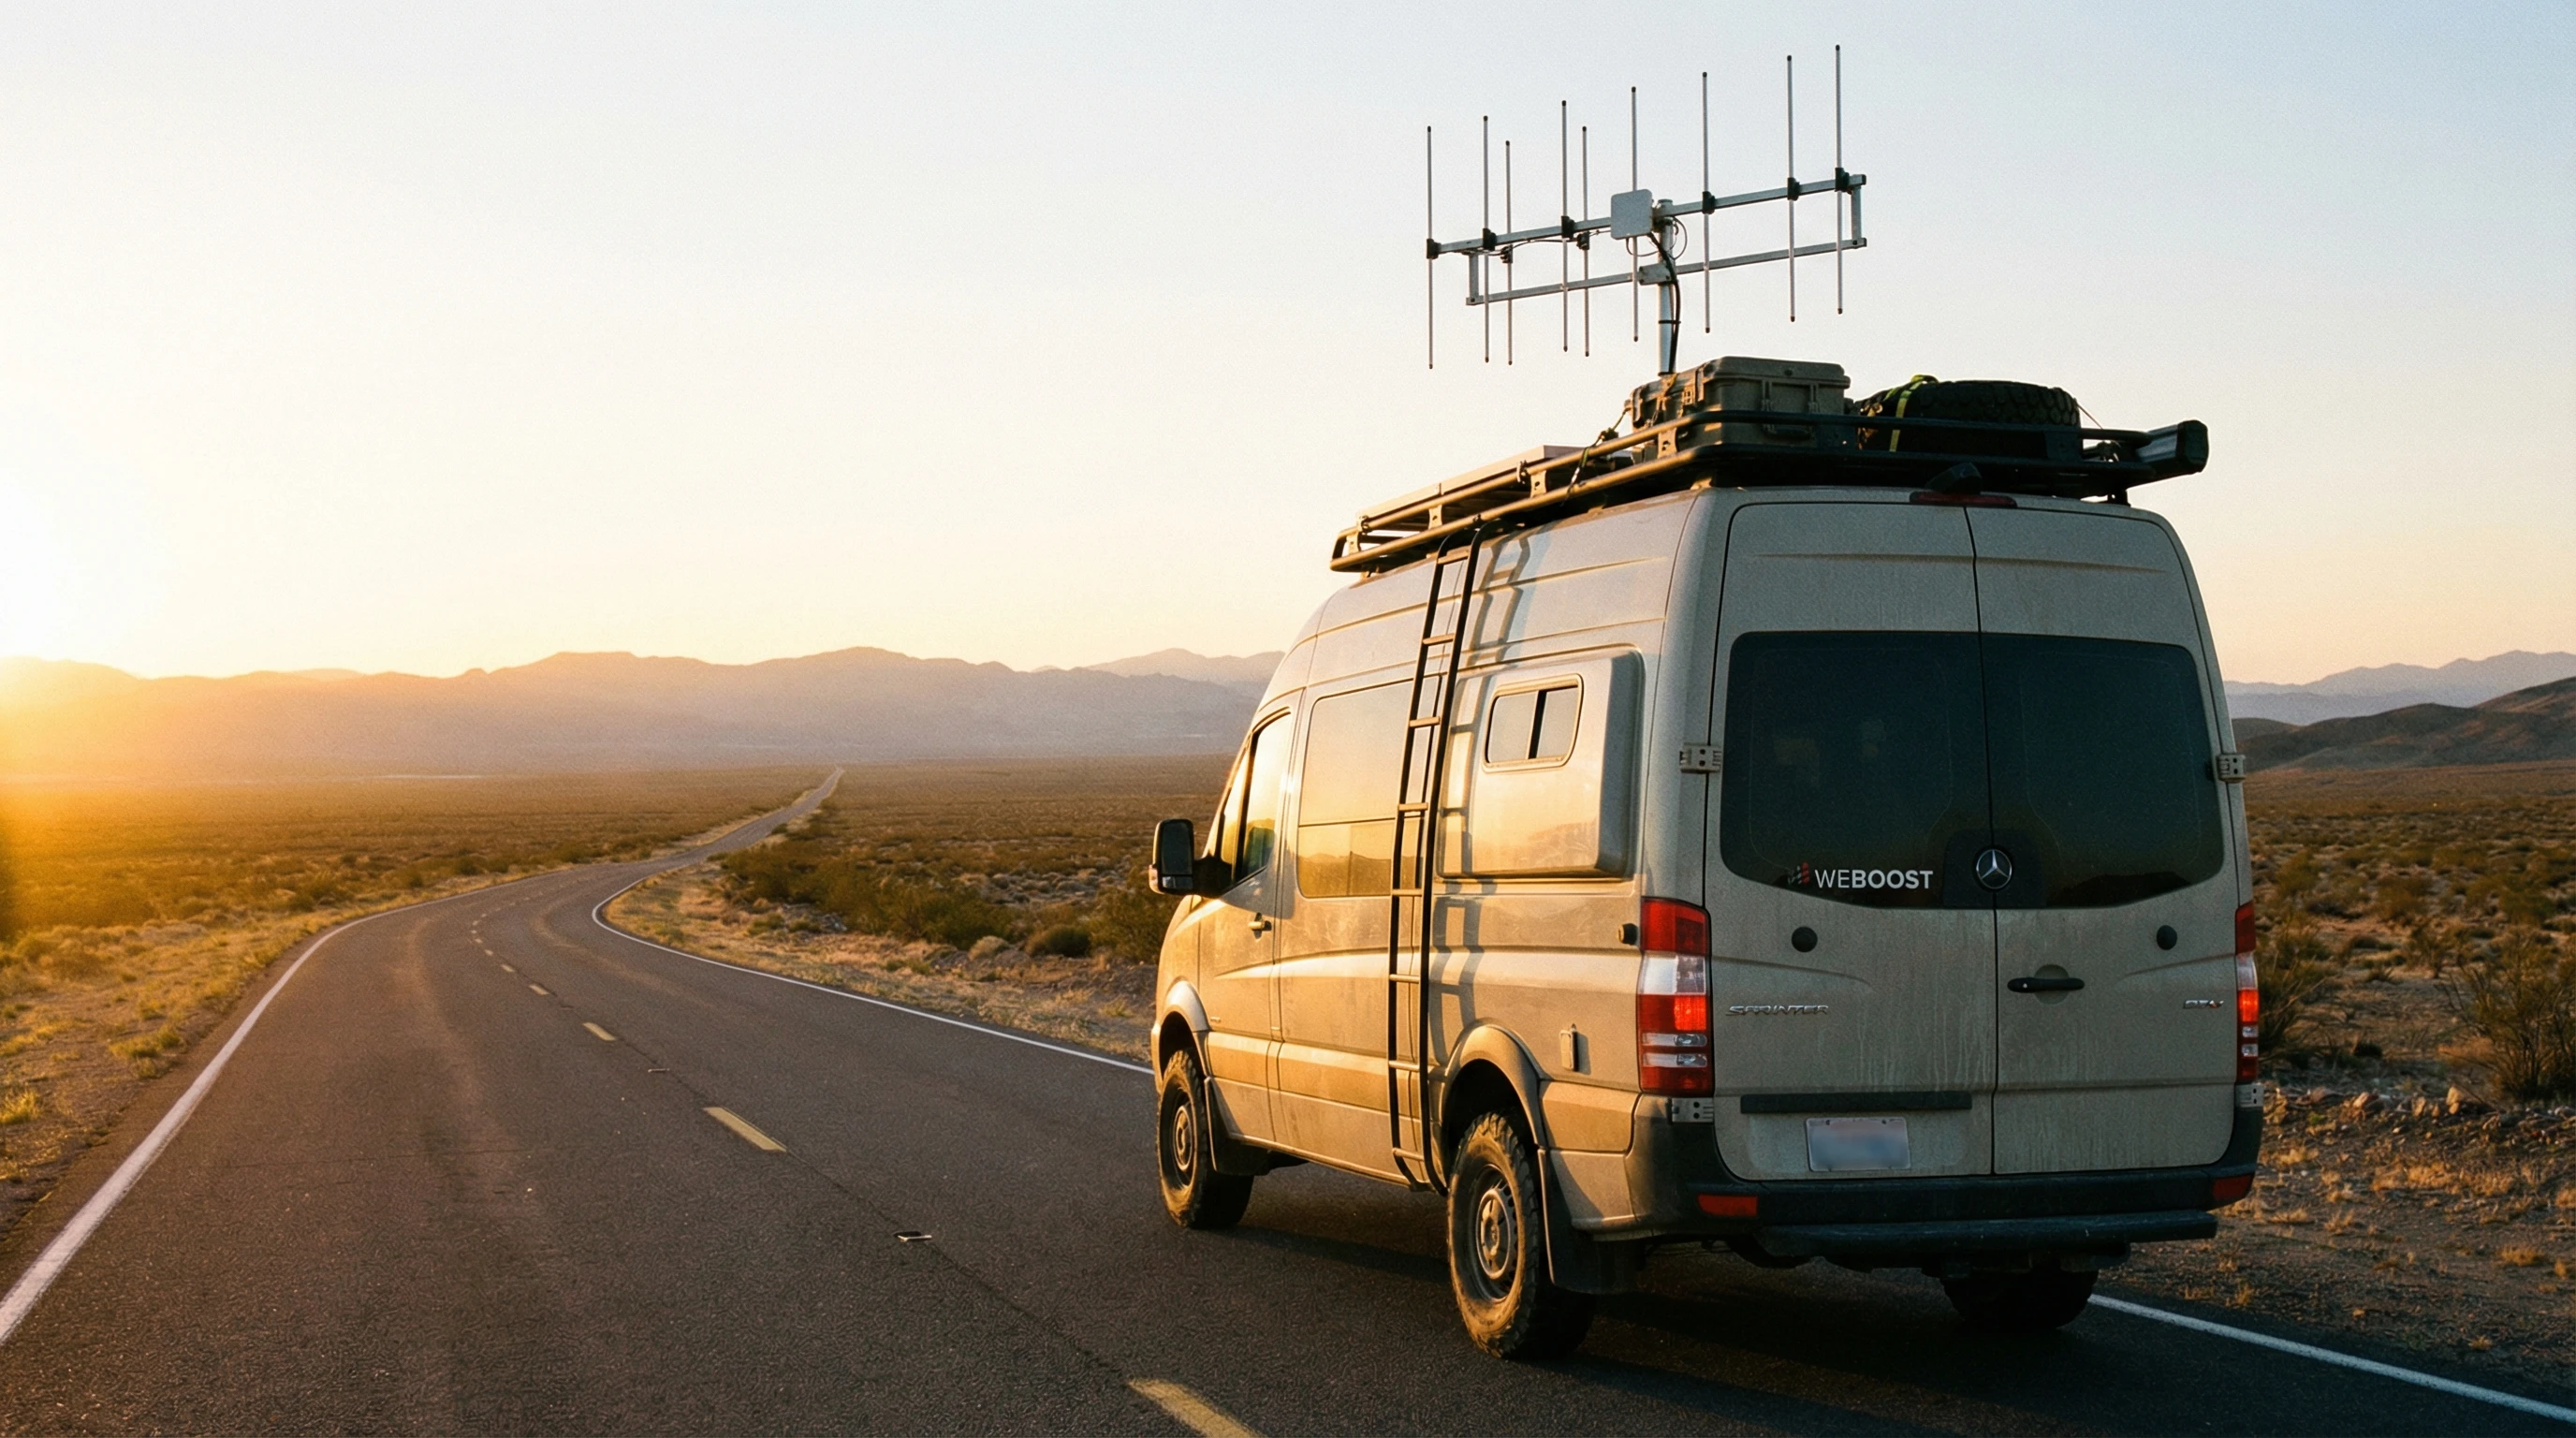
These steps usually sort most issues out in no time. For a bigger, more lasting improvement, you might want to add an external Wi-Fi antenna or even a cellular booster for more dependability when you’re way off the grid.

RV Wi-Fi extender setup with lights and cozy decor

Advanced Tips for Eye-Catching RV Internet

If you’ve mastered the basics and want an even smoother online adventure, try these upgrades:

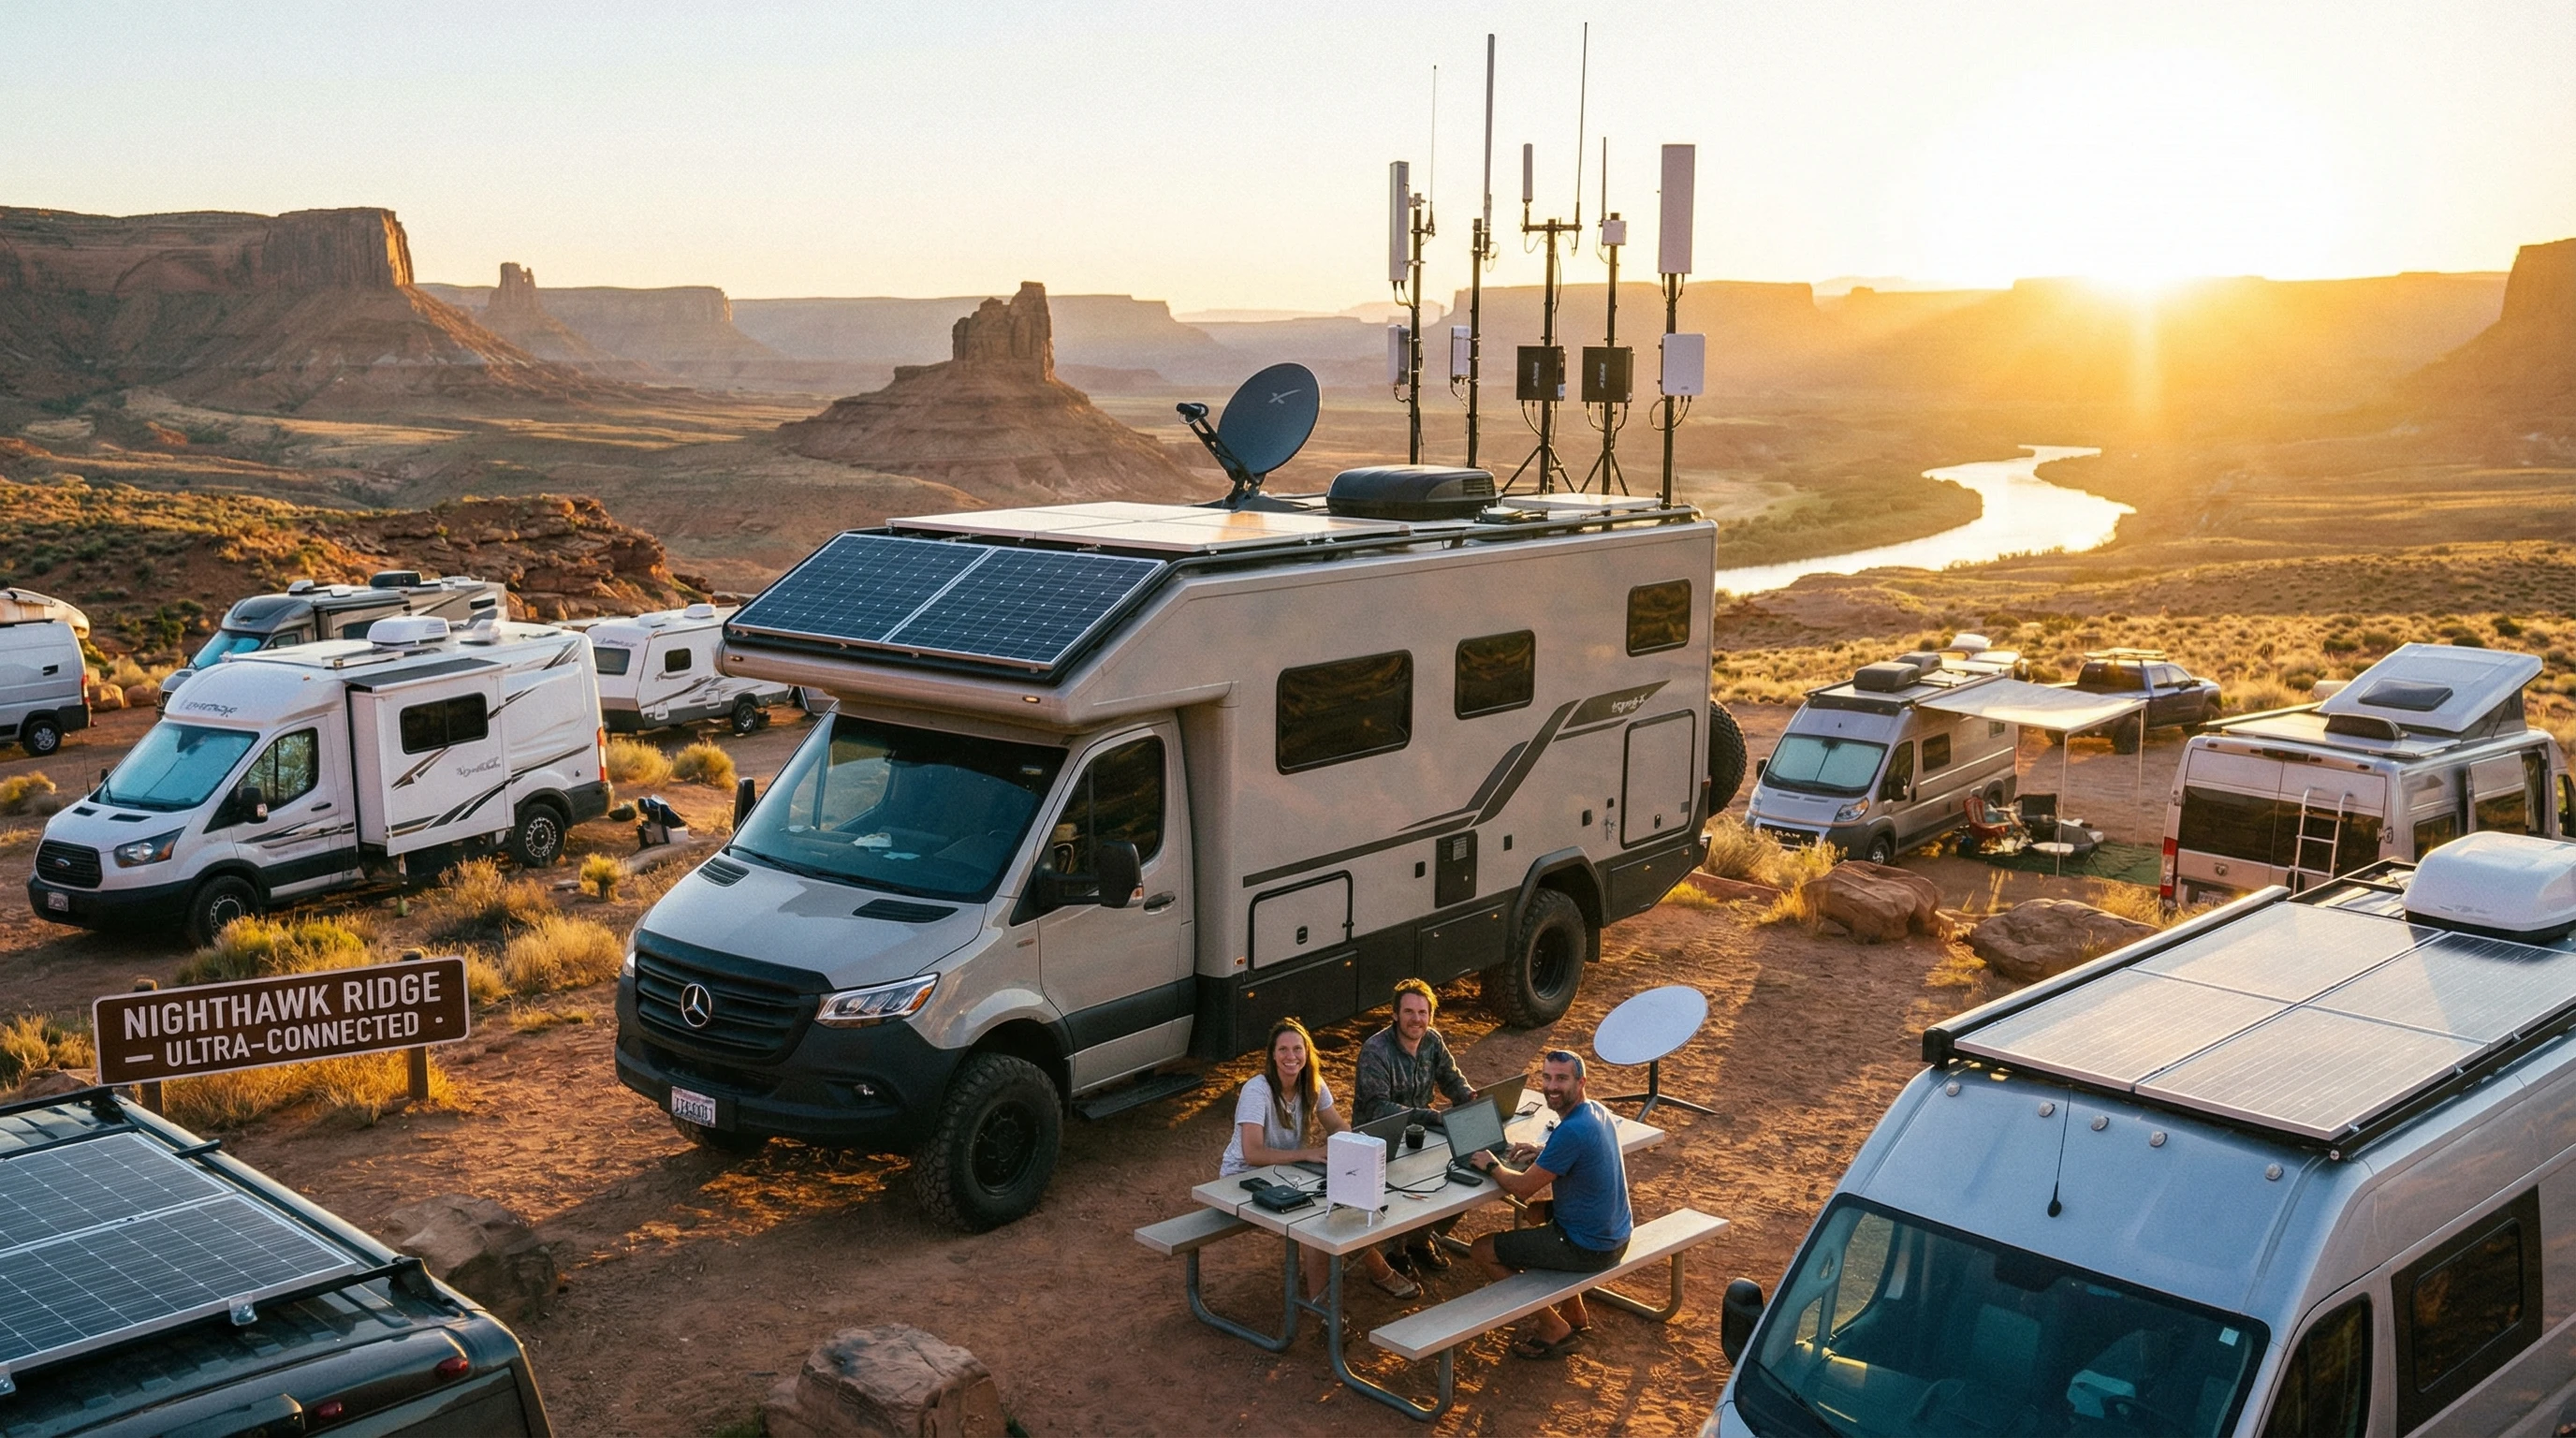
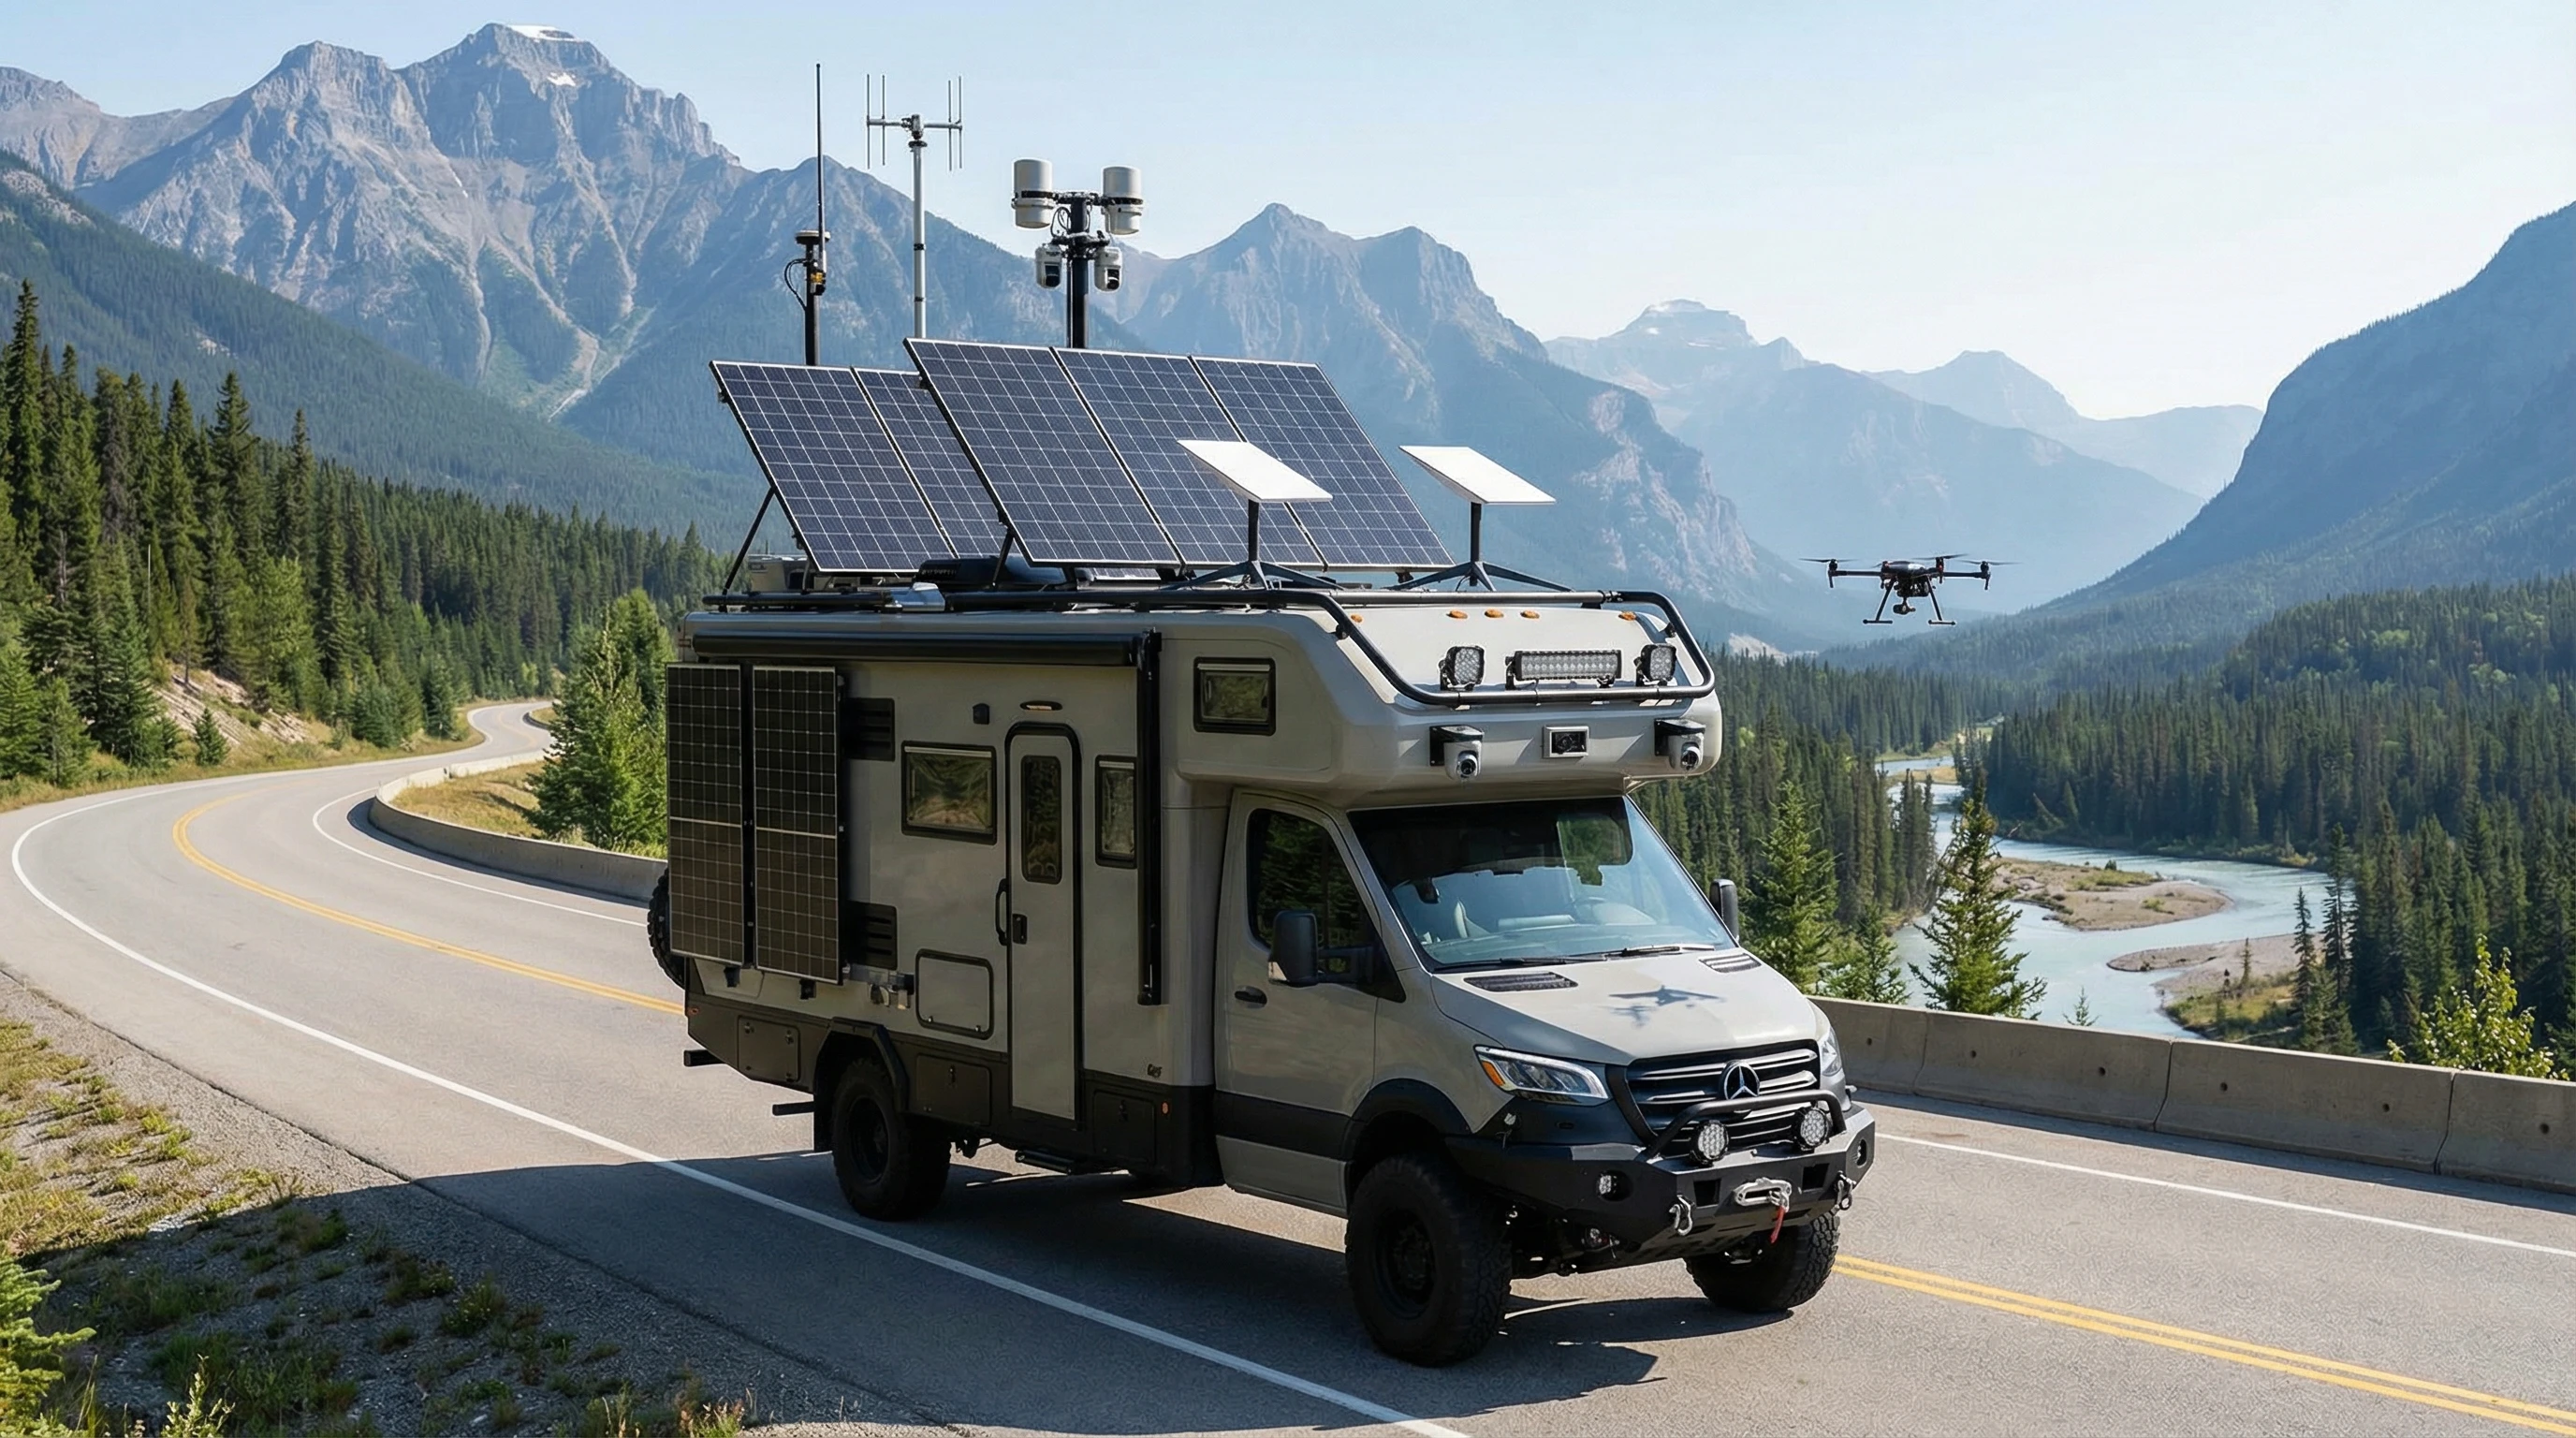
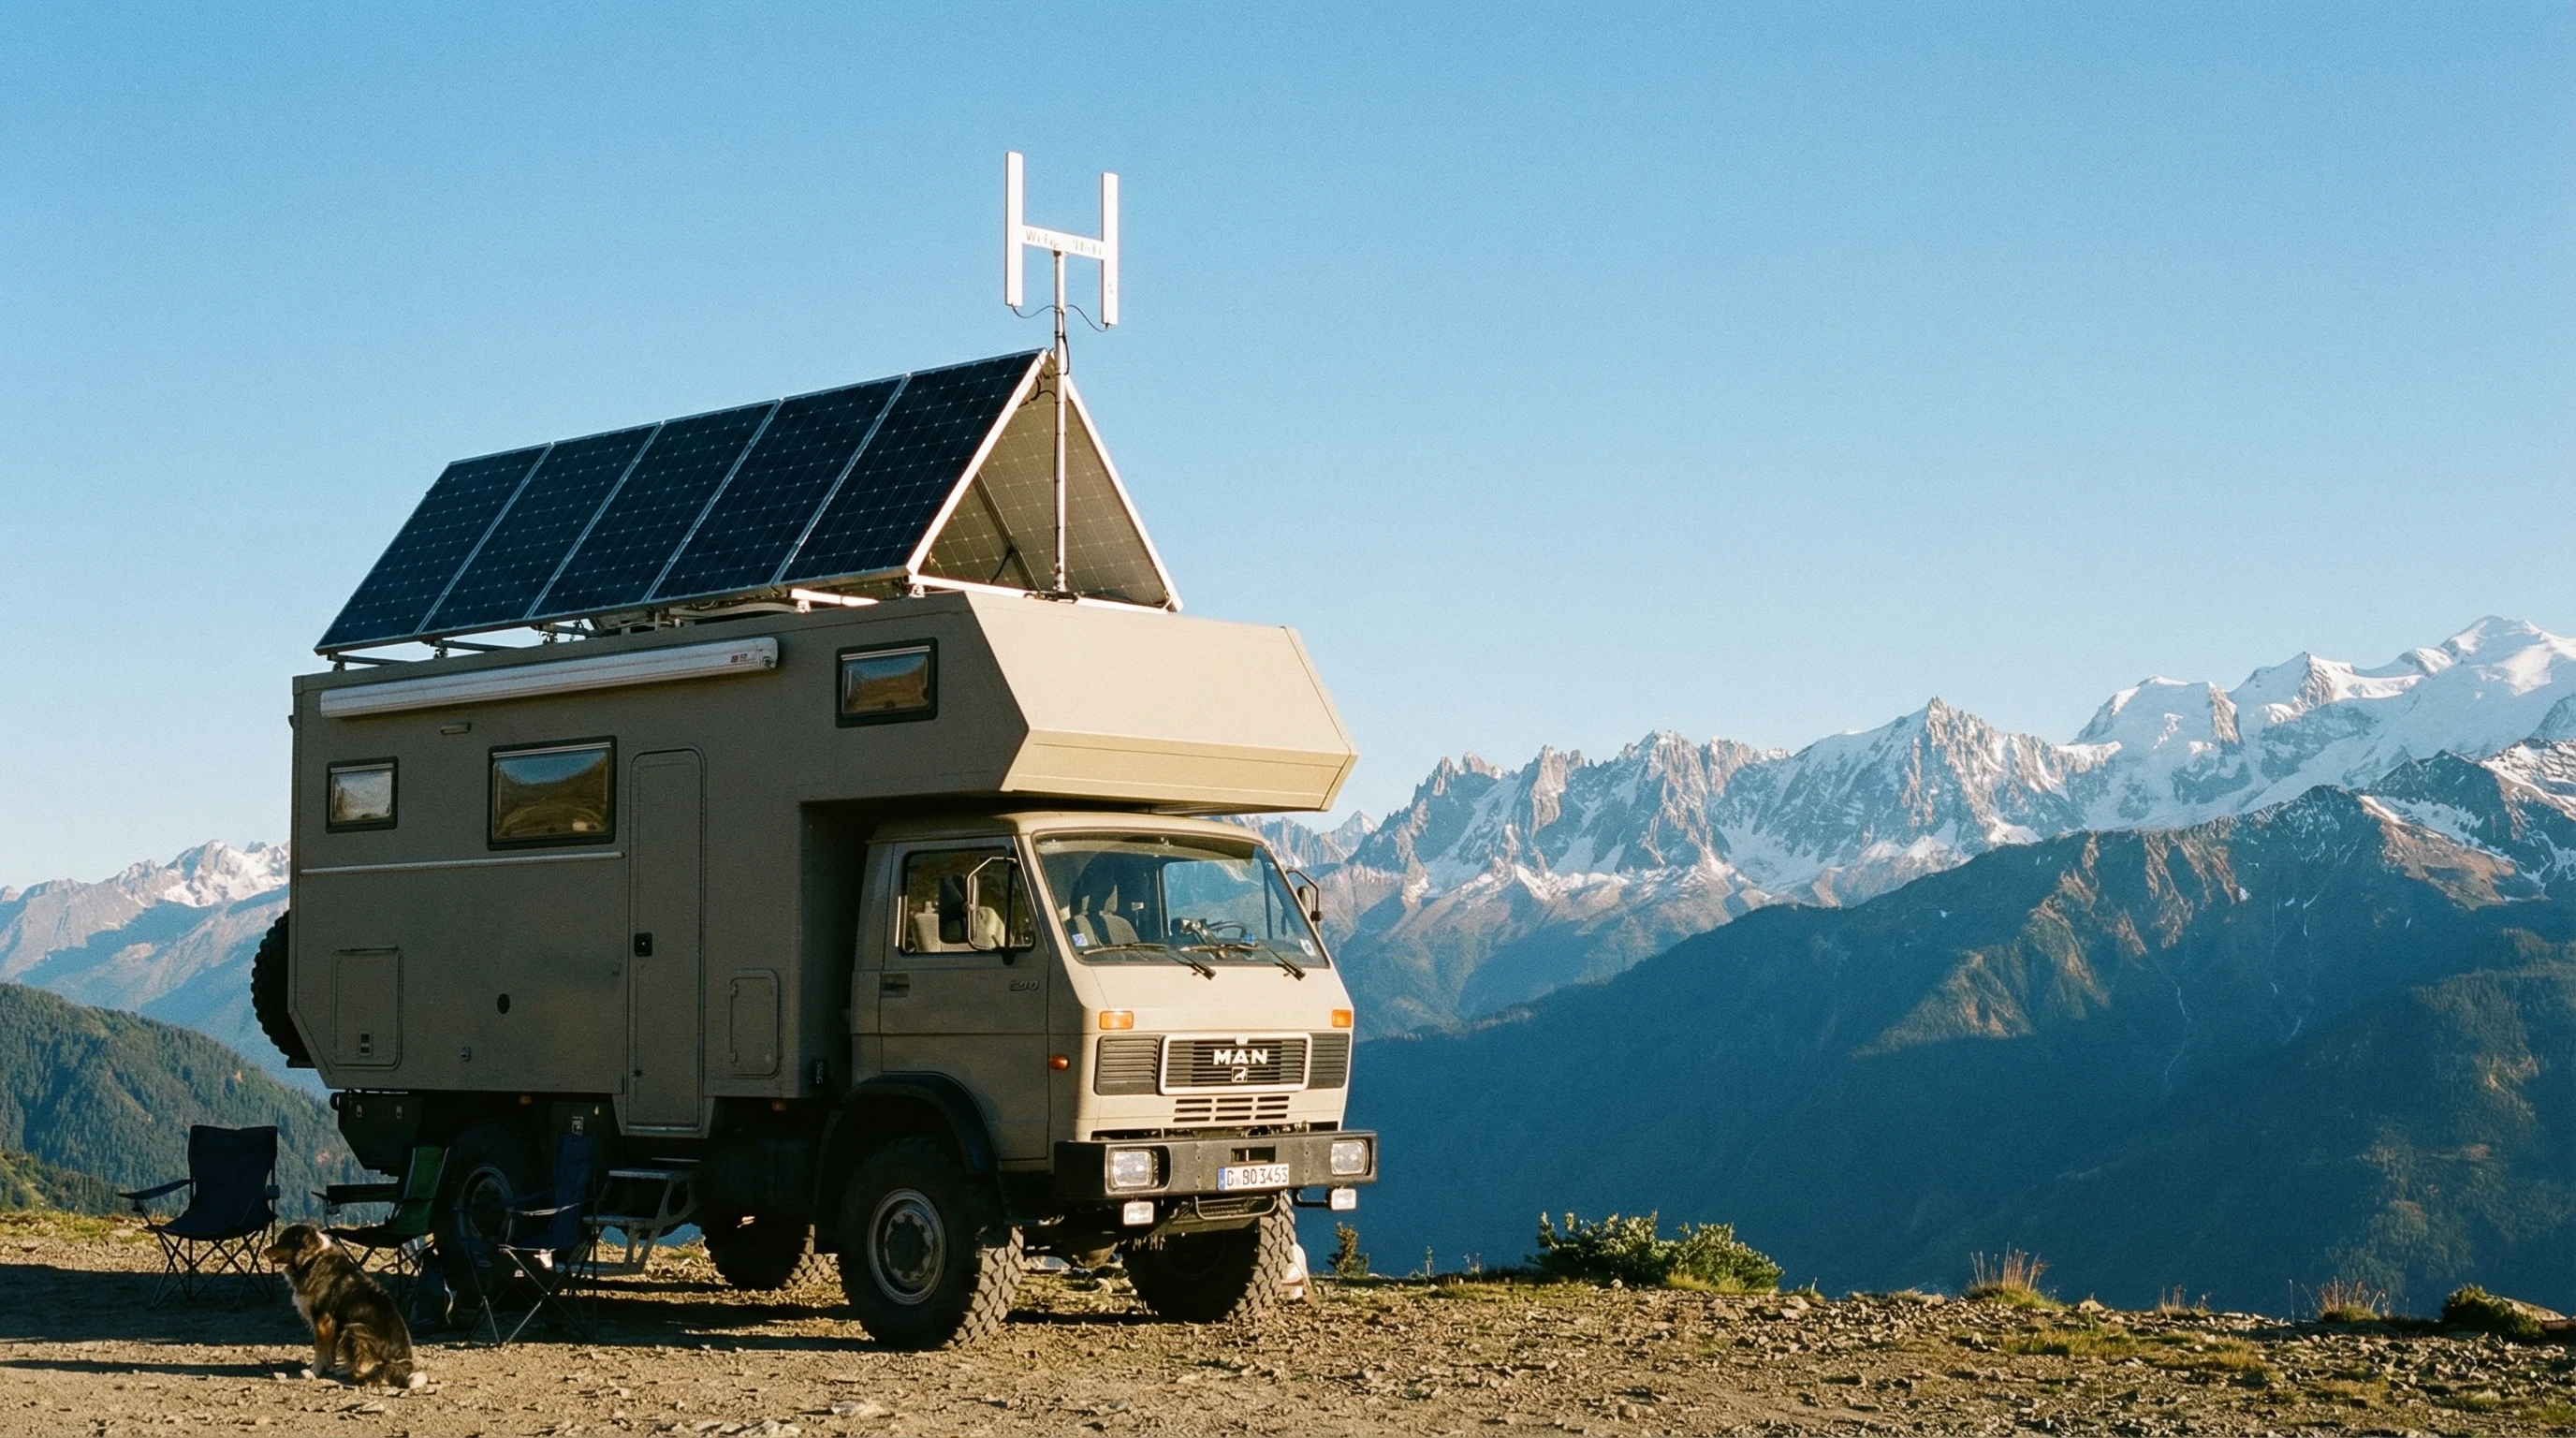
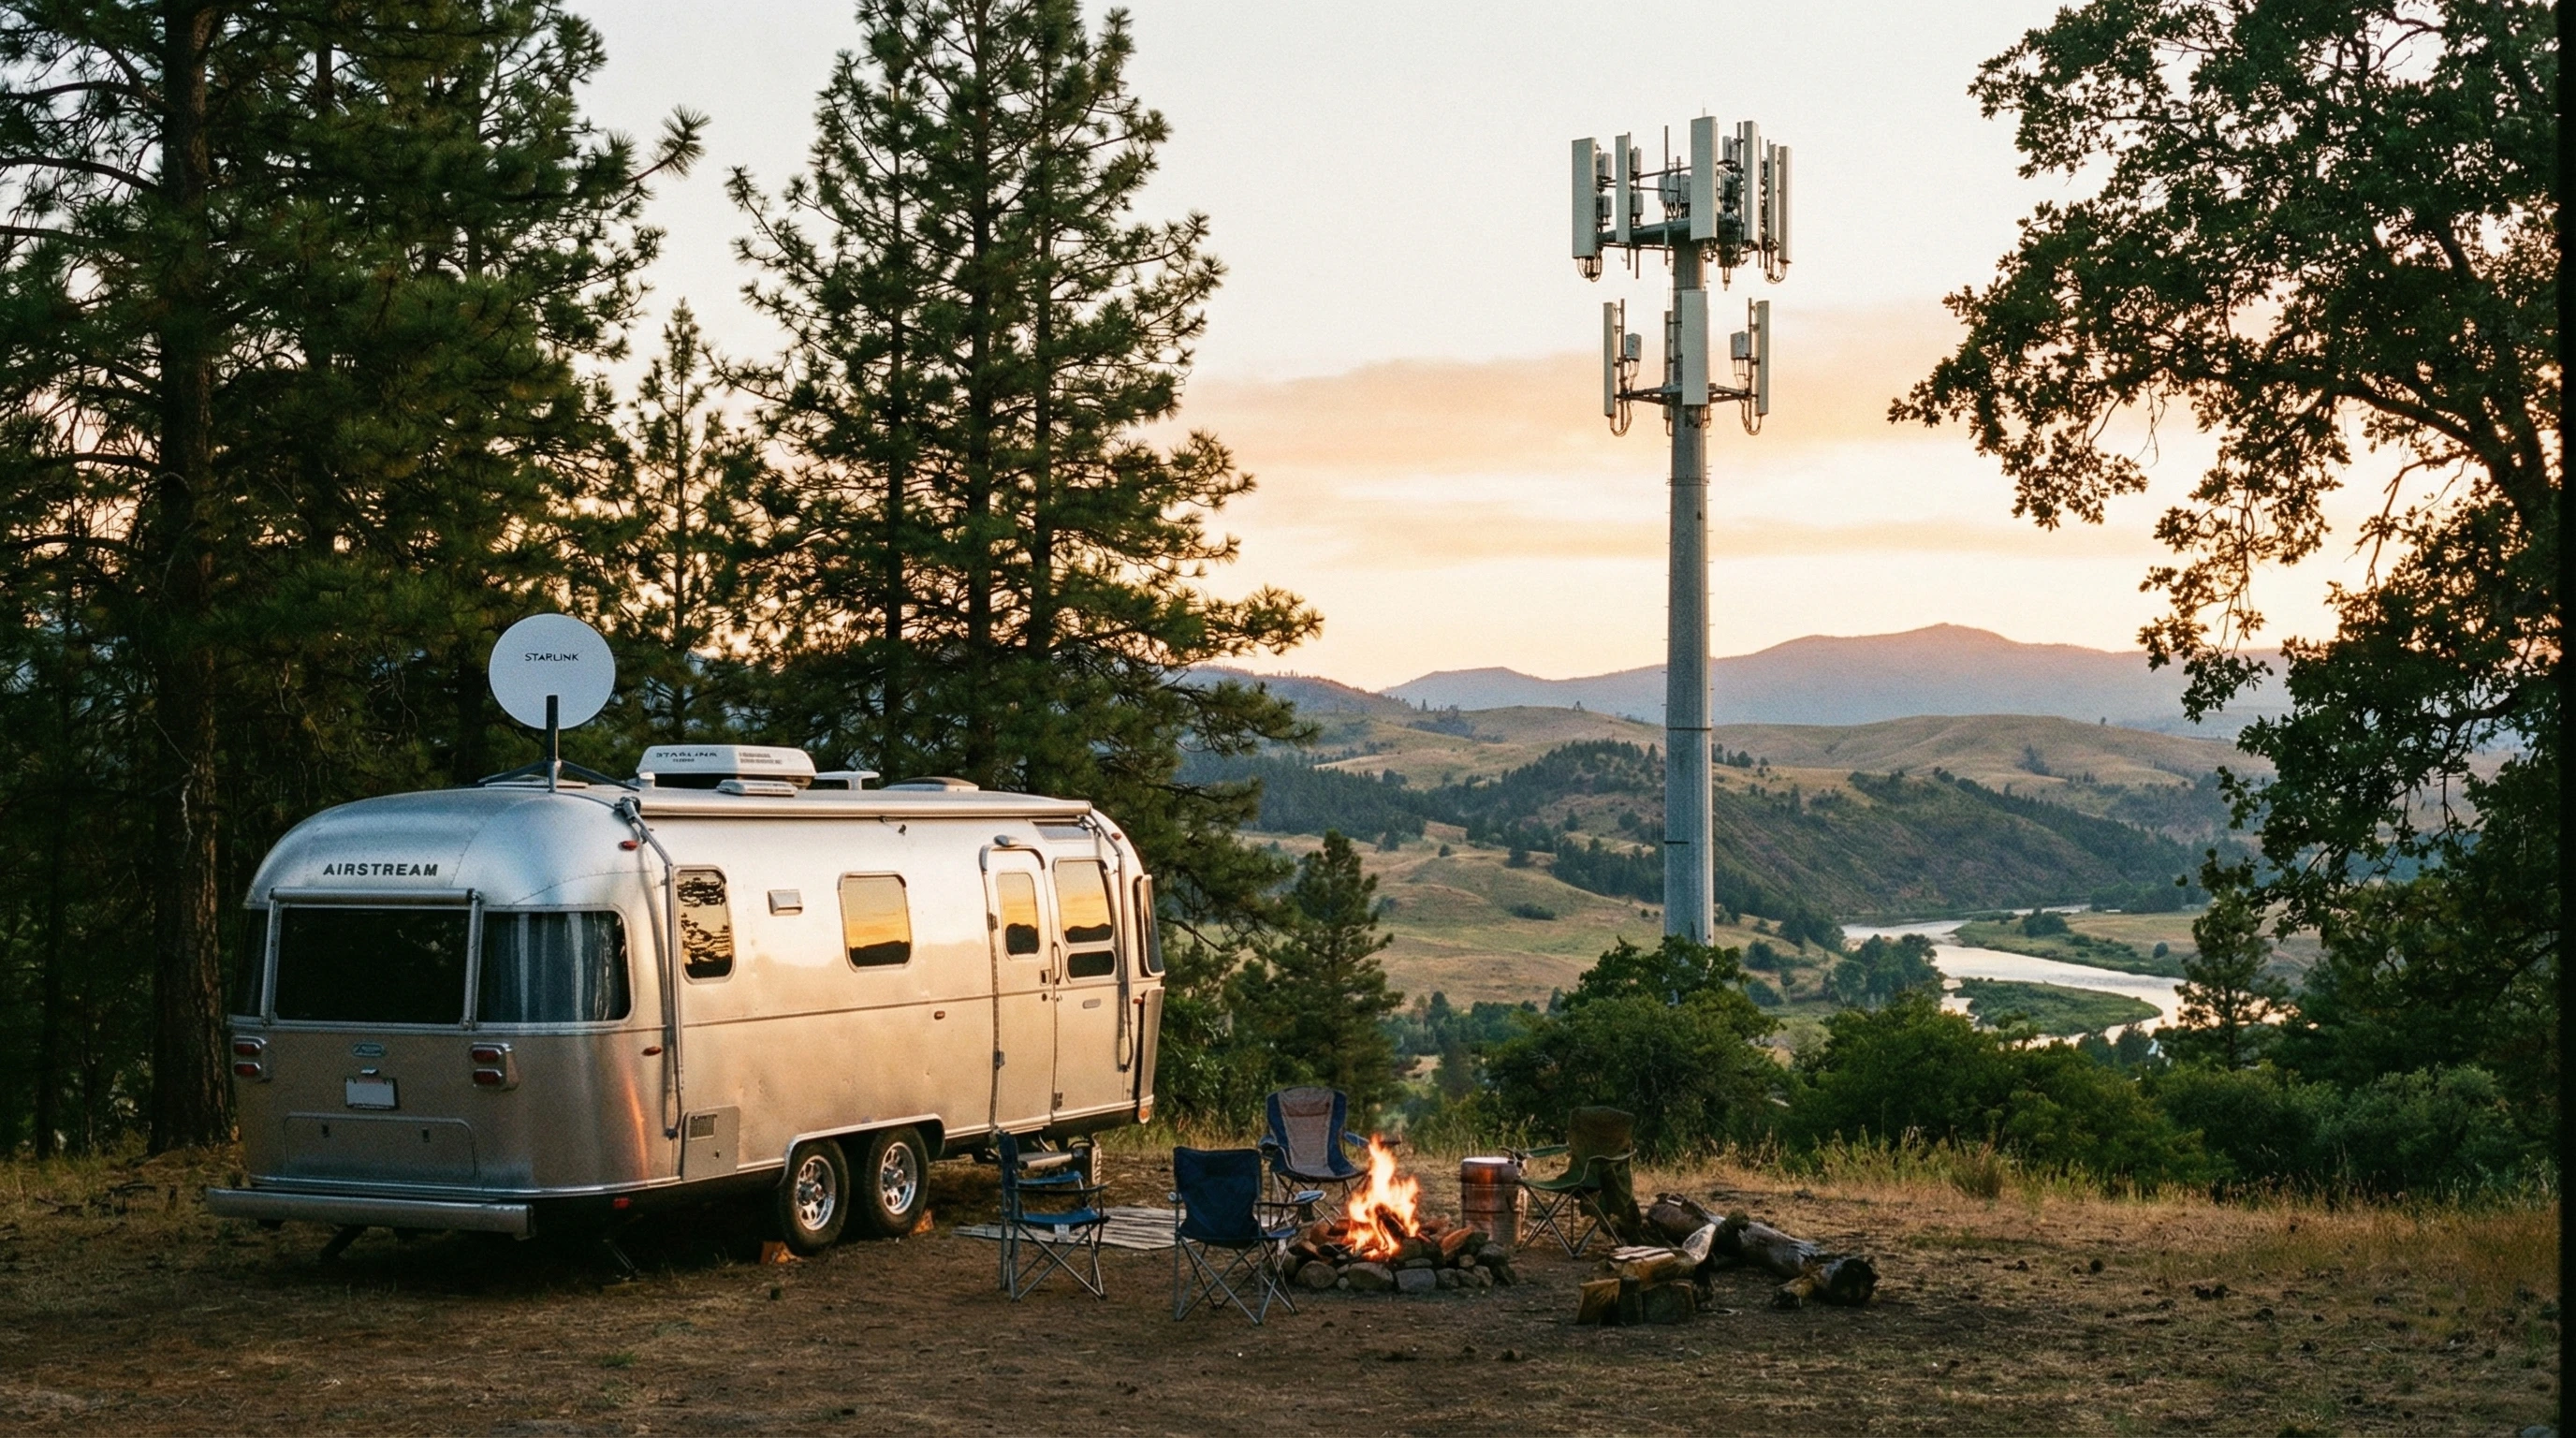
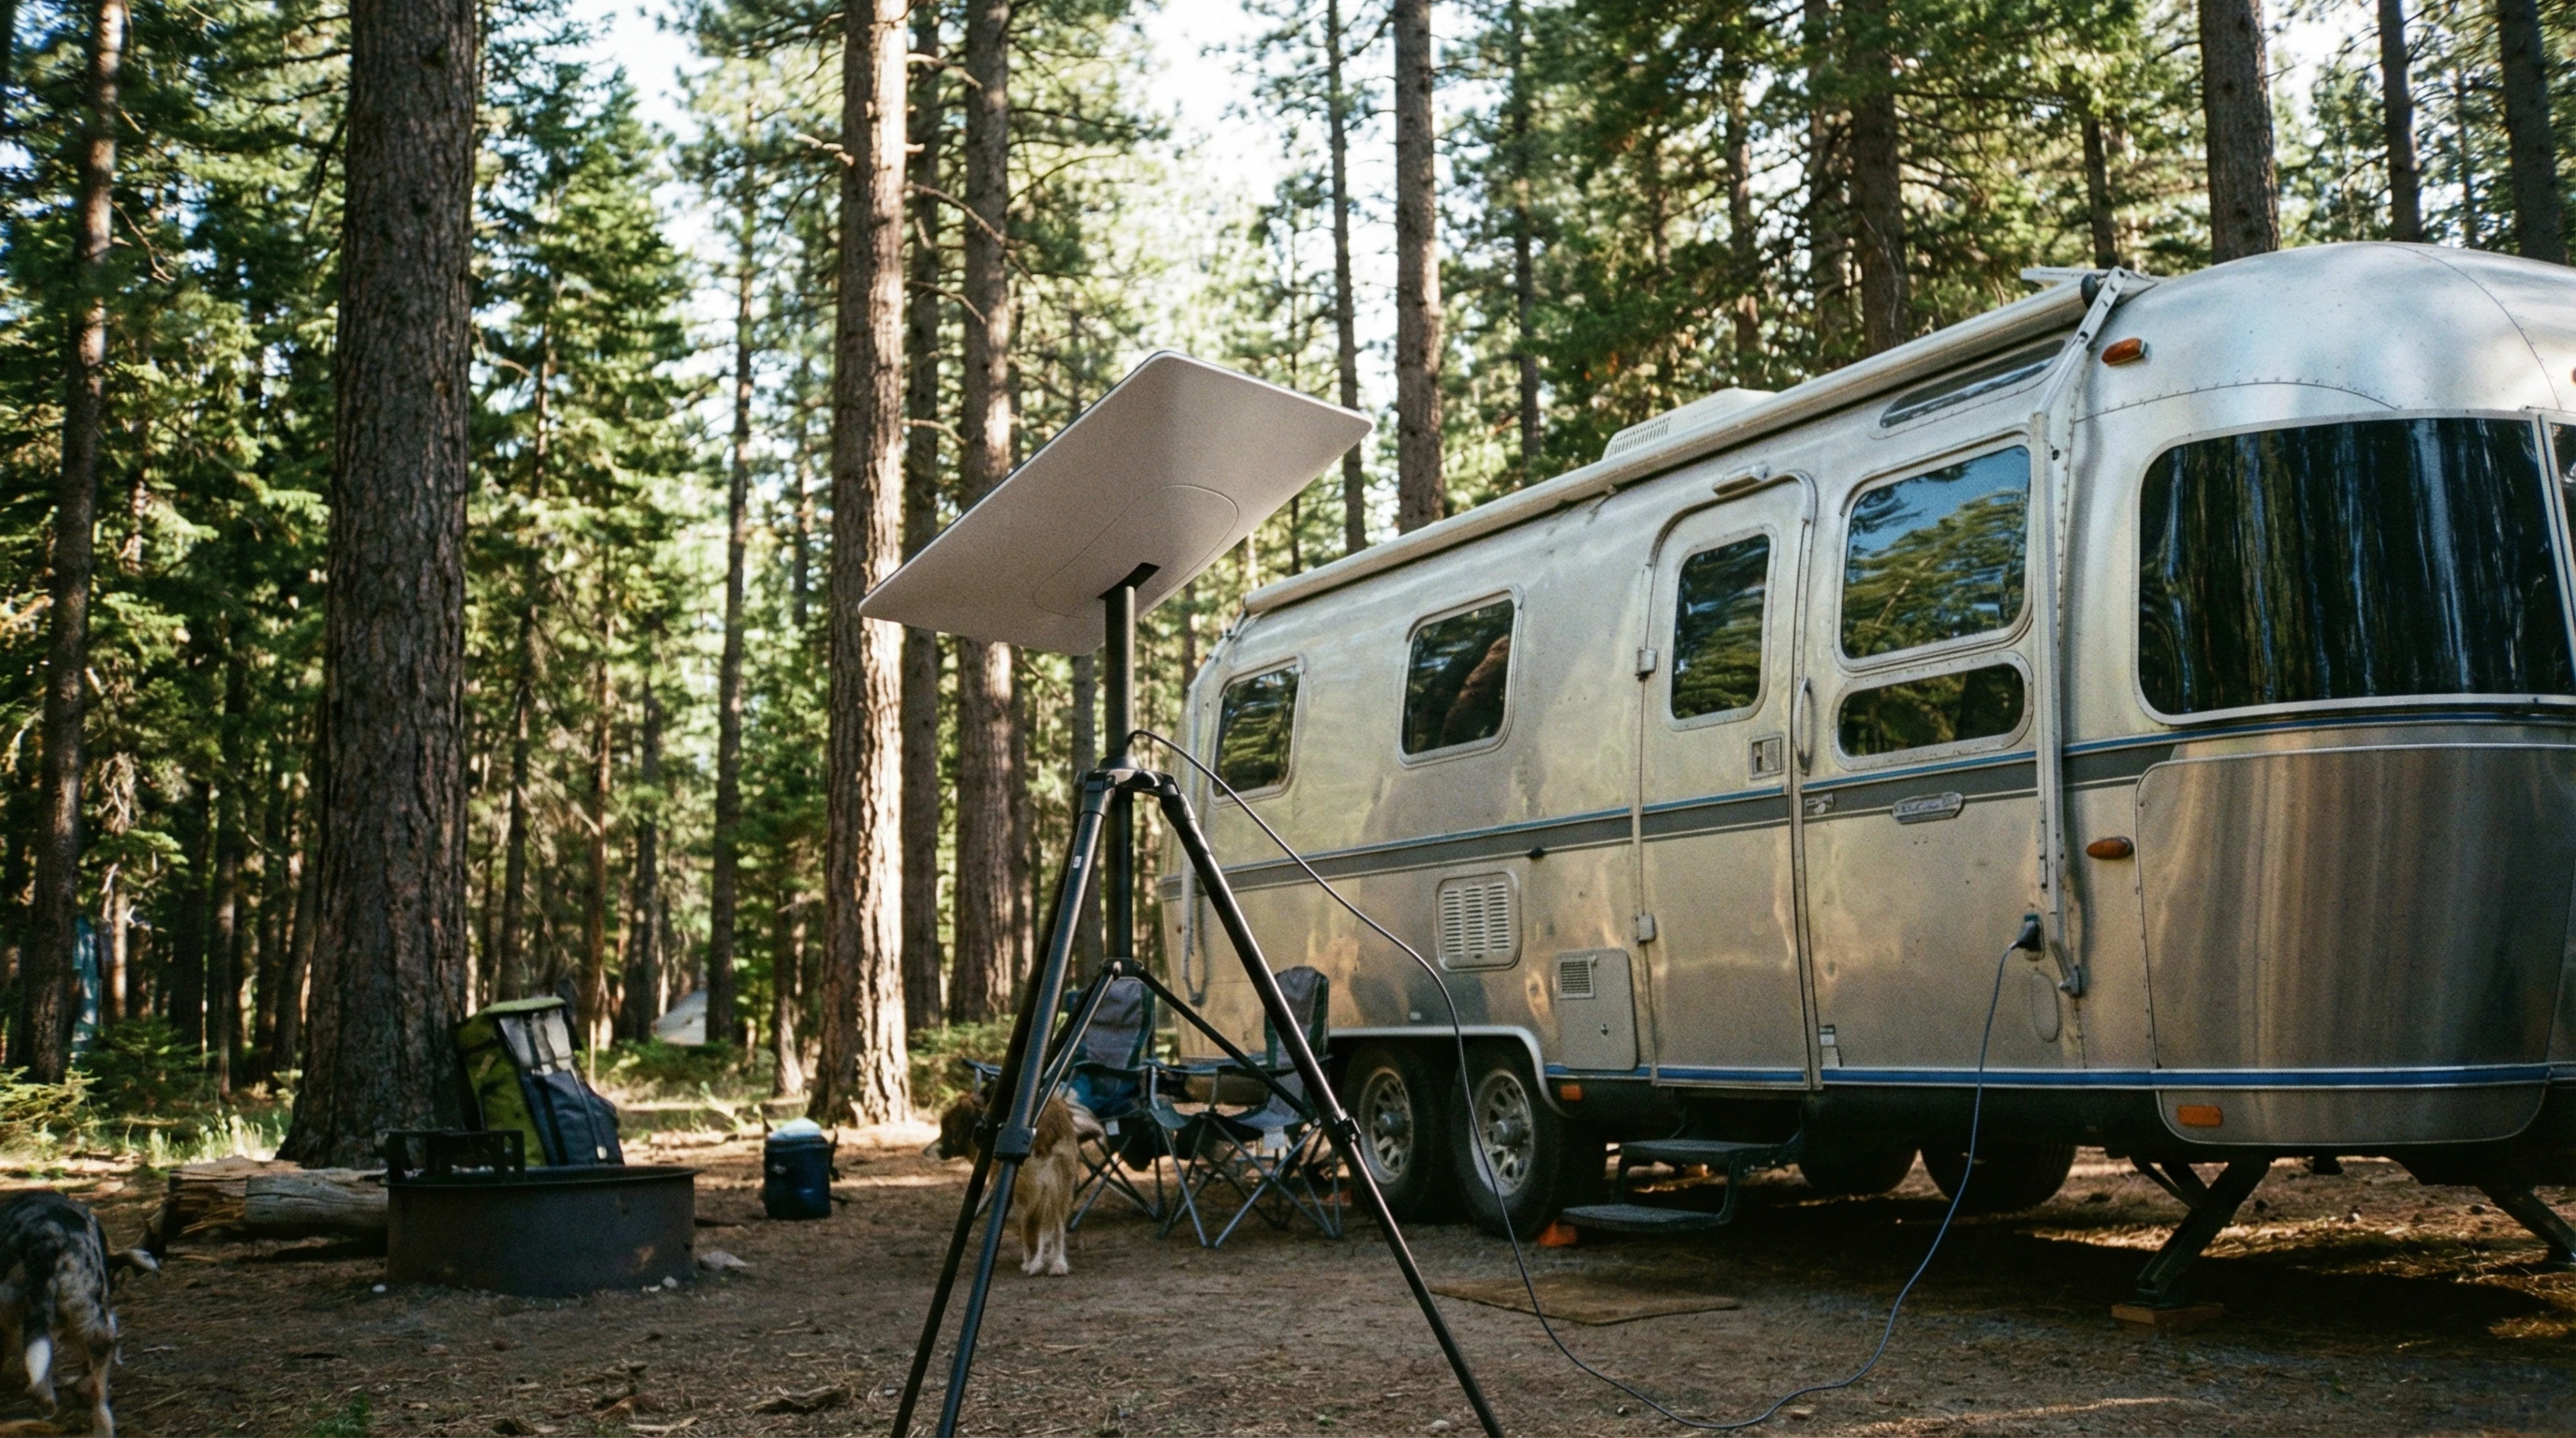
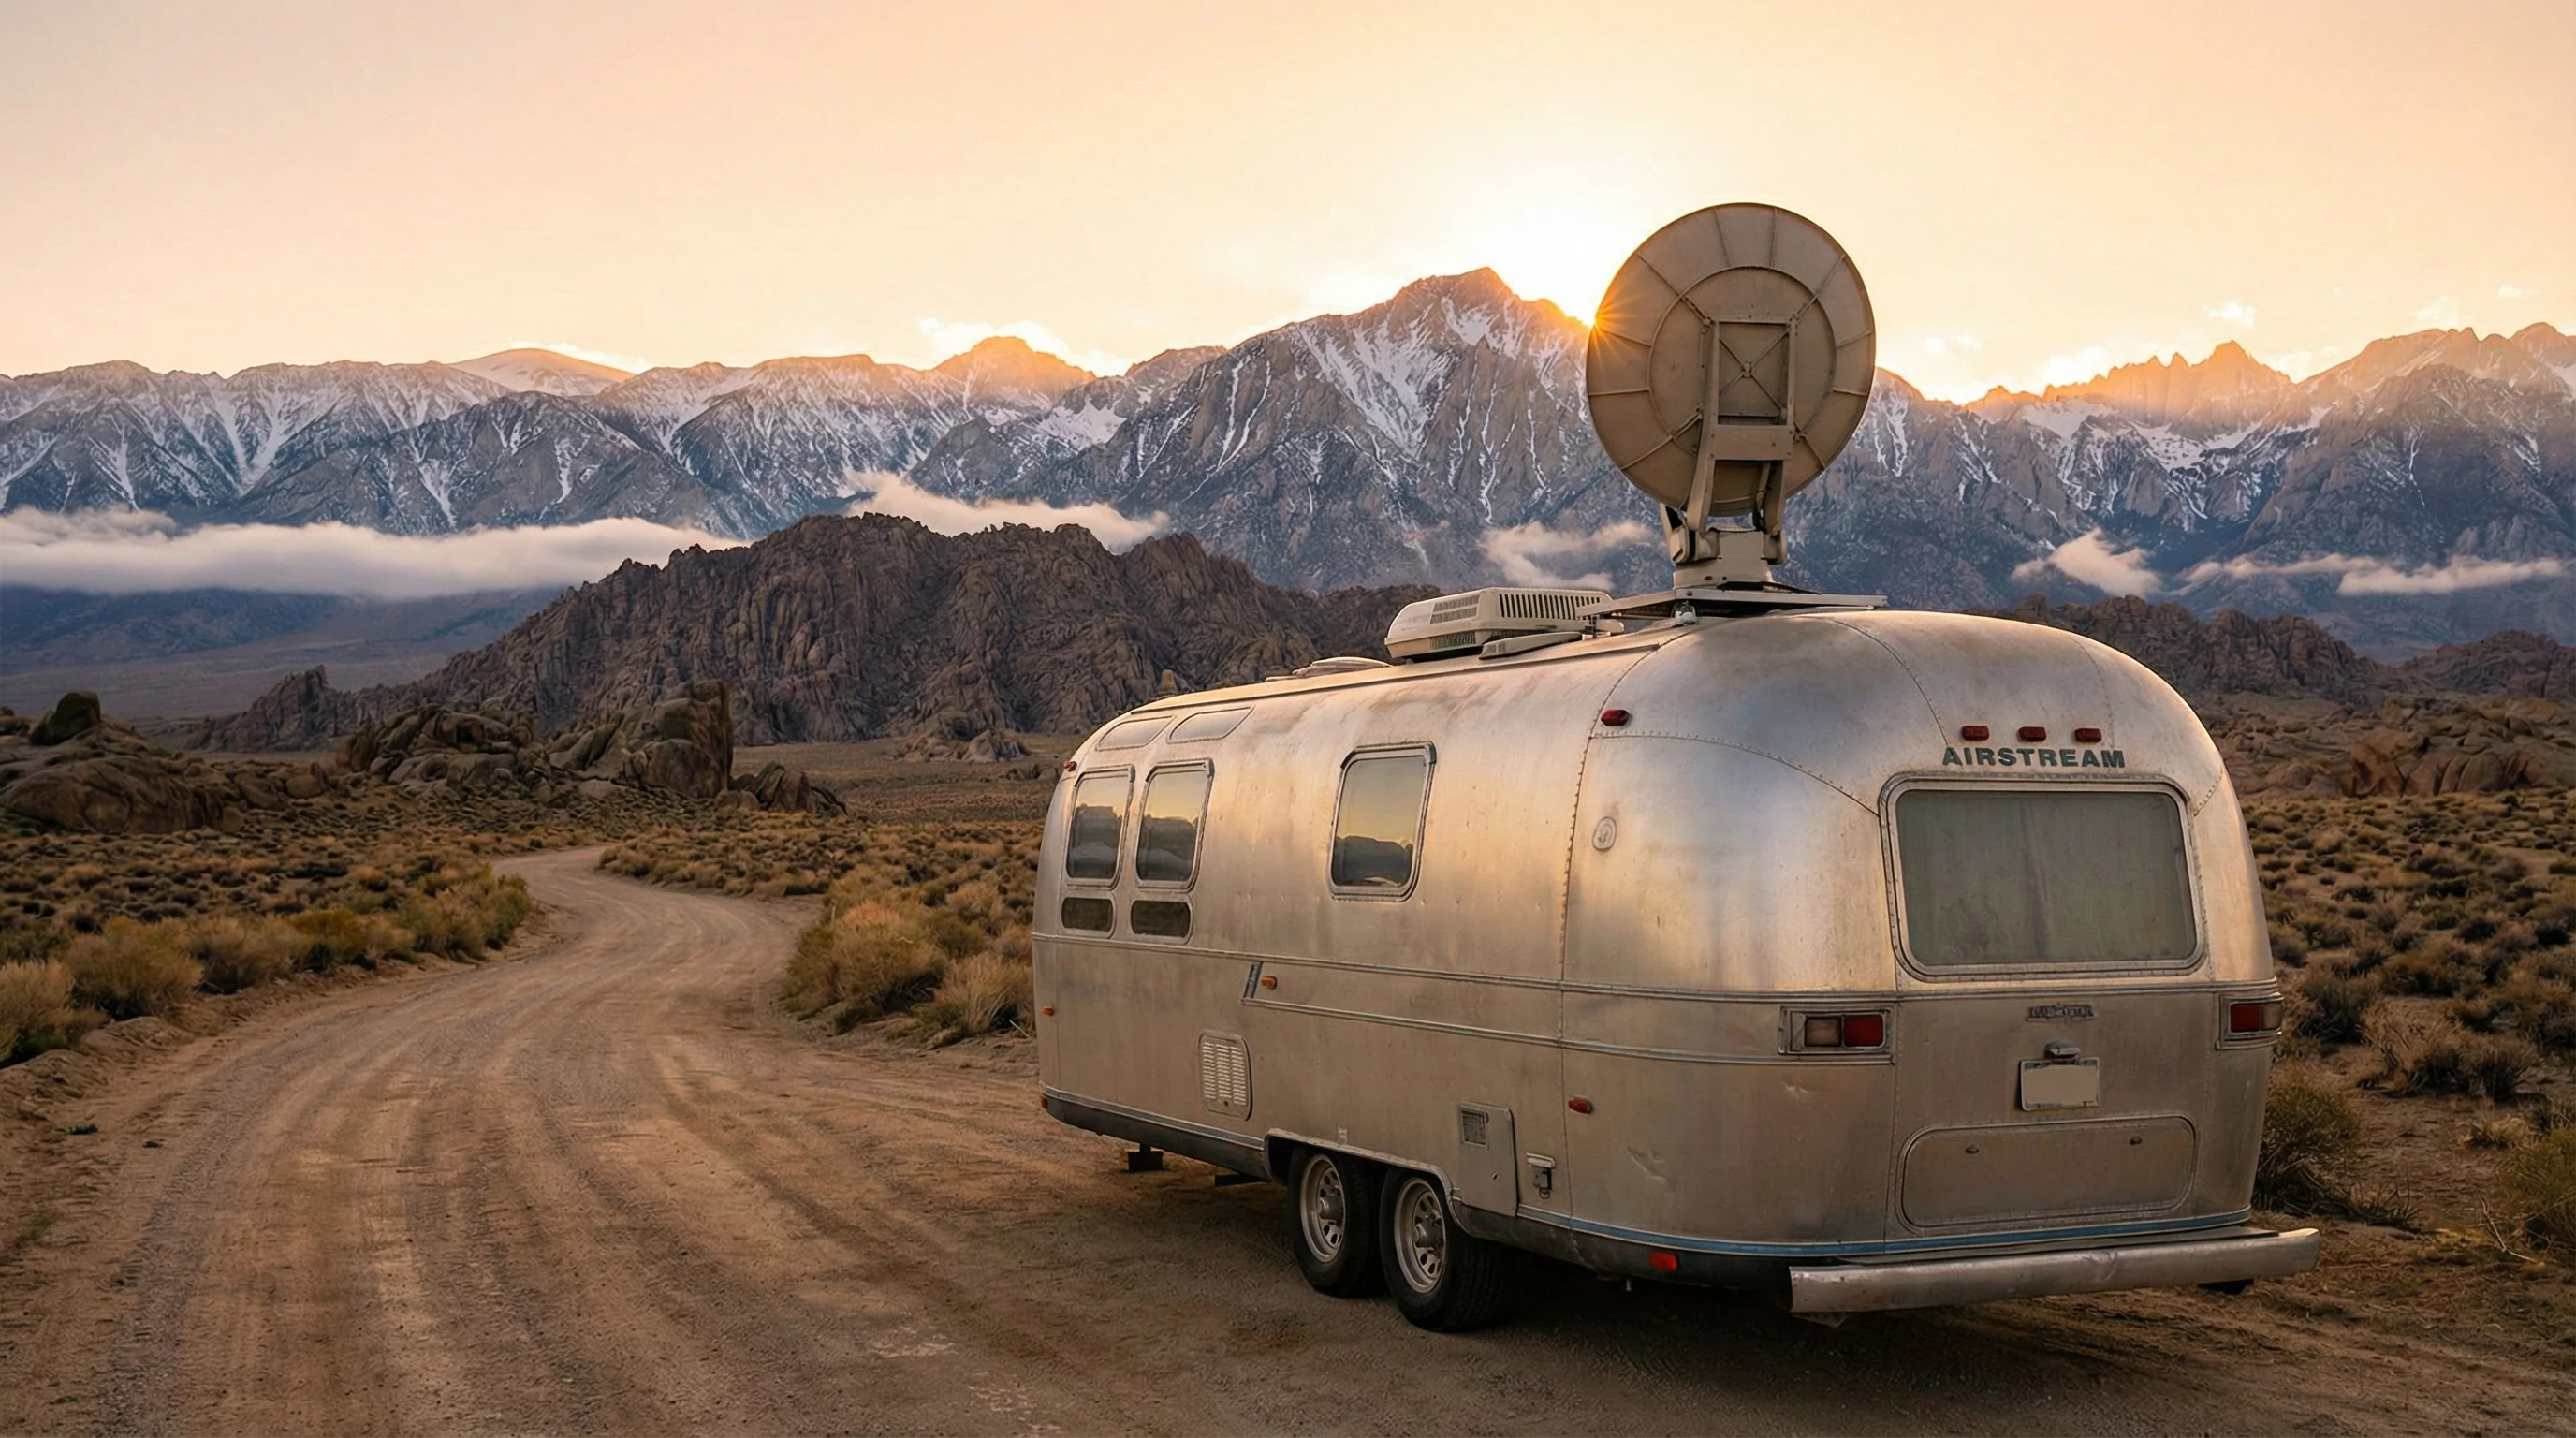
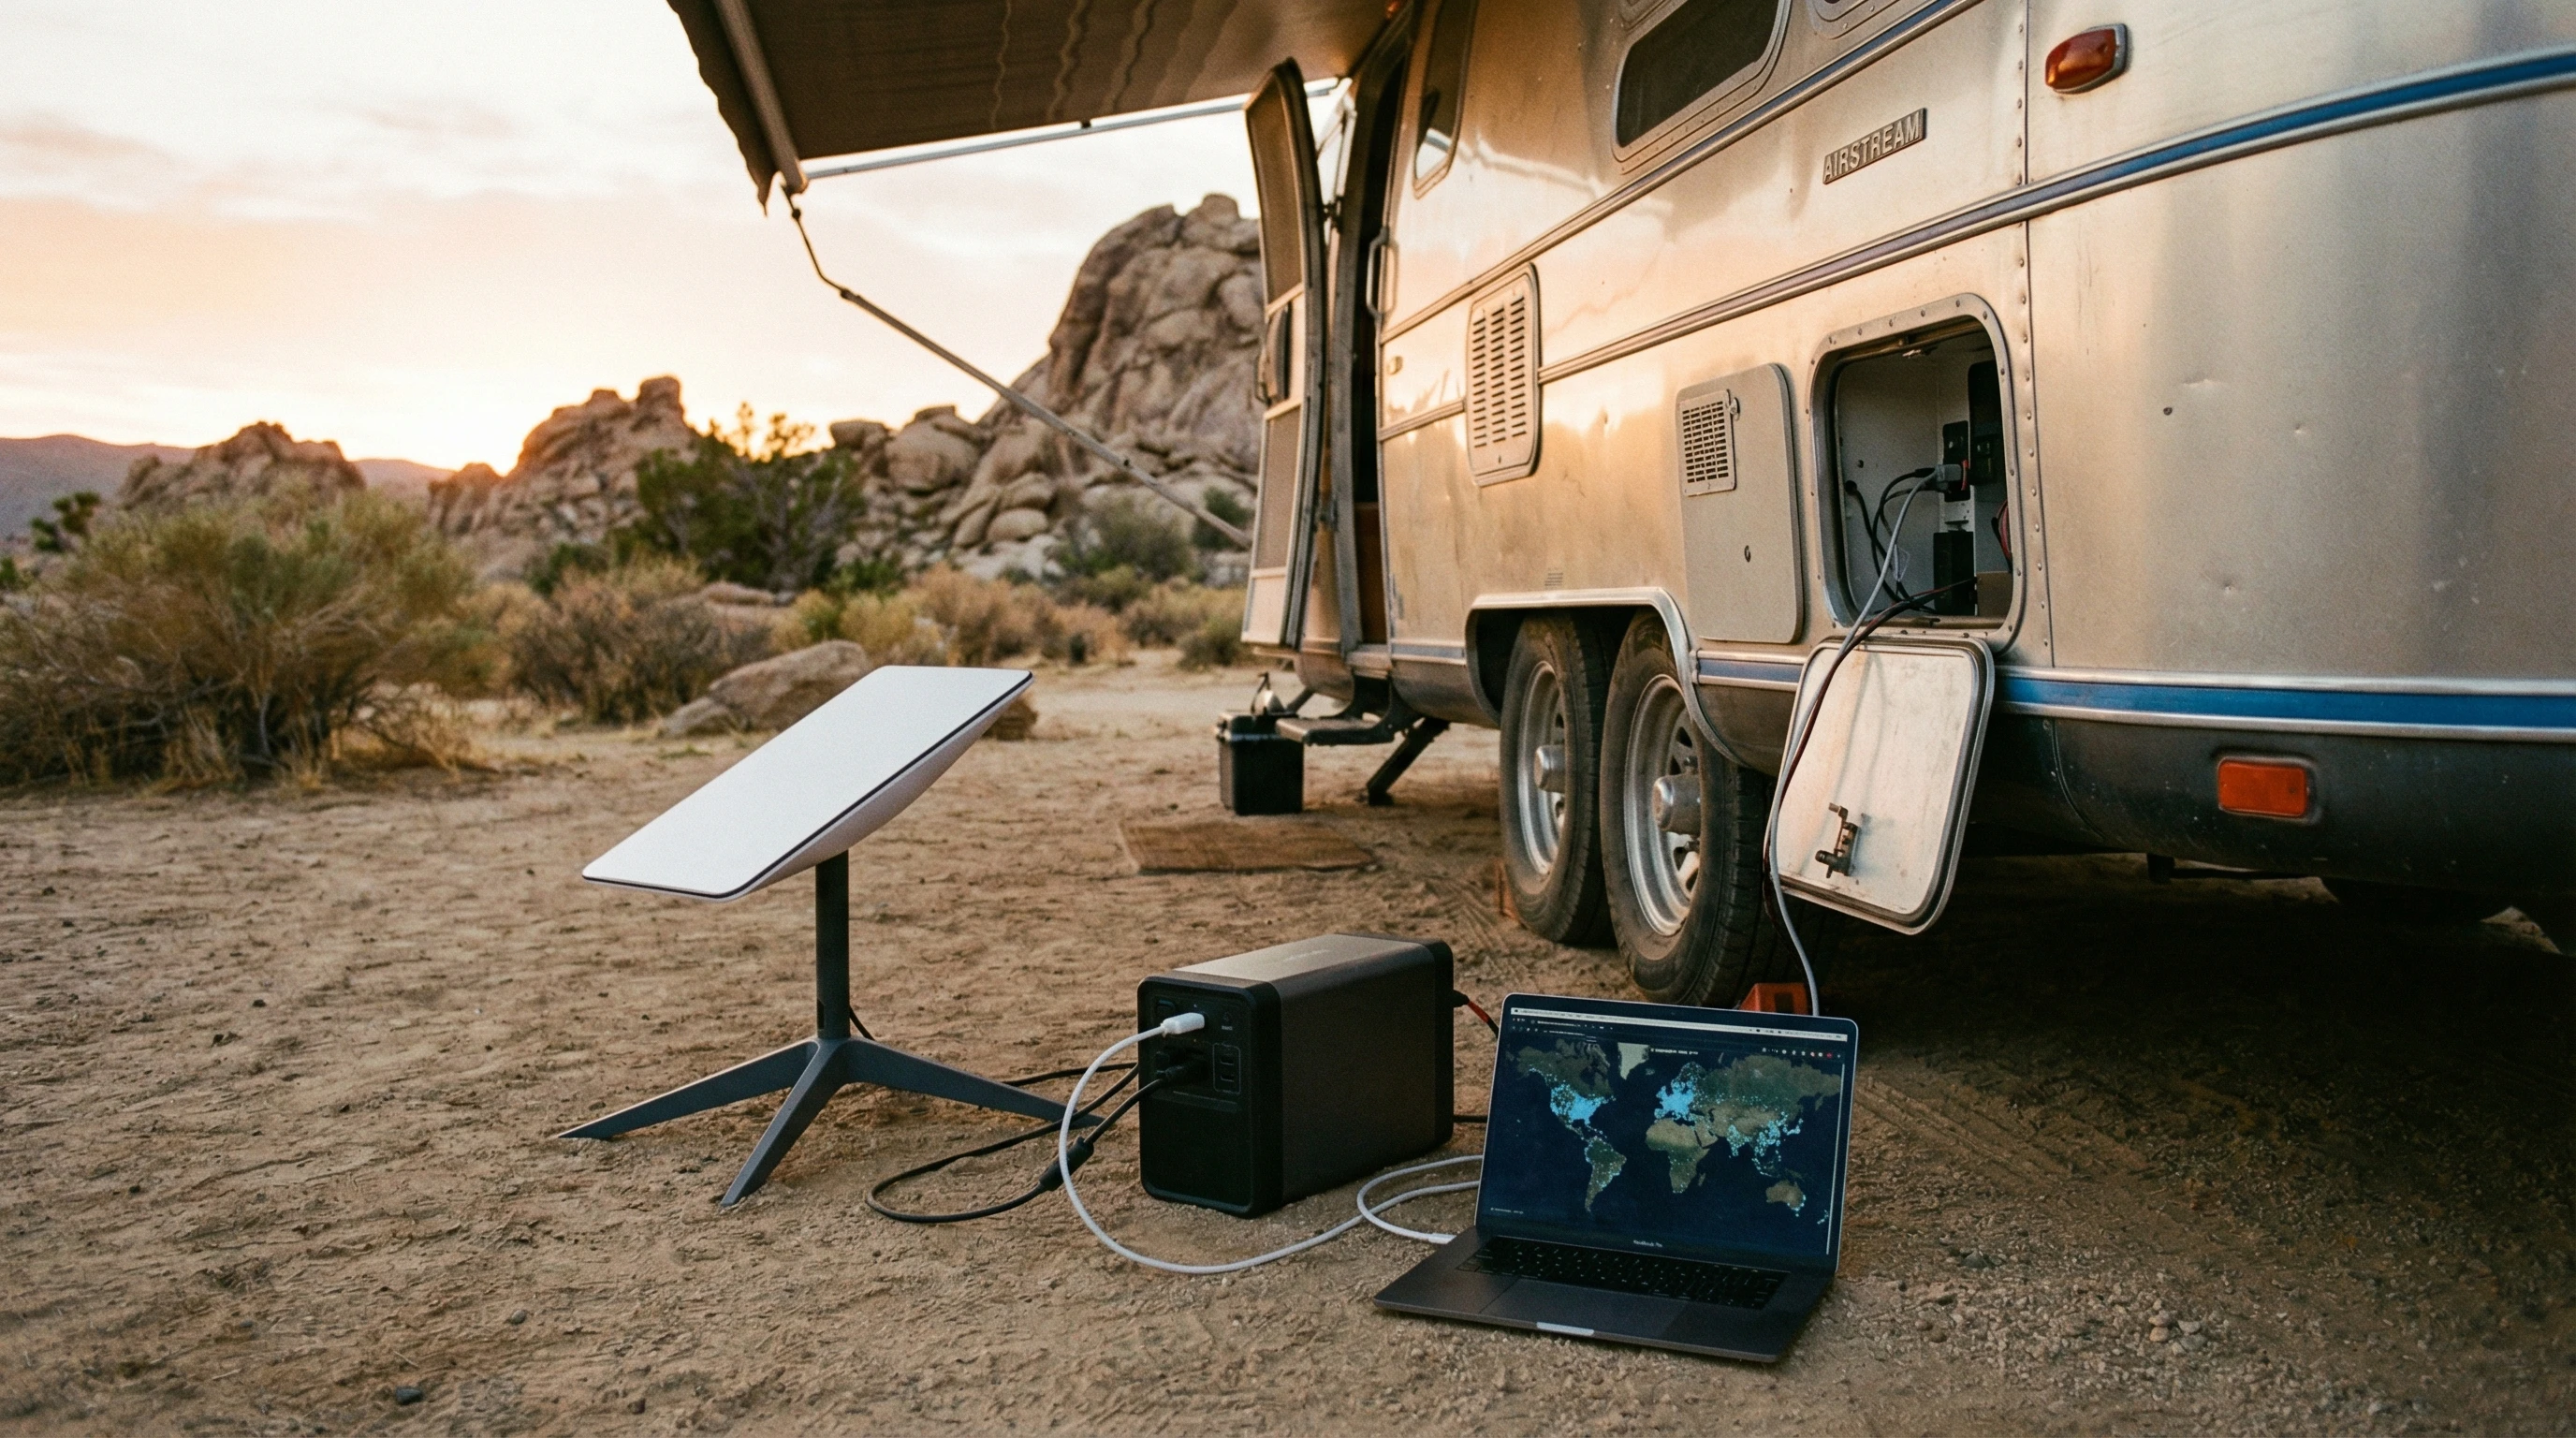
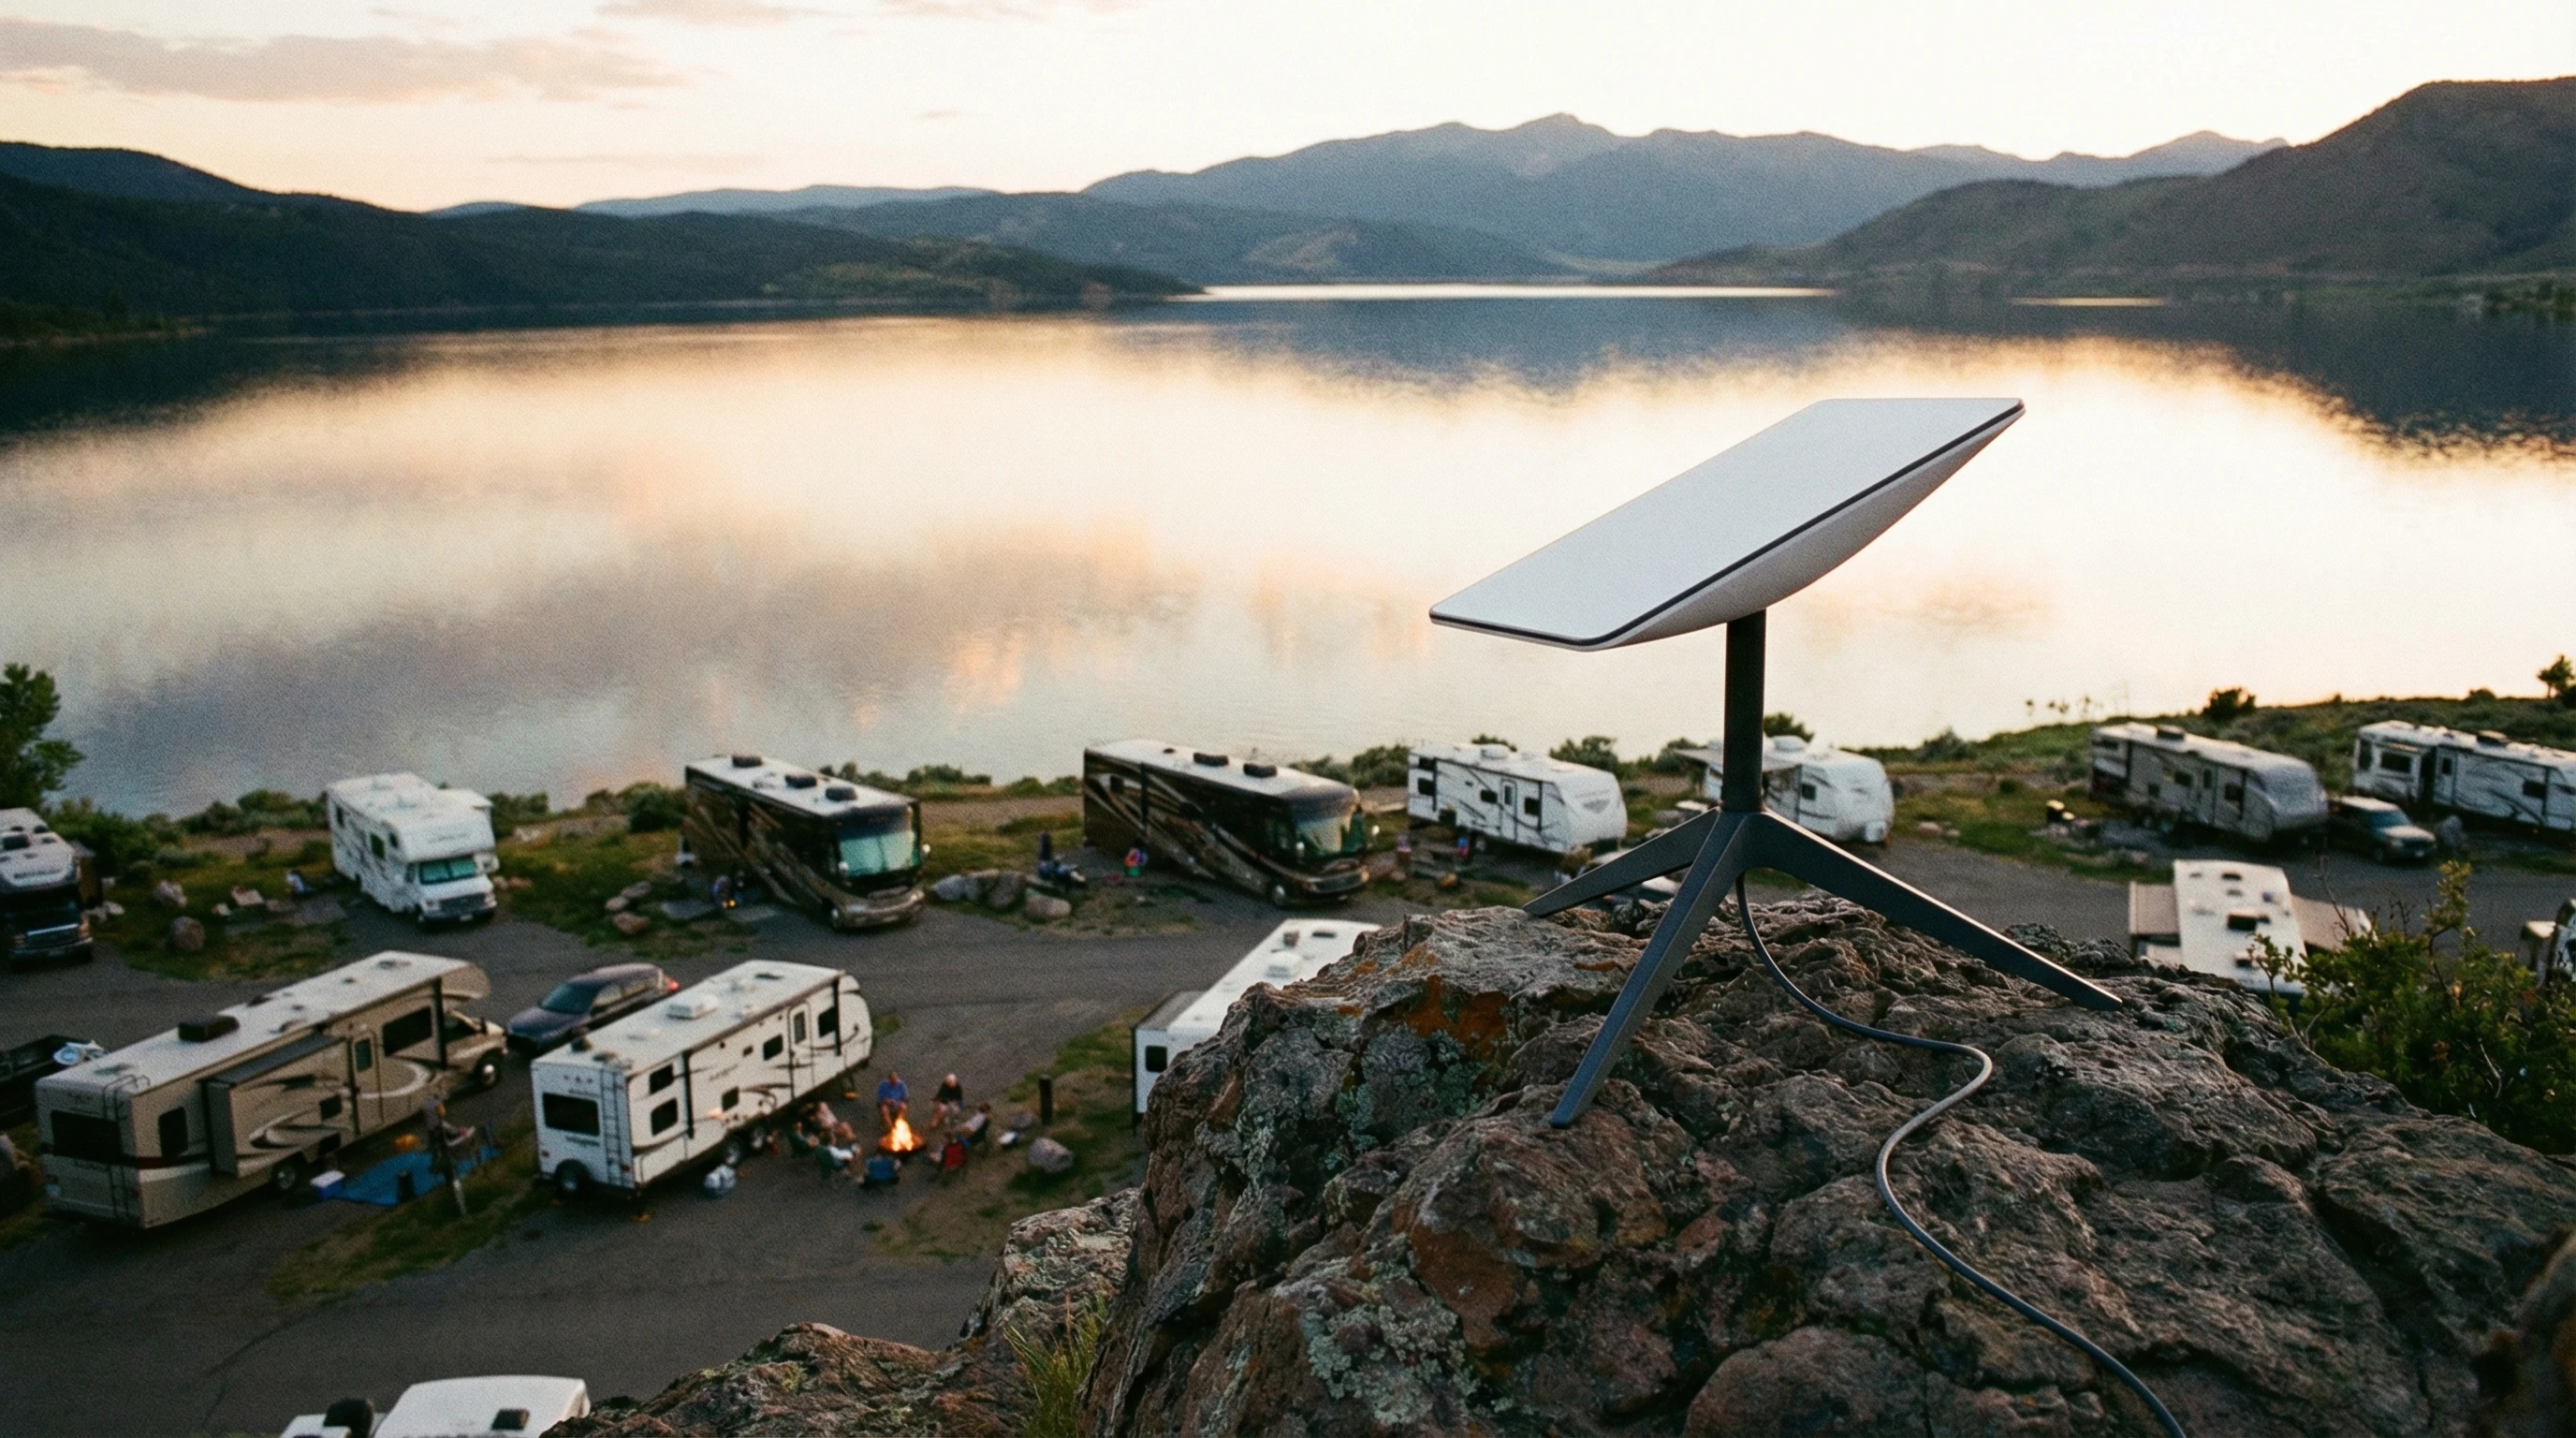
Add External Antennas: External or roof-mounted Wi-Fi antennas get weak signals far better than inside-only models, and work great for large or far-flung campgrounds.

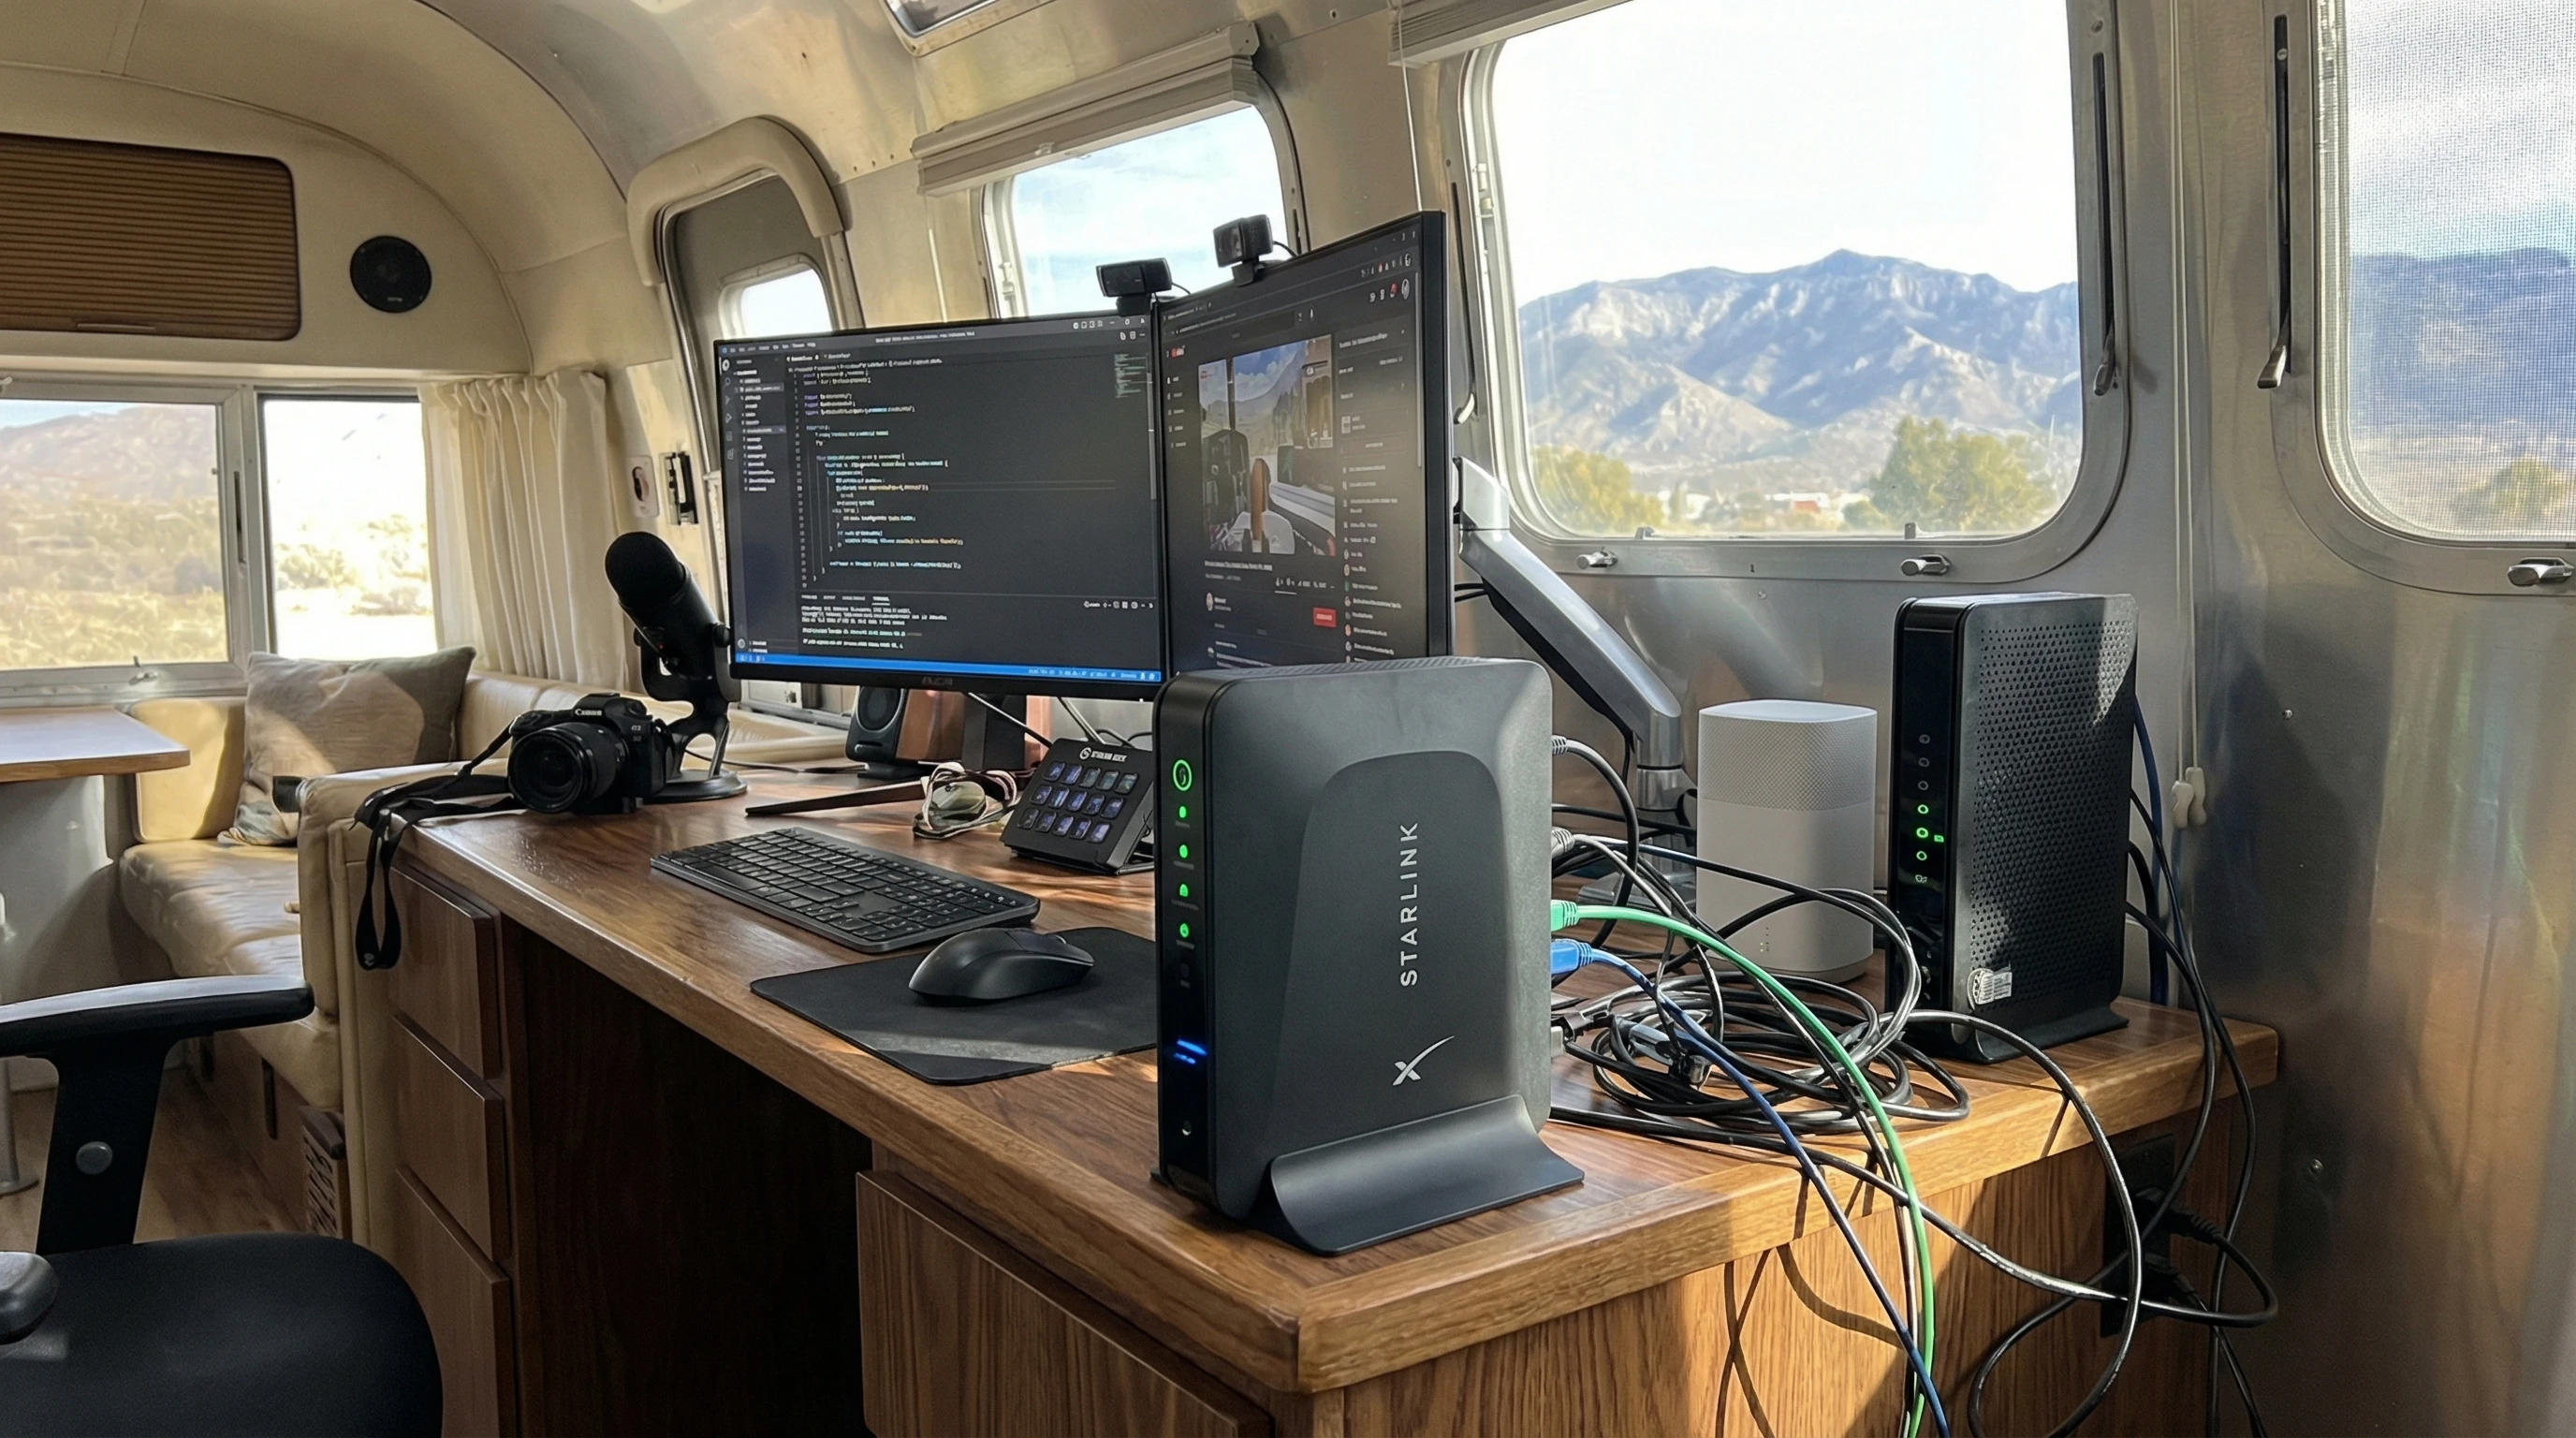
Combine with Data Hotspots: For areas with sketchy public Wi-Fi, pick up a portable cellular hotspot (the Tech Connect+ works great) and connect your mesh network to it. A few RVers even keep dual SIM cards for better coverage.

Manage Device Speeds: Many mesh systems let you choose which device gets first dibs on bandwidth—helpful for those all-important video calls or streaming marathons.

Protect Privacy Using VPNs: Using public or campground Wi-Fi? A VPN app encrypts your data and keeps you safer while traveling.

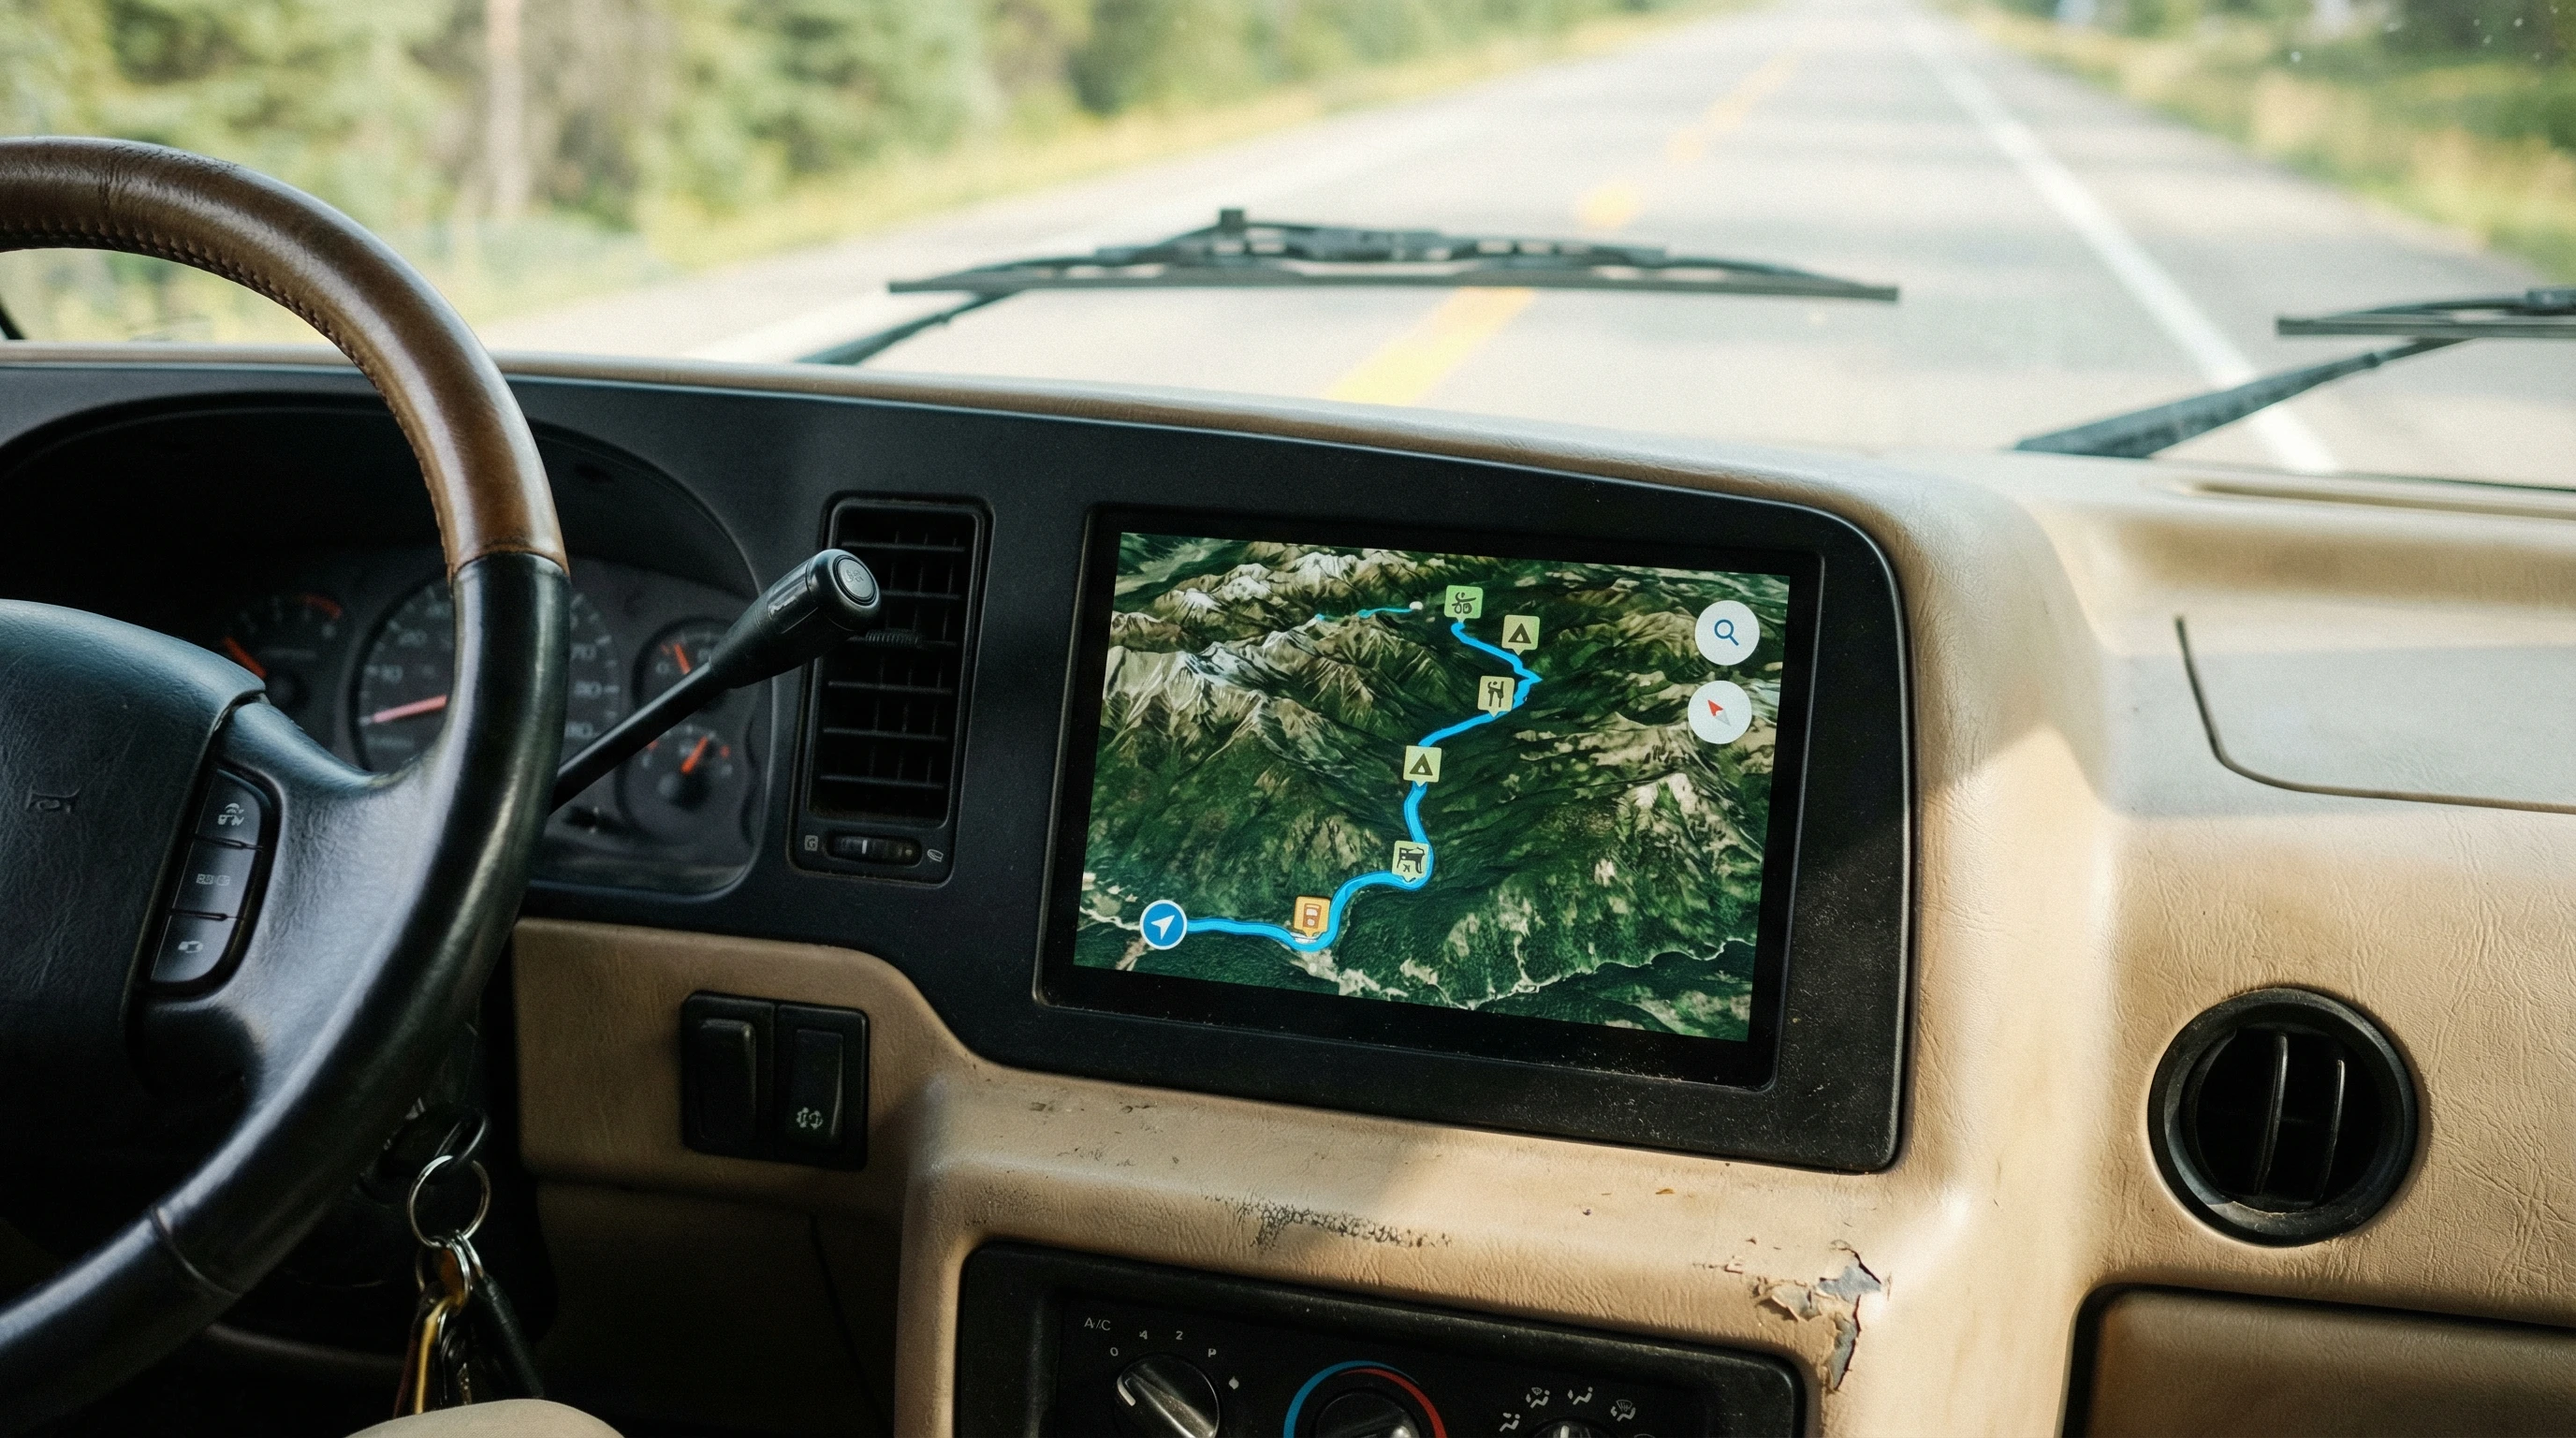
Remote Control Apps: Monitor, tweak, and restart your network from your phone, without crawling under tables or climbing over storage bins.

Adding these upgrades makes for a super steady and safe setup. It keeps your network humming in tough spots and ensures you can work— or just kick back—without dropouts.

Mesh Wi-Fi node mounted inside an RV kitchen

FAQs: Wi-Fi Extenders and Mesh Networks for RVs

Some common questions from friends and fellow travelers looking for better internet on their RV trips:

Do Wi-Fi extenders really make RV internet better?
Answer: Yes, if the campground Wi-Fi is weak, extenders help deliver more of the signal into your RV. Just remember, your speed depends on how good the original connection is.


Is a mesh network worth buying for a small RV?
Answer: In most small rigs, a single-node mesh unit works wonders. Bigger RVs with slideouts get more out of multi-node setups. Mesh is especially useful if you connect lots of gadgets or need clear video calls on the road.


Can I combine Wi-Fi extenders and mesh networks?
Answer: Usually, you’ll want one or the other. Mixing the two can cause interference. For most RVers who want full coverage, a mesh system covers everything smoothly.


Do I need an outdoor Wi-Fi extender?
Answer: Only if you camp far from Wi-Fi sources or want a great signal while relaxing outdoors. Go for weatherproof types if you’ll camp through rain or snow.


What’s the best way to keep the network secure while traveling?
Answer: First, pick new passwords quickly and set up guest networks if possible. Stay up to date with firmware and think about using a VPN for more privacy.

RV covered area with a mesh router on the table

If you want more ways to make RV life smoother, check out other posts on this site. We have been enjoying full-time RV living since 2008!

I’ve gathered plenty of tricks over the years and enjoy sharing what actually works. Internet on the road doesn’t have to be a pain with a little planning and the right tools; you can stay connected wherever the road leads.

_________________________________________________________

What If Your RV Could Help Pay for the Journey? Could you make money while boondocking?

Many full-time RVers quietly earn money online: writing, recommending products, and building simple digital assets that generate income while they travel.

You don’t need tech skills.
You don’t need experience.
You just need the right roadmap.

👉 Discover the beginner-friendly approach! Take a look at this post on this website.

Full-time RV laptop workspace with a scenic mountain view, showing how RVers run a small online business while traveling and living on the road

How To Boost Your RV’s Wi-Fi Signal On The Road

Reliable WiFi on the road makes RV living so much better. From streaming shows to handling remote work or just scrolling through social media, a solid internet connection is at the heart of many road adventures.

Since I spend all the time traveling in my RV, I’ve picked up some pretty handy tricks for boosting WiFi signals, even when I’m deep in the woods or parked at a busy campground. Here’s how I keep my RV’s WiFi running smoothly, along with some practical gear that’s worth checking out.

RV parked in a scenic area with WiFi signal waves radiating from the roof

Why WiFi Troubles Happen in Your RV

RV WiFi issues show up at the worst times. Most campgrounds have public WiFi, but speeds can drag. Distance from the router, lots of users, and even trees or hills can mess with your signal. Regular RV walls and metal skins block the signal, almost like being inside a mini Faraday cage.

The further you park from the clubhouse or office, the worse things usually get. Even in fancy resorts, you might still struggle when everyone jumps on at once. That’s why it’s smart to have a game plan to boost your WiFi and save yourself frustration, so your gadgets stay online all day long.

Understanding the Basics: How WiFi Works in an RV

Getting good WiFi in an RV is pretty different from what you get at home, mainly because RV parks use big, shared networks. These networks are set up with access points that work as hubs spread around the campground.

The signal is strongest near those hubs and fades as you move away. Inside your RV, appliances and thick insulation can block signals, and weather conditions can make things trickier. Many travelers rely on their phones as hotspots, but even mobile data gets slowed down in remote spots. The kind of antenna on your device affects speed and stability, too. Using the right setup makes a huge difference here.

Must-Have Gear to Improve Your RV’s WiFi Signal

Upgrading your setup with the right tools can give your signal a big boost. Some gear is portable, and some solutions are mounted, but all work to give you more bars and better speeds.

  • WiFi Extender (Repeater): This gadget picks up the campground’s WiFi and rebroadcasts it inside your RV. It’s a simple fix for weak signals if you park far from the main office. I use one that plugs into an outlet and connects in just a few steps.
  • External WiFi Antenna: An outdoor antenna mounts on your roof or window and pulls in a stronger signal before passing it to your router or device. Omnidirectional antennas grab signal from every direction, while directional ones focus on a single hotspot for even more range.
  • Cellular Hotspot Device: For serious flexibility, a standalone hotspot or MiFi device makes a new WiFi network wherever cell service is available. It’s worth keeping as a backup if campground internet fails. Modern hotspots connect with several networks for better coverage in rural spots.
  • Boosters and Amplifiers: Cellular boosters grab a weak outdoor cell signal, boost it, then rebroadcast it inside your RV. Super helpful for streaming, video calls, or uploading big files. I’ve found the WeBoost devices work well, but there are plenty of brands to try.

Adding even just one of these tools has a noticeable impact on your connection. Mixing a few together gives you options for nearly any campground or remote boondocking location.

Close-up of a roof-mounted WiFi antenna and equipment on an RV

Practical Steps to Get Better WiFi in Your RV

Having the right gear helps, but a few extra tricks take your WiFi even further when you travel. Here’s my easy playbook:

  1. Choose the Best Parking Spot: Before settling in, take a quick walk with your phone to check signal strength around the campground. The closer you are to the WiFi access point, the stronger your signal will be.
  2. Point Directional Antennas the Right Way: Using a directional antenna? Aim it directly at the campground’s router building. Many apps (like WiFi Analyzer) let you check the signal as you move, making it simple to find the best angle.
  3. Reduce Interference: Move routers and extenders away from microwaves, TVs, or metal appliances. Even a small move can make a difference.
  4. Secure Your Network: When you’re using your own hotspot, choose a strong password to make sure only you and your crew are signed in.
  5. Regularly Restart Devices: Restart your WiFi extender, router, or hotspot to clear memory and refresh your connection so you get the fastest speeds possible.

These steps, paired with the right hardware, have saved me tons of headaches on the road.

Common Problems and Simple Solutions for RV WiFi

Even good equipment can’t solve every issue, but these fixes cover frequent WiFi challenges:

  • Slow Speeds: Most parks have limits, especially at busy times. Try downloading big files or updates early in the morning or late at night. Turning off unused devices helps, too.
  • No Connection at All: If you can’t get online, first check if the campground WiFi is actually up. The staff might need to reboot their system. If all else fails, switch to a cellular hotspot for backup.
  • Weak Signal Indoors: Move your devices closer to windows or use an outdoor antenna. Even opening a window near the hotspot can bring in more bars.
  • WiFi Drops Frequently: Frequent disconnects usually mean interference. Move wireless gadgets away from big metal objects or try a different channel on your extender if you can.

Using a blend of WiFi and cellular solutions means you’re almost never offline for long.

A campsite with multiple RVs using antennas and routers outdoors

Advanced Tips for Streaming, Working, or Boondocking

For heavy online tasks like video meetings or streaming in HD, a few next-level tricks make all the difference:

  • Multicarrier Hotspots: Using an unlocked hotspot means you can swap SIM cards between networks. If one provider stinks, switch it up. Apps like OpenSignal let you find the strongest provider around.
  • Data Management: Track your data usage with built-in hotspot tools or third-party apps. Switch off background updates if you’re running close to your data plan’s limit.
  • Bonding Multiple Connections: Some routers can mix WiFi and cellular data for a steadier connection. Routers from Peplink or Cradlepoint are popular with digital nomads for this reason.
  • Solar Powered Routers: When camping off the grid, try a router that runs on your RV’s solar panel or its own backup battery. This comes in handy if you boondock for a few days or more.
  • Using Public WiFi Securely: A Virtual Private Network (VPN) keeps your browsing private and adds a layer of security on shared networks. Paid VPNs usually run faster, but free options work in a pinch.

Interior RV workspace set up for streaming and remote work, with router and indicator lights

RV WiFi Boosting FAQ

Here are some questions I often get about boosting RV WiFi:

Question: What’s the easiest way to boost WiFi without spending a lot?
Answer: Park close to the campground’s access point and use your device near a window or door. Simple extenders are pretty affordable and can make a difference.


Question: Can I use my home router in my RV?
Answer: Sometimes, but travel-friendly routers are typically smaller, use less power, and are easier to set up for on-the-go use.


Question: Are cellular boosters worth it?
Answer: If you hang out in remote spots often, absolutely. Boosters can turn even a weak signal into something you can actually use for calls and the internet.


Question: How do I keep my data use in check?
Answer: Stream in standard definition, switch off autoplay, limit background app updates, and download big files only on unlimited WiFi.


Question: What if campground WiFi is always slow?
Answer: Use your own data, ask staff about less crowded networks, or depend on a cellular hotspot for steady service.


Question: Is public campground WiFi safe?
Answer: With strong passwords and a VPN, you can shrink the risks, but avoid logging in to sensitive accounts if you can help it.

Close-up of travel gadgets and hotspots on an RV table, with outdoor backdrop

Getting the Most Out of the Internet on the Road

Staying connected on the go doesn’t need to be stressful. Using the right tools, smart parking, and a few simple tricks usually keeps my WiFi humming. If something isn’t working, backup plans like a cellular hotspot or mobile booster keep things moving. With a bit of planning, you can stream, work, and play online from nearly anywhere your RV adventure takes you.

For more RV internet tips and deeper gear reviews, check out this guide. It covers tons of real-world tricks and step-by-step fixes from people who live and work on the road.

An RV campsite at sunset, with solar panels and antennas visible, hinting at strong connectivity

If you’re curious about creating a remote income as you travel in your RV, I’m always happy to share more. I use several resources, different platforms, and a reliable setup to stay online no matter where I am. Traveling with good WiFi helps you get the most out of RV life, whether you’re working, streaming, or just sharing photos of amazing places you find.

_________________________________________________________

What If Your RV Could Help Pay for the Journey? Could you make money while boondocking?

Many full-time RVers quietly earn money online: writing, recommending products, and building simple digital assets that generate income while they travel.

You don’t need tech skills.
You don’t need experience.
You just need the right roadmap.

👉 Discover the beginner-friendly approach! Take a look at this post on this website.

Full-time RV laptop workspace with a scenic mountain view, showing how RVers run a small online business while traveling and living on the road

Best Apps Every RVer Needs For Navigation And Internet

The Best Apps For Navigating And Staying Connected In Your RV

Hitting the road in an RV can feel like freedom on wheels, but staying connected and finding your way is a whole different game. Whether I’m parked lakeside in the middle of nowhere or weaving through a busy city, the right apps turn every stretch of the ride into something smoother and way less stressful.

I’ve put a good chunk of miles behind me, over two hundred thousand in RVs, so here’s my personal guide to the best apps for navigation and connectivity in your RV.

Scenic RV parked on a mountain overlook with a smartphone displaying apps in the foreground

Why RV Living Needs Special Apps

RV travel is way more than regular road tripping. The size of the rig, low bridges, small gas stations, and patchy internet all get in the mix. A regular GPS or the usual phone map often leads you right into headaches. Small alleys, impossible turns, or low clearances are real concerns. Connectivity also gets tricky, especially in remote or forested areas.

I use my phone for everything on the road, but using the right apps saves me from dead zones, keeps me off rough roads, and lets me plan overnight stops at the last minute. Some RV-specific navigation tools help you dodge low bridges and tight roads.

There are also apps that find free WiFi, public dump stations, and friendly campgrounds with good mobile coverage. These apps actually make it easy to stay on track even in less populated areas, and when you’re out there for weeks or months, having good tools is a huge bonus.

Top Navigation Apps for RVers

Getting to your destination without stress means using apps that work for RVs, not just cars. These are my go-to choices:

  • RV LIFE (RV Trip Wizard): Plots your route while factoring in your RV’s size, weight, and propane restrictions. Easily avoid low bridges and sharp turns. It also highlights campgrounds and points of interest along the way.
  • CoPilot GPS: Offers offline routing and specific RV profiles for safer route choices. This one shines if you’re crossing areas with bad mobile service.
  • Google Maps (with tweaks): For everyday errands, I often pin campsites ahead of time and use Google Maps for up-to-date traffic info. But I always double-check trickier stretches with an RV-focused app.
  • Campsite Apps (Allstays, Campendium): Not strictly navigation, but these show accurate access roads, overnight policies, dump stations, and even user photos of site entries.

A lot of these apps can be paired with Apple CarPlay or Android Auto, which keeps everything easy to check on the dashboard. And if you want a big-screen experience, most tablets will run these apps just fine, giving you a clear look at your whole trip map as you go.

Map on a tablet inside an RV cab, showing a planned RV-friendly route

Apps for Reliable RV Connectivity

Internet on the road can be spotty. I run an online business from my rig, so I really rely on these apps to stay online and find areas with service:

  • Speedtest by Ookla: Checks actual mobile speeds at current or planned stops. No big file downloads, just a few taps, and I know if I can send emails or join a video call.
  • Coverage?: Shows cell coverage maps for all major networks in the US and Canada. Really helpful when deciding on your next overnight or when you need to upload big files.
  • WiFi Map: Maps out free and paid WiFi nearby, plus shows user ratings for speed and reliability.
  • OpenSignal: Uses crowd-sourced data to guide you toward stronger data signals; super handy in parks or big rural stretches.

These come in handy if you split work and fun, or just want to binge your shows without constant buffering. You’ll often stumble upon better spots for uploading photos or working if you dig into the detailed coverage reports other users have left in these apps.

Planning and Campsite-Finding Apps

Finding a safe, scenic, and comfortable spot for the night is super important in RV life. I use a mix of these apps so I’m never stuck without a spot or a plan. Sometimes, after a long day on the road, you just need a trustworthy place to crash, and these tools keep those late-night headaches rare.

  • Allstays: Shows campgrounds, rest areas, dump stations, Walmarts, and other services. Filters by rig length, pet-friendly, hookups, or even propane fills.
  • Campendium: Great for user reviews, cell coverage reports, and photos of sites. It covers both private and public spots, plus lots of boondocking locations.
  • iOverlander: Focused on free camping, unique stops, and services. Users add updates about road conditions or what’s available at a spot.
  • Harvest Hosts: Adds a twist by listing wineries, breweries, farms, or museums that welcome RVers for overnight stays.

I also like RVParky on my smartphone! This is my go-to choice for safe boondocking spots as I travel the United States.

The best part about these apps is the real-time tips from fellow travelers. You can get details like “watch out for potholes near the entrance” or “water spigot in loop B.”

Additionally, crowd-sourced updates on campground conditions or closures keep things more accurate than old paper guides. Sometimes, these same apps will even point you toward events, nature trails, or nearby festivals, making it easy to extend your adventure on the fly.

Staying Safe: Weather and Emergency Apps for RV Travelers

Unpredictable weather and emergencies can turn an enjoyable ride into a problem fast. Here are a few apps that keep me safer out there:

  • WeatherBug: Complete weather updates, road conditions, and lightning alerts.
  • MyRadar: Live radar images, wind patterns, and forecasts that help you outrun storms or decide whether it’s safe to drive through the night.
  • First Aid by American Red Cross: Step-by-step guides for common injuries, plus offline content in case you’re off grid.

With these installed, I’m a lot more relaxed about popping the awning out or deciding if I should stay put for the day. If you’re ever caught in a place where alerts don’t come through quickly, checking local radio stations or talking with other RVers can add some peace of mind.

Storm approaching distant RV park with a weather forecast displayed on a digital device

Helpful Extras: Utility and Lifestyle Apps

RV life is a mix of travel and daily routines. There are extra apps I keep on my phone that save time and make things easier:

  • GasBuddy: Finds the cheapest gas or diesel along your route; super helpful for big tanks.
  • TruckMap: Gives info on truck stops, parking availability, and low-clearance warnings; helpful for taller rigs.
  • Flush: Finds the nearest public toilets, which is perfect for quick stops when the RV bathroom is out of order.
  • Roadtrippers: Helps plan out scenic detours and fun things to do within driving distance. It’s also a blast to find odd roadside attractions or lesser-known parks to mix things up.
  • Google Translate: If you end up in Quebec or anywhere with language differences, this speeds up communication at campgrounds or supply stores.

These little helpers add a level of comfort and keep the experience feeling lighthearted even after a long drive. Some folks I meet use food delivery apps, digital book readers, and even stargazing apps to round out long evenings. The possibilities keep spreading as more RV-specific tech pops up every year.

RV parked by a lake with various digital utilities apps displayed on a tablet beside coffee mug

Real-World Tips for Choosing and Using RV Apps

I’ve had a few years of messing up, retracing my route, or spending hours hunting for a signal. Here are a few tips that are worth keeping in mind:

  • Test essential apps offline before a trip. Some only show maps or listings with a connection unless you download the data in advance.
  • Save key stops and emergency contacts to your phone so you can reach out even if you lose service for a bit.
  • Update apps regularly for the latest route closures, campsite changes, or added features.
  • Read recent reviews, especially for campgrounds or overnight stops. Conditions can change fast.
  • Consider a mix of free and paid versions. Sometimes the paid versions drop the ads and add key features like offline maps or larger databases. You might also stumble upon unique features in paid versions that really take your trip up a notch.

For trip planning, I keep printed copies of essential details just in case my phone battery runs out or I lose my devices. Packing a portable charger or two never hurts either. Staying flexible on the road means rolling with a few tech hiccups, but having some backup is always smart.

FAQ: RV Navigation and Connectivity Apps

Got questions about using these apps on the road? Here are some common ones I get asked a lot:

What’s the best free RV navigation app?
RV LIFE and Google Maps (as long as you stick to State and Federal highways) are solid free picks, though you lose offline access and RV-specific routing without a paid plan.


How do I get internet while camping in remote areas?
I use a combination of cell boosters, hotspot data, and WiFi finder apps. Sometimes, I plan my route around campgrounds with strong cell coverage or nearby libraries or cafes for work uploads.


Can these apps work without a signal?
Many offer offline maps or allow you to download campground lists in advance. I always update and sync my data while I have a strong connection before heading out. Some apps like CoPilot GPS work almost entirely offline, which is invaluable when the signal drops.


Do any apps help find RV-friendly fuel stations?
GasBuddy and TruckMap both let you search for fuel stations that are easy for big rigs to access, including diesel lanes and parking. I also use the Open Roads program to save money on diesel fuel. It shows stations in real time as I travel.


Are these apps safe for sharing locations?
I use privacy settings and don’t overshare on public forums. Most apps have good privacy controls, but it’s always worth double-checking if you’re worried about sharing your exact overnight spot.

RV apps displayed on a phone, with mountains and forest in the background

Getting the Most Out of RV Life With Smart Apps

Traveling by RV has never been more fun or flexible thanks to the huge range of apps out there. By mixing navigation, internet-finding tools, and a few practical extras, I’ve taken most of the guesswork out of the road.

Whether you’re working remotely, traveling with friends, or chasing sunsets solo, there are options to make your ride a lot smoother. Tweak your app stack, check in on updates, and you’ll find that digital help can turn bumpy roads into something a whole lot nicer.

RV enjoying sunset with smartphone apps in use inside RV

If you found these recommendations super useful, you might like checking out my other guides on traveling smarter and working remotely from your RV. Stay safe, stay connected, and enjoy the freedom of the open road! Visit my home page at yourfulltimervliving.com.

_________________________________________________________

What If Your RV Could Help Pay for the Journey? Could you make money while boondocking?

Many full-time RVers quietly earn money online: writing, recommending products, and building simple digital assets that generate income while they travel.

You don’t need tech skills.
You don’t need experience.
You just need the right roadmap.

👉 Discover the beginner-friendly approach! Take a look at this post on this website.

Full-time RV laptop workspace with a scenic mountain view, showing how RVers run a small online business while traveling and living on the road

Integrating Voice Assistants In Your RV For Hands-Free Control

Integrating Voice Assistants In Your RV For Hands-Free Control

Traveling in an RV brings a whole new level of freedom, but fumbling with switches and gadgets on the move can take away from that sense of ease. Voice assistants are changing how RVers control and enjoy their space, making lots of things hands-free and much simpler.

I’m keen to share what I’ve learned about getting voice assistants set up in an RV and why they’re pretty handy for anyone looking to make life on the road more comfortable.

AI generated image of an RV interior with voice assistant smart devices on the table

Why Use Voice Assistants in Your RV?

It’s no surprise that smart technology is finding its way into RVs more than ever. From turning off the lights before bed to asking for weather updates while brewing coffee, voice assistants offer a hands-free way to take care of these small but important tasks. When I use my voice assistant to set up a route or get a traffic update, it takes just a second, and I can keep both hands on the wheel.

RVs are pretty compact, so it might seem like just reaching out to tap a button is easy enough. But I’ve found that voice control isn’t just about convenience; it ends up being about safety and comfort too. Picture driving at night and needing to adjust the thermostat or switch off the cabin lights. No more hunting around in the dark or pulling over.

Popular voice assistants like Amazon Alexa, Google Assistant, and Apple’s Siri work with many devices designed for homes and vehicles. These smart helpers tie your RV tech into one connected system and can even help with reminders, entertainment, and emergency help while you’re traveling. If you’re wondering whether it’s worth setting up, the answer is yes, especially if you want to make your RV experience less stressful and more enjoyable.

Getting Started: Core Components for Voice Assistant Integration

Before jumping in headfirst, it’s good to know what’s needed to get voice assistants up and running in an RV. Here are the basics I recommend focusing on first:

  • Smart Speaker or Display: This is the anchor for your voice assistant. It could be an Amazon Echo Dot, Google Nest Mini, or an Apple HomePod Mini if you’re using Siri.
  • Reliable WiFi Connection: Voice assistants need the internet to work. Setting up a strong mobile hotspot, cellular router, or connecting to campground WiFi is key.
  • Compatible Smart Devices: Lighting, plugs, thermostats, and even entertainment systems can often be upgraded to models that respond to voice commands.
  • Power Solutions: Portable power banks or solar setups keep your smart gear running, especially when you’re off-grid.

Once these are sorted, you can connect and control almost anything in your RV with your voice. There’s no need to go all in from the start. Even adding just a few devices can seriously upgrade your day-to-day routine.

Step-by-Step Guide to Setting Up Voice Assistants in an RV

Setting things up might sound technical, but with a few tips, it’s an easy process. Here’s how I did it in my own rig, and what you can expect:

  1. Choose a Voice Platform: Decide between Alexa, Google Assistant, or Siri based on what’s compatible with your existing devices or your mobile phone.
  2. Install the Main Device: Place your smart speaker in a spot where it can clearly hear voice commands from most areas of your RV. This could be the central living space or somewhere near your kitchen area.
  3. Connect to WiFi: Use your RV’s WiFi network or a mobile hotspot. A consistent internet connection keeps your voice assistant responsive.
  4. Add Smart Home Devices: Plug in compatible bulbs, outlets, thermostats, or even security cameras. Most of these connect over WiFi or Bluetooth and can be added through the voice assistant’s app.
  5. Create Groups and Routines: You can group devices together (like all the lights) or set up daily routines (like “Goodnight” to turn off lights and lock the door). This makes everything work smoothly with one command.
  6. Test and Tweak: Give your commands a go and adjust placement or settings as needed. Sometimes it takes a few tries to get voice recognition perfect, especially in an RV where acoustics can be a little weird.

The best part about this setup is being able to add or remove devices as you go. For example, you can start simple with just lights and speakers. Later, add a smart thermostat and a TV stick for hands-free streaming. The whole process doesn’t take more than an afternoon.

AI generated image of a connected RV featuring smart speakers and IoT gadgets

Top Uses for Voice Assistants in an RV

There are so many fun and useful ways to put voice control to work, so here are a few that I find the most useful:

  • Smart Lighting Control: Dim the lights, turn on reading lamps, or set up colored lights for movie night, without needing to get up or fumble for switches in the dark.
  • Thermostat Adjustments: Many RV thermostats now connect to smart systems. Just tell your assistant to adjust the temperature after a long hike or before going to bed.
  • Entertainment on the Go: Play music, launch your favorite streaming show, check the news, or listen to podcasts—all with a quick voice command.
  • Navigation and Weather Updates: Ask your assistant for the latest traffic, directions, or local weather before hitting the road. It’s a lot safer than looking at a phone while driving.
  • Appliance Control: Smart plugs let you turn on the coffeemaker from your bed, switch off fans, or set the slow cooker for dinner with your voice.
  • Security Checks: Some smart assistants can tap into cameras, sensors, or door locks for peace of mind, especially when leaving your RV for an adventure.

You can also connect routines for travel days, like turning off all electronics before moving. It really does make the RV lifestyle feel more modern and a lot easier to manage.

Common Challenges and How to Solve Them

While voice assistants bring a bunch of benefits, a few snags can pop up. Here are some of the most common challenges I’ve bumped into, along with practical ways to fix them:

Unreliable Internet Connection

This is the big one. Mobile networks constantly change as you move from place to place. Dropped connections can make your assistant ignore commands. Investing in a signal booster or antenna, and always having a backup mobile hotspot handy, keeps you connected almost everywhere.

Power Management

Smart devices need power, even in sleep mode. If you camp off-grid a lot, consider portable batteries or solar panels to keep your smart gadgets charged. Some devices can run on USB power, which is often easier to handle than full AC power needs.

Voice Recognition Issues

Road noise, cooking sounds, or conversations can sometimes confuse your voice assistant. Moving your speaker away from makeshift kitchens or using models with farfield microphones makes a big difference. If your device supports it, training it to your individual voice is worth doing.

Device Compatibility

Not every gadget works with every assistant. Before buying new devices for your RV, check their compatibility lists online. I always recommend sticking to one voice platform to keep things as simple as possible.

AI generated image of RV drivers seat with digital assistant icons overlayed

Advanced Tips for Streamlining Your RV Smart System

Once you’ve mastered the basics, there are some cool ways to step up your RV’s voice integration. Here are a few tips I find really useful:

  • Create Custom Routines: Set routines like “Arriving Home,” which turns on lights, adjusts the temperature, and plays your favorite playlist as soon as you open the door.
  • Integrate Location-Based Triggers: Some assistants let you automate things by GPS location, so the RV’s lights or heater activate when you get close to your campsite.
  • Link With Vehicle Monitoring: Some new RVs let you track battery levels, tank capacities, and maintenance alerts, all voice-controlled, through third-party integrations.
  • Smart Security Features: Equip your RV with smart cameras or motion sensors. Ask your assistant to show you the camera feed or alert you about unusual activity.
  • Remote Monitoring: If you leave your RV parked for an excursion, check on it or control devices remotely from your phone using cloud-connected apps.

Mix and match these features to make your setup fit the way you travel and live. The great thing is you can keep adjusting as your needs change or as new smart gadgets hit the market. You might stumble upon neat ways to automate tasks as you experiment more with routines and integration.

Best Smart Devices for RV Voice Integration

Picking the right devices goes a long way toward making your voice-controlled RV setup actually useful. These are the ones worth checking out, based on my own travels and feedback from other RVers:

  • Amazon Echo Flex or Dot: Compact and plugs right into a wall, perfect for smaller spaces.
  • Google Nest Mini: Great if you’re tied into the Google ecosystem and want a budget-friendly controller.
  • TPLink Kasa Smart Plugs: A simple way to make almost any small appliance voice-controlled.
  • Philips Hue or Wyze Bulbs: Offer adjustable lighting and mood setups that just need a voice command.
  • Ecobee or Nest Thermostats: Good upgrade for comfort control if you travel through different climates often.
  • Ring or Arlo Smart Cameras: Give peace of mind and remote monitoring even when you’re not at the RV.

AI generated image of smart lights, plugs, and thermostat devices arranged on a table in RV

Frequently Asked Questions

If you’re thinking about upgrading your RV with voice assistants, you might run into these questions:

Question: Can I use my voice assistant when my RV is off-grid?
Answer: Yes, though you need a stable mobile hotspot or a cellular connection for most voice commands to work. Some basic controls (like offline routines) may still function, but internet power really helps.


Question: Do smart devices drain my RV battery?
Answer: Smart speakers and gadgets use a small amount of power, so they typically won’t drain your battery much, but it pays to keep an eye on your setup, especially if you’ve got a lot running at once while boondocking.


Question: What if I already use a smart home setup in my house?
Answer: Many smart devices are easy to transfer between home and RV, especially plugs and bulbs. Just reconnect them to your RV WiFi, and you’re good to go.


Question: Are there privacy or security risks?
Answer: Like all smart devices, keeping your apps and devices updated, using strong passwords, and setting privacy preferences helps prevent unwanted access. Stick with popular brands for added peace of mind.


Question: What’s the easiest upgrade to start with?
Answer: Smart bulbs or a single smart plug are both great first steps. You can add more devices and routines once you get the hang of your system.

Enjoying More Freedom and Comfort With RV Voice Assistants

Integrating a voice assistant into your RV brings flexibility, comfort, and a bit of fun to road life. Setting up just a handful of devices can take care of chores, streamline your routine, and keep you focused on the adventure at hand. Whether you’re after safety, entertainment, or only want to turn off the lights without getting out of your sleeping bag, there’s a solution that can work for you.

If you’re curious about exploring more connected gadgets for RV living, check out related guides and tips on the rest of this site! You might even stumble upon smart appliances designed just for RVers that can make your travels even more enjoyable.

AI generated image of an RV parked with satellite dish and smart device icons in the sky

RV smart tech keeps getting better, and with a few upgrades, your RV can feel just as connected as a modern smart home, maybe even more so when you’re in the middle of nowhere. As technology improves, you’ll stumble upon more ways to put it to use on your own road adventure. Safe travels and enjoy the ride!

_________________________________________________________

What If Your RV Could Help Pay for the Journey? Could you make money while boondocking?

Many full-time RVers quietly earn money online: writing, recommending products, and building simple digital assets that generate income while they travel.

You don’t need tech skills.
You don’t need experience.
You just need the right roadmap.

👉 Discover the beginner-friendly approach! Take a look at this post on this website.

Full-time RV laptop workspace with a scenic mountain view, showing how RVers run a small online business while traveling and living on the road

Top 10 Essential RV Tech Gadgets For A Connected Journey

Top 10 Essential RV Tech Gadgets For A Connected Journey

Staying connected and making the most of technology can really transform an RV adventure. From navigation to streaming your favorite shows, a reliable setup brings a cozy, modern feel to life on the road.

I rely on a few solid tech gadgets to sort out daily hassles and keep things running smoothly on my own travels. Here’s my guide to the top 10 essential RV tech gadgets for a connected and enjoyable ride.

This image is a little over the top, but I would not put it past today’s Millennials to try it! 😂

A modern RV with antennas, solar panels, and tech gadgets on a scenic highway with mountains and trees

Why Invest in RV Tech Gadgets?

RV gadgets aren’t just eye-catching add-ons; they make road life easier and more fun. Many older RVs lack built-in modern features, so a few smart upgrades can really make a difference. Tech gadgets can improve safety, simplify navigation, help with RV maintenance, and of course, keep everyone entertained and connected wherever I park.

The market for RV tech is growing fast. More travelers are working remotely, streaming movies at campgrounds, and sharing adventures on social media. With so many options out there, knowing what works best helps reduce headaches and saves time. Picking the right gadgets means less downtime and more relaxing under the stars.

Top 10 Essential RV Tech Gadgets for a Connected Ride

Every RVer’s needs are a little different, but these 10 tech gadgets bring a lot of value to almost any setup. These devices cover everything from internet access to safety and convenience; some come in handy for solo travelers, while others shine on family road trips.

  1. Mobile WiFi Hotspot
    Staying connected on the go is really important for work and navigation. A compact mobile hotspot provides 4G or 5G internet coverage using a SIM card from a wireless carrier. I plug mine in near the dashboard or a window for better reception, and most units work with multiple devices at once. For those who venture far off the grid, certain hotspots accept external antennas for an even stronger signal in remote areas.
  2. Cell Signal Booster
    Many RV parks or backcountry spots have weak cell coverage. Signal boosters grab a weak signal and crank it up throughout the RV. This helps boost both data speeds and voice calls, so no more missed calls while camped among the pines. Investing in a solid booster is especially valuable for anyone relying on their phone or mobile internet for work or family communication.
  3. GPS Navigation System
    While apps on your phone work, a dedicated GPS for RVs is better for tricky routes. These systems provide oversized views, alert me to low clearances, and help avoid weight-restricted roads. Models like Garmin RV 1095 (we have used this for our large RVs for years) or Rand McNally specialize in large vehicle navigation, giving you peace of mind when heading down unfamiliar highways or city streets.
  4. Smart RV Thermostat
    Keeping the temperature comfortable can get tricky when traveling through different climates. A smart thermostat lets me adjust heating and cooling remotely from my phone. Some models even learn my preferences and help save energy, which is a real bonus while boondocking or chasing summer breezes up north.
  5. Bluetooth Tire Pressure Monitoring System (TPMS)
    Low tire pressure or overheating can turn into a big safety problem. A TPMS keeps an eye on tire status and sends real-time alerts to my phone, so I can catch leaks and faulty tires before there’s a blowout. Many systems now also give temperature readings, which helps cut maintenance costs over time. I have used the TST systems for years.
  6. RV Backup Camera
    Backing up a big rig can be nerve-racking. A wireless backup camera gives me a clear view behind, making it easier to avoid obstacles in tight campsites. Some systems offer split screens to monitor multiple angles at once—super handy for those tight spots in older campgrounds. This one is pretty cool!
  7. Solar Generator or Portable Power Station
    Off-grid camping is easier with a solar generator or portable station. These battery packs recharge with solar panels or shore power and run small appliances, laptops, and smartphones. They’re silent and clean compared to fuel-based generators, and they’re a great eco-friendly step for longer boondocking trips.
  8. StreamFriendly Smart TV or Streaming Device
    Entertaining myself or a crew on rainy nights doesn’t get much easier than plugging in a smart TV or a streaming stick. These work great with WiFi hotspots and pull up Netflix, YouTube, or Hulu, turning an RV into a little movie lounge. Look for models that offer screen mirroring and handy remote apps for even more flexible viewing options.
  9. Smart Door Lock
    Security matters, especially in busy campgrounds. A smart lock lets me unlock the RV with a code or an app, so losing physical keys is less of a worry. Some also autolock for added peace of mind, even if I’m away hiking or exploring nearby.
  10. Leveling System with App Control
    Getting the RV level can be a hassle, especially on rocky or sloped sites. An electronic leveling system or smart leveling device links to my phone and guides adjustments step by step, shaving time off my camp setup routine. Some advanced kits even feature voice prompts to guide solo travelers who are backing into a spot.

These gadgets don’t just give RV life next-level cool factor; they handle real-world challenges I face out there. A good setup also helps avoid common travel headaches. I get to spend more time hiking, relaxing, or just hanging out with friends and family instead of wrestling with avoidable problems.

Flat lay of popular RV tech gadgets including portable hotspot, GPS, smart thermostat, and backup camera, laid out on a picnic table

Choosing the Right RV Tech Gear: Tips and Considerations

The tech world changes fast, and not every gadget suits every RV or traveler. Some devices are more helpful for fulltimers, while others make short weekend getaways easier. As you shop for your RV upgrades, here’s what I keep in mind:

  • Compatibility: Make sure new gadgets work with your RV’s wiring, electrical capacity, or climate system. Some upgrades might need an adapter or extra space to install, especially in smaller rigs or vintage campers.
  • Coverage Areas: Internet tools like hotspots and boosters depend on mobile network coverage. Double-check if your favorite destinations have decent service for your provider before investing in a pricey data plan or booster.
  • Ease of Use: Fancy features are cool, but simple setup and controls matter. I love gadgets that work with a single app, fewer buttons, or easy-to-read screens while I’m on the move.
  • Power Needs: Extra tech can drain RV power quickly, so check the impact on batteries or generator use. Some devices, like portable power stations and TVs, come in lower wattage versions for boondocking or solar setups.

Doing some research ahead of time pays off and prevents buying gear that ends up in a storage bin. Reviews from other RVers and online forums like iRV2 or Reddit/vandwellers are worth checking out for real-world tips and troubleshooting advice. Some groups even post photos or short videos, offering insight into installation quirks or must-have travel hacks.

Maximizing Connectivity: Internet and Streaming on the Road

Fast and reliable internet is a game-changer for working, streaming, or catching up with family when you’re parked in the middle of nowhere. Here are a few ways I keep all my devices linked up, no matter where I’m camped out:

  • Check for Carrier Coverage: Before heading out, I look up which wireless carrier provides the strongest signal in my destination area. Sometimes, a backup SIM card with a different provider comes in super handy, especially as you travel across state lines with varying service.
  • Signal Placement: I always position my hotspot or booster close to a window and far from big appliances for the best reception. Investing in an external antenna gives me a stronger connection, and it’s worth it if you often camp in remote places or thick woods.
  • Prioritize Bandwidth: Heavy streaming can eat up data caps in no time. Lower streaming quality on Netflix or YouTube, or download episodes and playlists before leaving stronger WiFi signals behind. I also turn off automatic updates on devices to conserve data.

Public Wi-Fi at campgrounds is often slow or limited. For important calls or uploads, I rely on my personal setup. These upgrades keep my weekends stress-free and allow for flexible remote work whenever I need it, making RV living more dependable and less stressful.

An RV with mounted solar panels and Wi-Fi antenna parked with a view of mountains and blue skies

Upgrading Safety and RV Maintenance with Technology

Tech tools go beyond just entertainment and the internet. Safety and maintenance have seen big improvements with smart monitoring and alert systems, too:

  • Tire Monitoring: A Bluetooth TPMS gives early warnings for leaks, low pressure, or overheating. These simple alerts can prevent blowouts, keep fuel costs down, and even extend tire life by staying on top of maintenance. Our TPMS system has saved our bacon several times over the years!
  • Backup Cameras: Even older RVs can get a camera upgrade since many kits are now wireless. These help prevent dents, fender benders, or running over small obstacles when backing into camp spots or leaving tight parking lots. Some models let you record trips too—handy for capturing wildlife sightings or tricky maneuvers.
  • Level Indicators: No more wood planks or guesswork. Electronic systems let me make targeted adjustments from inside the RV, saving time (and keeping floors and beds from feeling crooked).
  • Remote Monitoring: Some newer models have sensors for propane levels, battery discharge, or water tank status, all easily checked through a smartphone. These remove surprise outages and make trip planning a breeze, especially for longer hauls across varying terrain.

The right gadgets help keep everyone safe, comfortable, and aware of RV health between travel days, shedding light on common problems before they slow things down.

A wireless backup camera attached to an RV with green trees in background and blue sky above

Extra Tips: Getting the Most Out of RV Gadgets

I found a few practical habits to keep gadgets humming and rides stress-free:

  • Keep charging cables and adapters organized in labeled pouches to avoid clutter and tangled cords.
  • Double-check firmware or app updates before leaving WiFi behind, since some devices need internet to upgrade. This prevents annoying connection issues down the line.
  • Secure all mounts and brackets to keep tech in place on rough roads or bumpy drives.
  • Test every new gadget at home before hitting the road, so there are no big surprises at the campsite. If possible, keep user manuals handy on your phone or in a travel folder for quick reference.

Getting familiar with each gadget’s controls and basic troubleshooting helps save time and keeps things enjoyable wherever I end up. Planning ahead and learning the quirks of your new tech can turn problems into quick fixes instead of RV trip mishaps.

Frequently Asked Questions

Here are some common questions people have about RV tech gadgets:

Which internet option works best for RVers?
A dedicated mobile hotspot paired with a signal booster is often the top choice. Satellite internet services work almost anywhere, but more than cellular setups. If streaming or working remotely is a priority, always check provider coverage maps ahead of time.


Do I need a special GPS for my RV, or will my phone work?
Your phone does the trick in most cases, but RV-specific GPS units offer height and weight restrictions, custom routes, and bigger screens. These help avoid low bridges, winding roads, and make navigation much less stressful for large vehicles.


How hard is it to install a backup camera or tire monitoring system?
Wireless kits make installation pretty simple, even if you’re not super handy. Some plug into lighter outlets or have magnetic bases. Just make sure to check compatibility and power sources before buying a new kit.


Can a solar generator really run everything in my RV?
Portable solar power stations can handle small appliances, fans, and lights, but they’re not meant for big air conditioners or ovens. For more energy needs, combine solar generators with roof-mounted panels and battery banks for a stronger, more flexible power setup.


Are RV smart thermostats worth it?
Smart thermostats save energy, maintain comfortable temps when you’re away, and let you check or adjust settings from your phone. They’re especially useful for folks covering regions with big temperature swings or anyone trying to keep pets comfortable during quick errands.


Get the Most from Your RV Adventure with the Right Tech

The right gadgets can turn any RV into a cozy, connected, and safe rolling home. I’ve found that a little investment in tech means more freedom and flexibility, whether I’m working on the road, helping the kids stream their favorite shows, or just making setup and travel more relaxing.

Each of these RV tech essentials is worth considering if you want to enjoy a smoother, more fun ride—no matter where the next road takes you.

If you’re interested in more RV tips and gear guides, check out extra resources on our website, at RV Travel or head over to RV LIFE for advice from RVers across the country.

Feel free to leave a comment or ask your own questions. I’m always happy to share more personal experiences and tips for making the most of your RV lifestyle!

A cozy RV interior set up with a mounted smart TV, Wi-Fi hotspot, and tech gadgets, with a forest outside the window

Ready to upgrade your own road trips? With the help of a few smart gadgets, life on the road gets easier, more comfortable, and a whole lot more fun.

_________________________________________________________

What If Your RV Could Help Pay for the Journey? Could you make money while boondocking?

Many full-time RVers quietly earn money online: writing, recommending products, and building simple digital assets that generate income while they travel.

You don’t need tech skills.
You don’t need experience.
You just need the right roadmap.

👉 Discover the beginner-friendly approach! Take a look at this post on this website.

Full-time RV laptop workspace with a scenic mountain view, showing how RVers run a small online business while traveling and living on the road

How To Choose The Right Cellular Data Plan For RVers

Using Cellular Networks: Choosing the Right Data Plan for RVers

Staying connected while living or traveling in an RV is a huge part of modern RV life. Whether it’s for work, streaming shows, navigation, or keeping up with friends, having the right cellular data plan can make life on the road much smoother.

I want to help you understand what options are available and how to pick a plan that actually fits your travel style and needs.

A scenic RV parked near trees with a visible 5G cellular tower in the background.

Why RVers Need Tailored Data Plans

Standard cell phone plans aren’t always the best fit for RV life. When moving from state to state, data needs vary, coverage can change a lot, and some plans might slow down your speeds or stop working altogether in certain areas. I’ve found that getting the wrong plan can mean frustrating dropped signals, surprise overage fees, or struggling with slow speeds right when you need Internet the most.

Most people use way more data in an RV compared to being at home. Streaming, video calls, and work projects use up gigabytes fast. Choosing a data plan built for mobility or adding RV-friendly features makes a big difference when you’re traveling all over.

Types of Cellular Data Plans for RVers

The good news is that there are several choices for RVers now, and each has pros and cons depending on how you travel. Here are the main types:

  • Phone Hotspot Plans: Most cell phones let you share your data with other devices. This works if you travel light and don’t need heavy data usage. However, most carriers limit how much full-speed hotspot data you get.
  • Standalone Hotspot Devices: These are separate routers that use a SIM card to deliver WiFi to your RV. Some plans come with unlimited data, but actual speed and usage caps still apply depending on the provider.
  • Prepaid SIMs: Great for short trips or when you need flexibility. Buy data by the month with no contracts, but these often have less customer support and coverage perks.
  • Specialty RV or Nomad Plans: Some companies offer plans designed just for people constantly on the move. These plans sometimes cost more, but they handle roaming, network switching, and higher usage much better.

Mixing and matching these can be smart, especially if you need to guarantee a strong signal in remote parks or while boondocking off-grid. Some seasoned RVers even carry SIM cards for more than one carrier, letting them switch easily based on where they’re parked. This flexibility means you can avoid getting stuck without a signal when you really need to send an important email or check on route changes.

Key Factors to Consider When Picking Your Data Plan

There’s no perfect plan for everyone, but I like to focus on a few details that make the most difference day to day.

  • Coverage: Not all networks reach everywhere. Verizon, ATT, and T-Mobile each have dead zones, especially in rural areas or national parks. Checking coverage maps for your usual routes can help you avoid surprises.
  • Data Allowance: Unlimited plans usually sound better than they really are. Most have soft caps where your speeds are slowed after a certain point. Know these limits and how you use data for work, streaming, or gaming before committing.
  • Roaming and Domestic Use: Some plans exclude Alaska or exclude service in Canada or Mexico, which matters if you plan to cross borders.
  • Price and Contracts: Flexibility matters for RVers. Month-to-month plans, no annual contracts, or seasonal pause options help you avoid paying for what you don’t use.
  • Device Compatibility: Some plans only work with specific hotspot routers or require certain phones, so double-check your gear before buying. In some cases, an unlocked device will give you much more freedom.
  • Customer Support: When something goes wrong, access to quick help can keep you running. Specialty RV data providers that focus on nomads usually do a better job here than big box retailers.

Quick Guide: Steps to Choosing the Right RV Data Plan

Narrowing it down can take a bit of effort, but here’s a basic checklist I use myself:

  1. Figure Out Your Needs: Add up your normal monthly data usage. If you stream TV and use Zoom a lot, shoot for plans with true unlimited data or very high caps. If you only check emails and browse casually, you might do just fine with 30 to 50GB per month.
  2. Map Your Typical Travel Area: Use tools like OpenSignal and each carrier’s official map to see who covers your favorite camping regions best. Sometimes it helps to ask in local RV groups about real-world coverage in places you visit.
  3. Decide on Device Setup: Will your phone hotspot cut it, or do you want a dedicated mobile router that improves coverage and lets several devices connect?
  4. Compare Plan Options: Look at each provider’s website and specialty RV connectivity companies. Pay close attention to setup fees, speed throttling, and what happens if you go over your data cap.
  5. Read Real User Reviews: Websites like r/RVLiving or RV-specific Facebook groups are super helpful for honest reviews. They also share hacks and current promos. Sometimes, RVers share which carriers were best in certain states or parks, which is info you won’t find in marketing brochures.
  6. Start Small, Scale Up: If you’re unsure, try the lowest commitment plan until you know what works for your travel style. Most companies make it easy to switch up or addon as you go.

Following these steps has saved me both time and money, and I can switch my setup anytime my travel patterns change. Remember, having a backup plan often means the difference between smooth streaming and total dead zones.

Common Cellular Data Challenges for RVers (And How to Handle Them)

Mobile Internet isn’t always smooth sailing. These are a few bumps I’ve hit along the way, and they’re pretty common for anyone using cellular data as their main connection:

  • Slow Speeds in Crowded Areas: Campgrounds often fill up with users during peak hours, which can slow data. Having plans from two carriers, or a cell booster, can help get around this issue. You might find one carrier is overloaded, while the other is still usable. Rotating between them keeps you online even when a campground is packed.
  • Data Throttling: After you hit your monthly cap, your speed can drop to a crawl, sometimes making streaming impossible. Tracking your usage and setting alerts or using offline downloads for shows keeps frustrations down. You can also schedule big downloads during off-peak times when speeds are less likely to be limited.
  • Signal Dead Zones: National Parks and remote camping spots sometimes have zero signal. A quality cell booster or outside antenna can give your hotspot or phone a much better chance of grabbing even a weak connection. Bring along updated offline content to keep boredom at bay during these stretches.
  • Firmware or SIM Locks: Buying a new hotspot device that’s locked to one carrier can put you in a bind if their network isn’t available where you travel next. Unlocked devices let you swap SIMs as needed, so always check before you buy new tech.

Handling Dead Zones

Even with the best plan, there are times when coverage tanks. I recommend installing offline maps or downloading podcasts and shows before heading out. For work, scheduling your heaviest uploads, downloads, or video meetings before you drive into spotty territory can keep stress levels in check. Updating your travel apps and info before you hit the road also ensures you have what you need, signal or not.

Managing Multiple Lines and Devices

Consider getting both a personal and backup line, especially if you need the Internet for remote work. Swapping SIMs or rotating devices has helped me keep my connection going even when one plan hits a limit or stops working along the route. Keeping a basic prepaid SIM as a last resort has saved me more than once!

An RV with a rooftop cellular antenna and a wide-open highway in the background during golden hour.

Advanced Tips for Optimizing Your RV Cellular Setup

Once you’ve picked a plan and have a device or two, there are ways to stretch your data and improve reliability. Here’s what I’ve picked up that really helps:

Boost Your Signal: External antennas and cell boosters make a big difference if you’re often in weak signal areas. These gadgets pull in faint signals and send a stronger feed to your hotspot or phone. Investing in a quality booster pays off, especially in mountain, forest, or desert settings.

Prioritize Data Use: Disable automatic cloud backups and software updates on all devices until you get back to areas with strong, fast connections. This prevents blowing through your cap by accident overnight or when you least expect it. It also means your essential apps won’t be slow when data counts.

Offline Everything: Download maps, podcasts, Netflix shows, and YouTube videos before travel days. Offline content uses no extra data and means you’re never bored or lost, even off-grid. It’s a lifesaver for families as well, giving everyone entertainment during those long drives.

Consider Load Balancing: Some routers can combine multiple connections, helping you balance data between carriers or WiFi and mobile data. It’s a little advanced, but great for digital nomads who work on the road. If load balancing sounds intimidating, don’t worry, many internet-savvy RVers are happy to walk newcomers through their setup in online groups.

With these tweaks, I’ve managed cross-country trips with stable work calls and plenty of streaming, even in some pretty rural stretches. Staying connected opens up new possibilities, like sharing your travel experiences in real time or booking campsites on the go. Keep a checklist of these optimization tricks to revisit as your needs change with each trip.

An aerial view of a camper van parked by a lake, surrounded by trees, with clear blue sky and a visible cell tower in the distance.

Frequently Asked Questions

These are some of the common questions I get about finding and using cell data plans on the road:

Question: What’s the best carrier for RVers?
Answer: There’s no single best carrier. Verizon generally covers the widest area for rural travel, ATT is second, and T-Mobile does better in cities. I recommend carrying a plan from two carriers if you cross a lot of states. This makes it easier to stay connected in different regions, especially out West.


Question: How much data do I really need?
Answer: Most part-time RVers do fine with 30 to 100GB monthly, but fulltimers who stream, work online, or game often will need a plan with at least 200GB or true unlimited data. Always check for speed restrictions after the cap, since “unlimited” isn’t always truly limitless.


Question: Can I use my phone’s hotspot for everything?
Answer: For light use, yes, but most phone plans limit hotspot speeds after a set amount. If you’re working or streaming a lot, a standalone mobile hotspot device will handle larger data loads. Also, dedicated hotspots tend to have stronger antennas and sometimes longer battery life, making them more RV-friendly.


Question: What should I do if I hit my data cap?
Answer: Look for plans that let you buy extra high-speed data, set alerts to warn you ahead of time, or switch to a backup plan from a different carrier. Planning ahead allows you to avoid losing critical connectivity when you need it most, particularly for remote workers or families traveling with kids needing entertainment.


Question: Is it worth investing in a cell signal booster?
Answer: If you camp often in remote places, definitely. A booster can turn a barelythere signal into a workable one for video calls, uploads, and navigation. For casual campers sticking to well-served campgrounds, it might be less essential, but for offgridders, it’s a total game-changer.

A high-tech cellular signal booster on an RV dashboard, with modern RV interior visible and green woods outside the windshield.

Choosing a mobile data plan for RV living really comes down to flexibility, real-world coverage, and understanding your own usage patterns. I always recommend starting with basic gear, keeping an eye on how much data you really use, and being ready to adapt. With a strong connection, you can work, stream, and explore with way less stress—no matter where the road takes you. The right plan brings peace of mind and lets you focus on the adventure, not your signal bars.

We use the FRVA Tech+ data plan. For $20 per month, per line, for 50G of cellular service. That’s the best deal out there at the current time! For longer-term stays, we like Starlink for signal speed and connectivity!

____________________________________________

To check out more practical RV guides and gear reviews, visit my site here.

Any specific questions about RV data plans? Feel free to drop a comment or browse the rest of my articles for more road-tested advice.

Travel happy and stay connected!

_________________________________________________________

What If Your RV Could Help Pay for the Journey? Could you make money while boondocking?

Many full-time RVers quietly earn money online: writing, recommending products, and building simple digital assets that generate income while they travel.

You don’t need tech skills.
You don’t need experience.
You just need the right roadmap.

👉 Discover the beginner-friendly approach! Take a look at this post on this website.

Full-time RV laptop workspace with a scenic mountain view, showing how RVers run a small online business while traveling and living on the road

How To Troubleshoot Common RV Connectivity Issues

Why Does RV Internet Keep Dropping and How Do You Fix It?

Staying connected in an RV can really change the whole experience, especially if you travel often or work remotely on the road (see more about that at the end of this article). Dropped signals, slow speeds, and confusing setups can quickly turn an adventure into a headache.

Over the years, I’ve dealt with my fair share of WiFi dead zones, tricky routers, and cellular dropouts. So, I put together this practical guide for troubleshooting the most common RV connectivity issues. This should help you avoid frustration and get back online quickly.

Modern RV park with visible WiFi antennas and satellite dishes among RVs under a bright sky

Why Connectivity Troubles Matter for RVers

Reliable internet in an RV isn’t just a perk; it helps folks keep in touch, work on the go, or stream favorite shows after a long hike. Many campgrounds now offer WiFi. Still, signal strength can be patchy, and connecting safely isn’t always simple.

Cellular data is another go-to choice, but hitting coverage gaps in remote areas happens more than most folks expect. Satellite internet is out there, too, yet weather delays and higher costs used to make it a “last resort” for many travelers.

Understanding these issues makes problem-solving a lot less stressful. When you know what could be causing slow speeds or dropping connections, you’ll have an easier time fixing the problem, sometimes with just a few quick tweaks or pieces of gear you already own.

Main Types of RV Internet Connections Explained

Before troubleshooting, it helps to know the main ways folks get online in their RV. WiFi works at most RV parks and public spots, but speed depends on how crowded the network is. Cellular internet relies on a mobile hotspot or phone and depends heavily on the carrier’s coverage. Satellite uses a dish to connect when no other options are available, though speeds vary, and weather often gets in the way.

Many people mix and match these options. For instance, I keep a cellular hotspot for backup and switch to Starlink when stationary for a bit. Understanding what your setup uses makes troubleshooting way easier.

  • WiFi: Common at campgrounds, but often limited by distance and crowding.
  • Cellular: Flexible across locations, but coverage can be spotty outside metro areas.
  • Satellite: Useful in dead zones, but can lag and costs more to set up. Starlink solved the issues, but it is costly for some. My monthly roam package is $165 per month for unlimited usage. We use 300 to 500 Gig a month. It’s the best way to watch TV!

Common RV Connectivity Problems (and How to Fix Them)

Some connectivity problems come up constantly for RVers, no matter how fancy the rig or how new the gear. I’ve seen shaky WiFi, throttled cell data, unbearable lag, and the classic “no internet” message. These headaches usually boil down to a few main issues:

  • Weak WiFi Signal: RV parks rarely cover every campsite with a strong signal. Metal RV walls block signals, trees create interference, and distance from the router can drop speeds.
  • Cellular Dead Zones: Even top carriers have patches with no service or slow speeds, especially in valleys, mountains, or deep forest locations.
  • Device Issues: Laptops, tablets, and routers can glitch or need a reset. Outdated firmware matters more than most people realize.
  • Network Overload: Lots of devices on the same campground WiFi mean bandwidth gets spread thin, making everyone’s speed crawl.

Fixing these usually involves a bit of trial and error, but a few smart steps often get things moving again.

Close-up of RV WiFi extender and 5G hotspot next to travel gear on a picnic table

Step-by-Step Guide: Diagnosing RV Internet Issues

Getting the internet running smoothly in your RV can take a few steps. I usually started by finding out exactly where the problemexisted. Here’s my go-to approach:

  1. Restart Devices: Turn off the router, hotspot, or phone (and any WiFi extenders you use), wait a minute, and turn them back on. This simple reboot solves loads of minor connection issues.
  2. Check Signal Strength: Use your phone or laptop to walk around your RV or campsite. Watch how many bars you get. Sometimes, moving just a few feet makes a big difference.
  3. Test Multiple Devices: Try connecting another phone or computer. If only one device is acting up, the issue could be in its settings or software rather than the network.
  4. Switch Networks: If you’re using campground WiFi, try your hotspot, or vice versa. Comparing speeds helps pinpoint if the public network is overloaded.
  5. Update Firmware: Check for updates on your router, hotspot, or device. Firmware fixes often solve bugs you can’t see.
  6. Use Speed Test Tools: Apps like Ookla Speedtest help you check upload, download, and ping. Fast speeds but choppy video might mean the problem is actually buffering or device-related.
  7. Inspect Cables and Power: Look for loose cables or weak power connections if you use a wired router in the RV.

Keeping a short troubleshooting checklist handy is pretty helpful, especially if you move around a lot or work remotely. If you’re often exploring new campgrounds, having such a list posted near your main work area saves time every time you arrive at a new site and run into sluggish connectivity.

Tips for Boosting RV WiFi and Cellular Signals

Improving the internet in an RV usually comes down to location, gear, and a few easy tricks. Here are my favorite ways to get a better signal:

  • Use a WiFi Extender: These amplify campground WiFi, helping reach weak spots farther from the main router. I’ve had good luck with small plugin extenders and black box style boosters that mount outside the RV.
  • Upgrade to a Dualband Router: Dualband routers deliver a more stable connection and let you switch between 2.4 GHz (longer range, slower) and 5 GHz (short range, faster).
  • Install a Cellular Booster: These kits amplify even faint cell tower signals, turning “one bar” into reliable coverage. They work best if you already get a weak signal; they can’t create coverage where none exists.
  • Relocate Your Hotspot: Placing your hotspot or router in a window, up high, or even in a waterproof case outside can dramatically improve speeds. Avoid storing it near metal appliances or thick RV walls.
  • Switch to a Different Carrier: Some places have poor coverage from one US carrier but good bars from another. Check coverage maps and consider carrying backup SIMs if you travel off the beaten path.

If you’re planning extended trips through national parks or rural areas, packing an extra extension cord and a long USB cable for your hotspot lets you get creative with placement, which sometimes makes all the difference in weak-signal areas.

Dealing with Network Overload at Campgrounds

Introverts and extroverts alike get frustrated when a crowded network ruins movie night or remote work plans. RV parks often serve hundreds of users with low-bandwidth systems. At busy times, streaming or uploading photos can slow to a crawl. When I camp at popular parks, I notice that dawn and late-night produce the best speeds.

If slow WiFi is wrecking your plans, try these ideas:

  • Schedule big downloads or video calls outside peak hours. Early morning or late at night is best.
  • Limit the number of connected devices on your end. Turn off tablets or smart TVs you aren’t actively using.
  • If you work online, switch to your cellular hotspot for important meetings and reserve the campground WiFi for web browsing or downloads.
  • Ask the front office if there’s a less crowded access point, or if they offer a premium “work package” during busy times.

Landscape showing several RVs parked with a view of a cell tower and satellite dish in the background

Advanced Troubleshooting and Essential Gear

If you’re still stumped, a few more advanced steps can help. Signal analyzers and apps like NetSpot or WiFi Analyzer let you see which frequencies are crowded. Changing your WiFi channel can solve hidden interference issues. Some campers swear by rooftop antennas for cellular signals or dedicated MIMO antennas for fixed hotspots.

A strong setup includes:

  • A reliable hotspot (unlocked for all carriers if possible)
  • WiFi extender or booster
  • Cellular booster kit (with rooftop or window antenna)
  • Long-range router if you often stay at big parks
  • Backup cables, adapters, and a surge protector

Spending a little extra on good gear up front saves a ton of headaches. Still, even the best tech gets tripped up by weather, crowded networks, or a misbehaving device now and then.

If you frequently travel in a group or with family, consider investing in a power bank with multiple outputs, so everyone keeps their phones and hotspots charged even during long dry camping stretches.

Practical Examples: RealWorld RV Connectivity Solutions

In my travels, I’ve seen a wide mix of setups. Sometimes, a simple hotspot and window mount antenna works great for short stays. For longer trips, a cellular booster and RV-specific router keep things running whether in the woods or city parks. Friends of mine who full-time also use Starlink satellite combined with a mobile hotspot for backup, even in the desert or deep woods, they stay online for work and video chats.

We have tried many technologies over the years since starting full-time RV living back in 2008. After over 200,000 miles of travel and that many years on the road, we have changed tactics many times. Technology changes have made trouble-free connectivity a breeze!

As I mentioned earlier, Starlink and an unlimited mobile hotspot are our current choices for trouble-free connection to the world.

A modern RV interior setup showing a laptop, mobile hotspot, and WiFi booster on a compact table

Blending methods based on your travel style is really important. Keeping flexible and packing backup solutions helps you get back online quickly if one system fails. If you camp for extended periods, having a signal analyzer app (I like the Speed Test Master app) on hand lets you quickly spot and avoid overloaded networks.

Frequently Asked Questions

Here are some common questions I get about RV connectivity, with quick answers to each.

Question: What’s the easiest way to check if campground WiFi is any good?
Answer: I usually asked at the front office and then used my phone for a quick speed test right outside the main building. If speeds were fine there but dropped off at my site, a WiFi extender helped a lot.


Question: Do cellular boosters really help RV internet speeds?
Answer: They work well if there is at least a weak signal. If you have zero bars, nothing will help. My booster took me from barely loading web pages to streaming video in places that otherwise had poor reception.


Question: Why does my internet get so slow at campgrounds every evening?
Answer: Most campers go online at the same time, usually after dinner. This crowds the network. Try using the web early in the day, or switch to your phone’s hotspot in the evening.


Question: What’s the best connection type for remote RV camping?
Answer: Satellite is the main option where cellular and WiFi won’t reach. Starlink is popular, but having a backup hotspot or being ready to go offline is smart if you camp in the deep wilderness. I like the Tech+ program at FRVA! For $60 per month, we get an unlimited-use mobile hotspot!


Ready for Reliable RV Internet?

RV life feels a lot smoother with solid internet. Getting familiar with signal boosting tricks and knowing common fixes can keep you connected, wherever you park. Trying out different solutions lets you find what fits your travel style best.

A scenic RV campsite surrounded by nature, with visible WiFi booster and clear sky for satellite access

If you’re interested in learning more about mobile internet setups, check out additional guides and reviews on my site. Feel free to drop your questions about gear, setup, or troubleshooting. Community experience always helps. Wherever the road takes you next, having a plan for connectivity means you won’t have to scramble for a signal at the last minute.

_________________________________________________________

What If Your RV Could Help Pay for the Journey? Could you make money while boondocking?

Many full-time RVers quietly earn money online: writing, recommending products, and building simple digital assets that generate income while they travel.

You don’t need tech skills.
You don’t need experience.
You just need the right roadmap.

👉 Discover the beginner-friendly approach! Take a look at this post on this website.

Full-time RV laptop workspace with a scenic mountain view, showing how RVers run a small online business while traveling and living on the road

Installing Solar Panels And Managing Off-Grid Power In Your RV

Installing Solar Panels and Managing Off-Grid Power in Your RV

If you’ve ever struggled to run your coffee maker or keep your phone charged while camping out in the wild, installing solar panels on your RV can make a big difference. Off-grid power means you don’t have to rely on crowded campgrounds or noisy generators.

I’ve set up several RV solar systems, and managing solar power on the road has changed the way I travel. Here’s what you need to know if you’re ready to power your adventures with the sun.

Solar panels on an RV roof in a scenic natural setting

Why Go Off-Grid with Solar Power in Your RV?

Going off-grid with solar makes RV life a lot more flexible. I can park almost anywhere without worrying about plugging in. It’s great for boondocking in remote forests or waking up beside quiet lakes. Solar panels can run your essentials quietly, which means you’re helping the environment and saving money on hookups.

Solar power in RVs isn’t new, but it keeps getting better as technology advances. Many travelers find they can handle most daily needs from solar alone. From keeping your devices charged to running a fridge or powering your lights, a good solar setup keeps you comfortable wherever the road takes you.

Plus, stepping up to solar lets you truly get away from it all. Imagine waking up to a sunrise over the mountains, knowing your coffee will brew and your fridge stays cool, all thanks to the sun. That feeling of freedom can be hard to beat.

Key Components of an RV Solar Power System

Getting started with RV solar means knowing the main parts involved. Each component has a specific job. Here are the basics:

  • Solar Panels: These capture sunlight and turn it into electricity for your RV. You’ll find both rigid and flexible panels; each type has its perks depending on your roof and travel style.
  • Charge Controller: This device regulates the electricity from the panels before it goes into your batteries, protecting them from being overcharged.
  • Batteries: Solar energy gets stored here, so you can use it when the sun’s not shining. Deep-cycle batteries are the go-to for RVers and come in lead-acid, AGM, or lithium varieties.
  • Inverter: Many RV appliances need standard AC power (like at home). The inverter changes the battery’s DC power into usable AC.
  • Wiring & Mounting Hardware: Good wiring ensures your solar system runs smoothly, and proper mounting keeps your panels safe on the road.

If you’re new to solar, understanding these parts makes shopping and installation a whole lot simpler.

Planning Your RV Solar Setup: What to Consider

Before jumping in, think about your power needs and travel habits. Start by making a list of what you want to run with solar. Are you just charging devices and LED lights, or do you want to power a fridge, TV, or even an air conditioner? Most folks start with the basics and expand as needed.

Try tracking your power use for a day or two with your current setup. Most solar calculators online can help you estimate what size system you need. It’s better to aim a bit higher than your minimum needs; I learned that the hard way after my first too-small system. Also, factor in roof space for panels and where your batteries and inverter will go.

For RVers traveling in shady places or during winter, adding more panels or battery storage is a smart move. Flexible panels work better on curved roofs, while rigid panels last longer and handle harsh weather well. If you’re a fulltimer or travel in hot regions, investing in higher-end batteries like lithium can really pay off.

And don’t forget: solar isn’t just about panels. You need to think about every link in the chain. A powerful system is only as good as its weakest part, so consider upgrading your wiring and battery monitoring tools as you make changes.

Step-by-Step Guide to Installing Solar Panels on Your RV

Installing RV solar might sound tricky, but with some patience, it’s pretty manageable. Here’s a breakdown based on my own installations:

  1. Assess and Clean the Roof: Make sure your RV roof has enough room. Remove any dirt or debris so the panels stick properly.
  2. Plan Panel Layout: Lay out your panels to avoid shade from vents and AC units. Sketch your wire path to minimize excess cable runs.
  3. Install Mounts and Panels: Attach mounting brackets to the roof. Securely fasten each panel, following the manufacturer’s instructions. Double-check that everything is waterproofed with quality sealant.
  4. Wire the Panels: Connect panels with the provided cables. Route wires through a waterproof gland or roof port into the interior. Keep wires out of harm’s way and neatly bundled.
  5. Connect to the Charge Controller: Mount the controller in a space with good airflow. Connect panel wires to the controller, then attach the controller to your battery bank.
  6. Wire the Inverter (if needed): Place your inverter close to the batteries to reduce voltage drop. Connect it according to the instructions, and only power it up after double-checking all connections.
  7. Test the System: Once everything is hooked up, test each part. Make sure the controller is reading the panel output and charging the batteries correctly. Test your outlets and devices.

If you’re not confident with tools or electricity, a professional can handle the trickier parts for you. Doing it yourself can save a lot, but safety should always come first.

Close-up of solar panels being installed on an RV roof

Common Hurdles and How to Handle Them

Off-grid RV solar systems can have some challenges. Here’s what I’ve seen most often and how to avoid frustrations on your travels:

  • Batteries Not Lasting Overnight: Sometimes batteries drain faster than expected. This might mean your system is too small or you’re using more power than budgeted. Adding another battery or being selective about device use solves that.
  • Shade or Bad Weather: Clouds and tree cover really cut down on solar power. Try to park in the sun where possible; portable panels can be moved to catch more rays.
  • Wiring Issues: Bad connections can slow charging or stop the system entirely. Regularly inspect your wiring, especially after bumpy drives.
  • Heavy Loads: Running big appliances like microwaves or hair dryers uses a lot of power. I try to plan these uses for sunny days or when batteries are full. For large loads, a generator backup may help.

Most problems come down to sizing and smart use. Investing in a good battery monitor also helps track your power in real time, taking out a lot of the guesswork.

An overlooked tip: check your connections often. Even a loose cable can cause your whole system to underperform. Simple inspections after rough roads keep things running smoothly and save headaches later on.

Solar Battery Types Explained

Lead Acid: These are affordable and common, but need more maintenance. They work well if you’re careful not to drain them completely.

AGM: These sealed batteries require less maintenance and handle bumps better, making them popular among RVers.

Lithium: Lightweight and long-lasting, lithium batteries cost more upfront but last for years with little upkeep. They recharge quickly and can be used nearly to empty without damage.

Each type suits different travel styles and budgets. If you camp mostly in warm places and don’t want to worry about checking water levels, AGM or lithium makes for a smoother trip.

Also, take note: lithium batteries can weigh much less than the equivalent power capacity in lead-acid batteries. This matters if you’re close to your RV’s weight limits or want to improve your fuel mileage with less heft on board.

Deep-cycle batteries and wiring inside an RV storage compartment

Pro Tips for Managing and Maximizing Off-Grid Power

Managing your system well gives you the freedom to go off the beaten path. These are the habits I’ve picked up:

  • Use LED lighting and energy-efficient appliances. Swapping bulbs and gadgets saves tons of power.
  • Shut off devices when you don’t need them. Small loads add up over time.
  • Keep your solar panels clean. Dust and grime can reduce power by a lot. A quick wipe every week makes a big difference.
  • Add a portable solar panel so you can adjust it with the sun, especially if you park in partial shade.
  • Monitor your batteries with a good battery meter. This helps you avoid overusing and keeps your batteries healthy for years.

Even small adjustments in habits go far. For example, charging devices in the afternoon when solar output peaks prevents evening shortages.

Consider investing in an inverter with energy monitoring features, too. This gives you instant information about your draw and helps you spot problems before your batteries run out. Tracking your trends over a week or a month helps you make smart tweaks for longer stays off-grid.

Inside view of an RV kitchen powered by solar, showing lights and appliances running

Frequently Asked Questions

Here are some questions RVers ask a lot when it comes to RV solar and off-grid living.

How many solar panels do I need for my RV?
A typical RV setup starts with 200 – 400 watts if you’re running small devices and lights. For more power-hungry setups, like full-time travel or running a fridge, aim for 600 – 800 watts. Calculating your specific needs based on your devices is the best approach.


Can I install solar panels myself?
Many RVers take the DIY route with basic tools and some research. Professional installation is available if you want the job done quickly or feel unsure about electrical work.


Are portable solar panels worth it?
Portable panels give flexibility if shade is a problem at your campsite. They attach quickly and can boost your charging without being a permanent fixture.


What should I know about solar system maintenance?
Maintenance is mostly about keeping panels clear of dirt, checking wiring connections, and watching battery health. Most of these can be done in a few minutes each week.


Can I run my air conditioner on solar power?
Air conditioning draws a lot of power, so a basic solar setup usually can’t keep up for long. To run AC, you’ll need a larger system and a bigger battery bank, or you might rely on generator backup for really hot days.


How long do RV solar panels and batteries last?
Most quality solar panels last over 20 years with proper care. Battery life depends on the type, ranging from 35 years for lead-acid to 10 years or more for lithium batteries.


Ready to Hit the Road OffGrid?

Installing RV solar and managing off-grid power opens up options for adventure and relaxation. With the right setup and simple daily habits, you’ll stay charged up wherever you want to camp. Whether you stick to weekends in the woods or hit the road full time, RV solar is worth checking out for the extra freedom and peace it offers.

RV parked in a remote desert, powered by roof solar panels at sunset

Got questions or an RV solar tip you want to share? Drop a comment below or browse other articles for more travel ideas and hands-on advice. Safe travels and sunny skies!

_________________________________________________________

What If Your RV Could Help Pay for the Journey? Could you make money while boondocking?

Many full-time RVers quietly earn money online: writing, recommending products, and building simple digital assets that generate income while they travel.

You don’t need tech skills.
You don’t need experience.
You just need the right roadmap.

👉 Discover the beginner-friendly approach! Take a look at this post on this website.

Full-time RV laptop workspace with a scenic mountain view, showing how RVers run a small online business while traveling and living on the road

What Are The Best Satellite Internet Options For RVers?

A Guide to Satellite Internet Options for RVers

Staying connected while traveling in an RV can be a real head-scratcher. Satellite internet has opened new doors for RVers who want reliable internet pretty much anywhere. Maybe you want to stream movies in the desert, check email by the lake, or run your business from the mountains.

Picking the right satellite internet setup and knowing what to expect can save a lot of headaches down the road. I’m breaking it all down for you here so you get online with the least hassle possible.

Satellite dish mounted on an RV roof at a scenic campsite

Why RVers Are Turning to Satellite Internet

The flexibility of RV life means you never know just how far off the beaten path you’ll end up. Cell service can drop out quickly once you leave the main highways. Satellite internet fills that gap because it beams data straight down to you from space. Unlike public WiFi or cell-based options, satellite internet covers way more places, and you don’t need to park near civilization to use it.

Over the past few years, companies like Starlink and HughesNet have been pushing the tech forward. The user base for mobile satellite internet in RVs is growing, with big jumps since the pandemic made remote work more popular. Traveling families, digital nomads, and weekend explorers all want to keep in touch with friends, stream entertainment, or handle work on the go. That’s where satellite really shines.

Of course, the extra gear and setup are different from sticking with a phone hotspot. Satellite does cost more upfront. There are ongoing fees too, but for true mobility and independence, a lot of RVers agree it pays off. It gives you the freedom to roam and still get work done or relax with your favorite shows, all on your own terms. Plus, being able to connect from nearly any setting—whether you’re in a deep forest or a wide-open plain—means satellite internet can give a real boost to your travel experience.

The Basics: How Satellite Internet Works On The Road

Satellite internet uses antennas and satellites in orbit to transfer data. You point a dish or antenna at the sky, get a signal from a satellite overhead, and that’s how you get your internet. For RVers, the system is designed to be portable, but it does take some setup.

There are two types of satellite networks you’ll hear about: geostationary and low-earth orbit (LEO) satellites. HughesNet and Viasat use geostationary satellites, which orbit high above the equator and seem to stay in one spot in the sky. Starlink is the biggest name in LEO satellites, which orbit much closer to the Earth and move across the sky. LEO systems offer faster speeds and less lag, but you need a clear view of more sky to stay connected. Geostationary systems have a higher latency, but the equipment is pretty simple to point and forget.

Internet speed and latency (that feeling of delay when you click a page) should be on your radar. Older satellite systems often feel laggy and aren’t great for video calls or gaming. The new generation, like Starlink, is much zippier and makes streaming, video meetings, and even remote work feel a lot smoother.

In recent years, the technology has become more accessible and easy to set up, which means even first-time users usually find it straightforward. While satellite gear may seem intimidating at first, most options come with detailed instructions to help you get connected fast.

Satellite Internet Options for RVers: Top Picks to Consider

There are a few main options for getting satellite internet on your RV adventures. Each one comes with pros and cons, so your style of travel and how much you want to spend will guide your choice.

  • Starlink for RVs (now called Starlink Roam): Starlink has gotten a lot of attention because of its fast speeds and relatively easy setup. The portable dish (often called “Dishy”) plugs in and automatically aligns itself. It works best in places where you have clear skies and a low horizon; think open fields, deserts, or mountain valleys. Service is available in most of North America and is expanding steadily.
  • HughesNet Fusion: HughesNet has been supporting RV internet longer than most. Their mobile plan uses a traditional dish that needs to be aimed at a fixed satellite. This takes a little more setup, but once you lock onto the satellite, you’re good to go. Speeds are slower (especially for uploads), and data caps apply. Still, if you spend a lot of time away from cell towers, it’s worth a look.
  • Viasat Mobile Internet: Viasat offers RV packages too, based on their geostationary satellites. Performance and data limits are similar to HughesNet. The hardware is a bit heavier and usually requires a roof or tripod mount. Uploads and streaming might not be as smooth as with Starlink, but it covers wide areas.

All three options require special equipment that you’ll need to install or carry with you. Starlink’s hardware is much easier to set up and move between campgrounds, while HughesNet and Viasat might need a bit more muscle and patience.

Starlink tends to offer unlimited data (for now) with faster speeds, so it’s the go-to for those who need a “home office” on wheels. If you want multiuser support and worry about coverage overlap, a mix of providers could make sense for long trips.

Setting Up Your Satellite Internet System

Getting your RV satellite internet ready is not as hard as it sounds. Most kits come with everything you need to get started. Here’s how it usually goes:

  1. Pick a spot with a clear view of the sky: Trees and buildings can block the signal, so open spaces are your friend. For LEO systems like Starlink, you want as much sky visible as possible because satellites move overhead.
  2. Mount or place the dish: Many people use a tripod on the ground right outside their RV, especially with Starlink. Some dishes can be put permanently on the roof. Just make sure it’s stable and won’t tip over.
  3. Connect the hardware: Plug in the power and run the supplied cable to your included router or WiFi base. Most new systems come with an app to guide you through setup and help you check your sky visibility.
  4. Power management: Satellite internet gear needs solid power, which comes from your RV’s electrical system or a portable battery. Starlink uses about 50 to 75 watts when running, so keep that in mind if you’re boondocking on solar or limited batteries.

Some RVers go the extra mile with custom mounting brackets, cable passthroughs, or even adding an outside weatherproof box for their routers. Test your system before heading off-grid to prevent surprises when you’re relying on it for work or trip planning. Consider picking up extra cables or adapters to have spares for those just-in-case moments.

Starlink satellite dish setup outside an RV in a forest clearing

Things You Should Probably Consider Before Choosing Satellite Internet For Your RV

Every system comes with tradeoffs. Here’s what to keep in mind so you can pick what fits your style and budget:

  • Monthly Fees: Satellite internet isn’t cheap, and plans often start around $100 per month or higher. Some options, like Starlink Roam, let you pause service by the month, which is nice for part-time travelers.
  • Hardware Costs: The dish and router are a big upfront spend. Expect the gear to run $600 to $2,500, depending on the system and accessories. That cost might be stretched out with financing or bundles for frequent RVers.
  • Speed and Data Caps: Speeds vary by system and location. LEO constellations are generally better for video, remote work, and gaming. The older systems are okay for checking email and moderate web browsing. Pay attention to any “fair use” policies or data slowdowns after a certain amount each month.
  • Weather Impact: Heavy rain or snow can sometimes cut your signal, called “rain fade.” Most of the time, performance recovers quickly, but you might have downtime during a storm.
  • Setup and Portability: If you move campgrounds often, an easy portable dish is a real perk. If you set up longer in one spot, a permanent roof mount might make sense.

Data Needs

If you’re only using the internet to check email and maps, you won’t need the fastest plan. For streaming movies, Zoom calls, or uploading videos, a faster and more robust data connection is really important. Many users combine satellite internet with cell-based hotspots to have a backup when conditions or data needs change. It gives an extra level of flexibility if you run into weather issues or heavy network congestion on one system.

Technical Support

Check what kind of customer support is available before you commit. Forum communities and Facebook groups can be super helpful for quick troubleshooting or sharing setup tricks if you get stuck. Look for service providers that offer responsive chat or phone help, as well as online documentation for specific RV setups.

Legal and Geographic Limitations

Not all satellite systems work everywhere. For example, Starlink restricts some mobile plans to specific regions. It’s always smart to check coverage maps or talk to other RVers who camp where you plan to go. International travel has extra restrictions to pay attention to as well. When crossing borders, always double-check the service status and coverage agreement before you rely on the system for work or navigation.

Satellite dish on RV in rugged mountains during sunrise

Advanced Tips for Getting The Most Reliable RV Satellite Internet

After you knock out the basics, there are a few ways to get even more out of your satellite setup.

Combine Internet Sources: Don’t rely only on satellite if you can help it. Add a cell hotspot or campground WiFi to your options, and use an automatic failover router to switch to the best source while you travel. This way, your video call doesn’t drop if a cloud rolls by. Some RVers even carry a portable signal booster for cell service as another layer of redundancy.

Optimize Placement: Even small obstructions can block your dish. Keep your setup away from tall trees and buildings, and always double-check your view of the sky before setup. I use a sky-finder app to check every new site; totally worth it. Scout your campsite a bit before parking and make sure you can shift your equipment if the angle isn’t perfect the first time.

Monitor Your Usage: Some services let you watch your data use in real time. Keep an eye on streaming hours and big uploads so you don’t get throttled or hit a surprise bill. Try downloading large files only when you have plenty of data left, and consider setting streaming services to a lower resolution if you’re close to your monthly limits.

Secure Your Connection: Changing the default router password and enabling WPA2 encryption go a long way to keep you protected while you roam. Likewise, a VPN is smart for business work or privacy-sensitive activities; just be aware it might slow things down a bit further on satellite connections. And always keep your device software up to date for the best security.

Staying flexible and learning the quirks of your hardware will help make the most of your internet time, whether you’re at a festival, stuck in a rainstorm, or parked by a mountain vista with nobody else for miles. Sharing tips with other RVers or checking online communities can help you troubleshoot issues faster and learn about new features as providers upgrade service.

Starlink Dish on tripod overlooking a lake and RV campground

Frequently Asked Questions

Here are some of the top questions I get from other RVers who want to use satellite internet:

Question: Can I use satellite internet while my RV is moving?
Answer: Most portable systems, like Starlink Roam and HughesNet, require you to be parked. There are expensive commercial options for “in-motion” internet, but they’re rare and not typically used by most RVers.


Question: Is Starlink better than HughesNet or Viasat for RVs?
Answer: For speed, ease of use, and data limits, Starlink is usually the preferred choice among RVers, especially for streaming and work. HughesNet and Viasat cover more places but have slower speeds and stricter data caps.


Question: How difficult is it to set up satellite internet at a new campsite?
Answer: Starlink is very easy to set up. Point the dish, plug it in, and let it self-align. The others require a bit more aiming and test runs. Most folks figure it out in less than an hour after doing it a couple times.


Question: Does bad weather totally knock out satellite internet?
Answer: Heavy rain or snow can slow speeds or drop connections temporarily. Usually, things bounce back once conditions clear up. Having a backup connection can help during storms.


Personal Experience With Starlink

We have had Starlink since 2022. When the need for unlimited internet and a good quality signal arose because of our RV consulting business, Starlink was the choice.

It has functioned perfectly for years. Using the roam plan, we have used the service all over the country with no issues, even through trees! We pay $165 per month, but given we use it for smartphones, laptops, and TV, it’s well worth it! While watching Netflix or Prime movies, we use one to two gigs of data per hour.

We figure we use between 300 and 500 gigs of data per month. So, the cost is well worth it! Check out this link for more information on Starlink.

Ready to Get Online With Your RV?

Satellite internet for RVers is changing almost every year. With better speeds and smarter gear, it’s finally practical to stay connected on true adventures far from home. Picking the right plan for your budget and travel plans means more streaming, working, or relaxing, no matter where you end up parking.

RV at a remote lakeside with satellite antenna aimed at clear night sky

Staying connected while you travel is totally doable now. Just pick your system, get your gear set up, and enjoy the freedom to roam without missing a beat online. Here’s hoping your next campsite has a wide open view of the stars, plus the satellites above. Enjoy the open road and stay safely in touch from anywhere.

_________________________________________________________

What If Your RV Could Help Pay for the Journey? Could you make money while boondocking?

Many full-time RVers quietly earn money online: writing, recommending products, and building simple digital assets that generate income while they travel.

You don’t need tech skills.
You don’t need experience.
You just need the right roadmap.

👉 Discover the beginner-friendly approach! Take a look at this post on this website.

Full-time RV laptop workspace with a scenic mountain view, showing how RVers run a small online business while traveling and living on the road

How Do You Set Up A Smart Home System In An RV?

Setting Up Your RV’s Smart Home System: Tips and Tricks

Turning your RV into a smart home on wheels adds comfort and control to your travel lifestyle. Being able to manage lights, temperature, security, and entertainment from your phone or a single hub simply makes day-to-day RV living smoother.

Setting things up takes some planning and trial and error, but once it’s done, you’ll notice just how much it gives a boost to your quality of life on the road.

A modern RV interior with smart home devices and ambient lighting

Why a Smart Home System in Your RV Changes the Game

Everyday routines in an RV are much easier to manage with a smart system. I’ve found that adjusting lighting, locking doors, or checking the temperature from my phone makes little annoyances vanish. If streaming music or tracking your travels with cameras matters to you, having all those gadgets synced up is seriously handy.

Our Newmaer Super Star was loaded with all the new technologies! I could operate so many features from my smartphone, even from bed.

Smart home systems aren’t just about being fancy. They save energy, give peace of mind, and make your space more comfortable, whether you’re out exploring or parked at a campground. And with more RV products now Wi-Fi enabled, it’s easier than ever to add tech upgrades, no messy wiring required.

Getting Started: The Basics of RV Smart Home Tech

Before buying devices, figure out what you actually want to automate. Starting with the systems you use most often is a good plan. Here are popular choices for RV smart home setups:

  • Smart thermostats: Set your heating and cooling remotely so your home feels just right when you arrive.
  • Smart lights: LED bulbs and strips that dim or change color make things cozy and help you save energy.
  • Security cameras: Indoor and outdoor Wi-Fi cameras let you keep an eye on your place while you’re out and about.
  • Smart locks: Make keyless entry possible. Just use your phone or a code to get in.
  • Entertainment: Connect TVs, speakers, and streaming devices so you can control everything by voice or in an app.

Not every product plays nicely together, so picking a main smart hub (like Amazon Alexa, Google Home, or Apple HomeKit) helps you manage everything from one app. Choosing products that are compatible with your hub makes things a whole lot smoother.

Key Considerations Before Setting Up

Unlike in a regular house, RVs bring some unique tech challenges. Wi-Fi coverage isn’t always perfect in a rolling vehicle, and power surges can create problems for sensitive devices. Here’s what to keep in mind:

  • Internet connectivity: Most smart home gadgets depend on stable Wi-Fi signals. Prioritize having a mobile hotspot or signal booster. Having backup internet access is a lifesaver out in remote areas.
  • Power management: RV electrical systems aren’t built to run loads of gadgets nonstop. Use smart plugs and make sure to switch things off when you don’t need them to keep your batteries healthy.
  • Product compatibility: Double-check that your gadgets, main hub, and phone all work together. Sticking to a single brand or ecosystem smooths the way for creating routines.
  • Physical installation: Space is limited, so look for compact, wireless devices. Removable sticky pads work great, and you don’t have to drill holes where you later regret.

Take time to plan what matters most, and add things step by step, instead of trying to automate everything overnight. This approach keeps things affordable and stress-free.

Step-by-Step: Setting Up Popular RV Smart Home Features

  • Connect a Smart Hub: Connect your hub (like Alexa or Google Home) to your camper’s Wi-Fi and park it where voice commands can be heard easily.
  • Add Smart Plugs: These are a lifesaver for controlling coffee makers, fans, or lamps through the app or voice. Plug small appliances into the smart plug, then set up on/off schedules.
  • Smart Thermostat: Most RVs need an adapter to upgrade the old thermostat. Check the voltage first and stick to the instructions closely. Once it’s in, you can control the temperature no matter where you are.
  • Lighting: LED smart bulbs or strips can be tucked beneath cabinets or along the floor. They usually pair up via Wi-Fi or Bluetooth, so you can adjust the brightness or color right from your phone.
  • Security: Battery-powered cameras, or those built for the outdoors, work best. Mount them with magnets or brackets so you can move them as needed or take them along when leaving your rig unattended.
  • Smart Locks and Door Sensors: Pick locks rated for outdoors with a backup key. Window sensors make for extra peace of mind if you leave your RV for a while.

Once you’ve installed each device, group them into rooms or zones in your app. This way, you can control everything at once, whether it’s for movie night, a morning routine, or bedtime.

A close-up of a smart thermostat and connected lighting controls inside an RV

Maintaining and Troubleshooting Your System

No matter how carefully you plan, sometimes things just don’t work right. I’ve had issues from cameras refusing to connect after driving to a new spot, to apps freezing during a rainstorm. Here are tips I’ve picked up to smooth the way:

  • Restart your RV’s router and hotspot if Wi-Fi drops or devices vanish from the app.
  • Keep all your smart home apps and device firmware up to date. New updates fix bugs and bring new features.
  • For power hiccups, use surge protectors and smart plugs with power monitoring. This helps spot energy hogs and prevent overloads.
  • Secure Wi-Fi with strong passwords and don’t share access codes for your devices unless you trust the person completely.

If a device just keeps losing connection, try performing a factory reset and adding it back to your hub. Some campground networks have issues with smart gadgets, so bringing your own portable router can help keep things steady and reliable.

Cool Smart Home Routines and Automations for RVs

Automations are where you can really make things shine. Here are helpful routines that make RV life even more enjoyable:

  • Soft lights turn on at sunrise or whenever you walk into the main living space after sunset.
  • Set your air conditioner to run just before you get back from a hike; your RV is always the perfect temperature!
  • Link a security camera alert to flash interior lights or sound an alarm if movement is detected outside at night.
  • Put your entertainment devices in a “movie night” scene, with lights down and your favorite streaming apps one tap away.
  • Use location routines: all lights and equipment go off as you drive away, then flip back on when you’re home.

These automations help you save energy and chill out while you’re busy exploring new places. Let your imagination run with it, you’ll keep finding new routines that match your lifestyle.

Smart lights and voice assistant being controlled from a tablet in an RV at sunset

Popular Smart Home Devices for RVs

After lots of hands-on use, here’s a selection of devices that get great feedback from travelers, myself included:

  • Wyze Cam (V3): Affordable, compact, and resistant to weather. Uploads video to the cloud and has solid motion alerts.
  • Amazon Echo Dot: Great for voice commands, music, and controlling automations in a tiny package.
  • TPLINK Kasa Smart Plugs: Work well even when the internet is a bit iffy and are super easy to set up.
  • Philips Hue Bulbs: Energy efficient, bright, and compatible with nearly all smart hubs.
  • August Smart Lock: Fits most RV doors, lets you share codes or unlock via your phone for easy access.

These devices balance ease of use, low power use, and awesome features that work on the go. Be sure to double-check what matches your RV’s setup before you buy.

Frequently Asked Questions

Here are some questions I often hear about setting up smart home systems in RVs:

Question: Do smart home devices use a lot of data?
Answer: Most devices only use a little data for updates or commands. Security cameras use more if you’re live streaming or storing video on the cloud, watch your data limit if you’re on a tight plan.


Question: Can I use smart devices with RV batteries or solar?
Answer: Yes, most smart devices draw very little power, but cameras and Wi-Fi routers need a steady 12V or 120V source. Use smart plugs to watch your usage, and solar banks can power your gear with the right setup.


Question: What happens to my system if I lose Wi-Fi or power?
Answer: Some devices work on Bluetooth or local networks, which can keep automations going, but most routines need Wi-Fi. Keeping backup power for your router and hotspot helps keep things running.


Question: Are smart systems secure in an RV?
Answer: Yes, as long as you set strong passwords and use two-factor authentication. Only share codes or camera access with folks you fully trust.


Question: Do I need to pay monthly fees?
Answer: Most devices don’t require a subscription to work. Extra features, like cloud video storage or deep automation, might have small monthly costs.

Final Thoughts

Building a smart home on wheels really does add comfort, ease, and security without sacrificing any of the freedom that comes with RV travel. Start with just a couple of devices, see what makes life easier, and grow your setup from there. The right mix turns your RV into a space you truly love wherever the road leads.

A cozy RV parked in nature at dusk, lights glowing, illustrating seamless smart home living

For more RV tech advice and real-world guides, check out the rest of the articles on this site or drop by YourFulltimeRVLiving.com. Got questions about RV smart home setups or want to show off your own gear? Add a comment below! I’m always happy to help fellow travelers get connected on the open road!

_________________________________________________________

What If Your RV Could Help Pay for the Journey? Could you make money while boondocking?

Many full-time RVers quietly earn money online: writing, recommending products, and building simple digital assets that generate income while they travel.

You don’t need tech skills.
You don’t need experience.
You just need the right roadmap.

👉 Discover the beginner-friendly approach! Take a look at this post on this website.

Full-time RV laptop workspace with a scenic mountain view, showing how RVers run a small online business while traveling and living on the road

error: Content is protected !!