
Keeping your RV’s plumbing in top shape pays off big time down the road. Avoiding leaks and damage means you get clean water when you want it, and you stay clear of costly repairs and unpleasant surprises.
After years on the road, I’ve started to treat my RV’s plumbing checkups a bit like regular oil changes. You just do them, and driving becomes a lot less stressful. I’m going to walk you through exactly how you can inspect your RV’s plumbing for leaks and damage with clear steps and simple tricks anyone can use.
Understanding Your RV’s Plumbing System
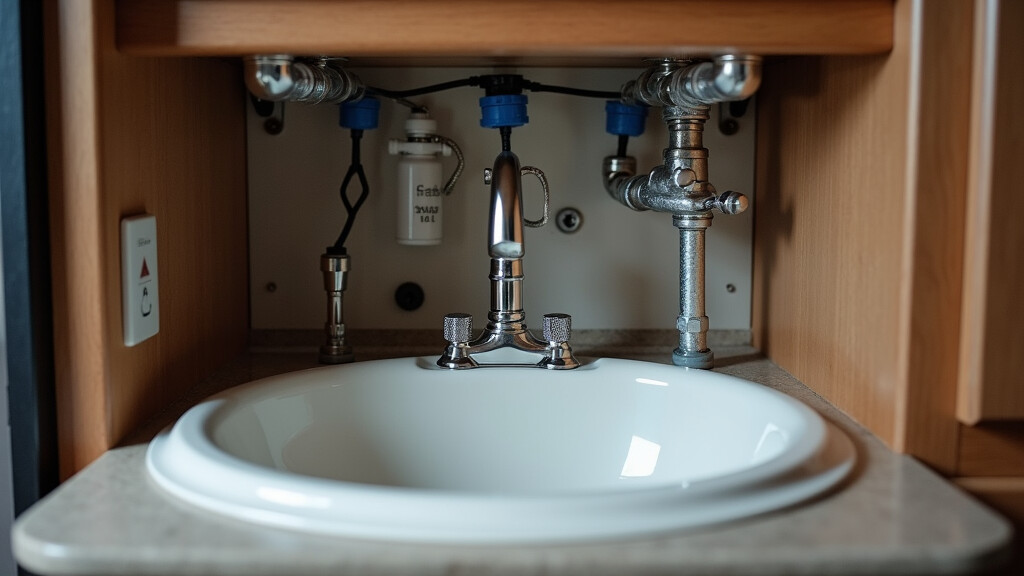
Like a house, an RV has a whole network of pipes, fittings, valves, and tanks. You’ve got fresh water lines (usually PEX tubing), a water heater, drain pipes, and different holding tanks for gray and black water.
Instead of everything being tucked behind walls and floors like at home, plumbing in an RV runs in tighter, sometimes awkward spots. That means temperature swings, road bumps, and vibrations can work parts loose or wear them out faster than in a regular home.
Most RV plumbing has a freshwater tank that supplies water to sinks, showers, and the toilet. A water pump pushes that water through lines, and it comes out when you open a faucet. Some folks also connect to city water at campgrounds, which puts pressure straight into the system. All outflow goes into holding tanks, which you then dump at proper stations.
Knowing what’s under your sinks, in your storage bays, and at the valves before starting any inspection will really help here. I always recommend grabbing a flashlight, maybe your phone’s camera, and a towel before you start poking around.
If you’re new, snap some photos as you go, so you can remember how everything fits together later. A sketch or quick diagram on a notepad can make it much easier to follow up if you stumble upon an issue down the line.
Why Regular Inspections Matter
Leaks don’t just waste water. They can lead to bigger headaches like mold, mildew, bad odors, and damaged floors or walls. Even the smallest drip can cause damage under an RV’s flooring, and catching things early is cheaper and easier every time.
RVs see a lot more flexing and moving than houses, so fittings might loosen just from driving. It’s a good habit to inspect your plumbing every couple of months, and always after a long trip or when you open up after winter storage.
A lot of people believe RV water leaks are super obvious, but sometimes they’re sneaky. You might just smell musty odors, see curled-up floor vinyl, or notice water stains under the sink. If you check often, you’ll spot these before they’re a bigger deal.
Plus, you’ll get a better feel for what’s normal and what’s not in your RV. Being proactive saves you money and gives you peace of mind, especially when you’re parked far from repair shops.
Step-by-Step Guide to Inspecting for Leaks
I like to break up my inspections by starting inside, where most of the fixtures are, then checking the tanks and plumbing outside. Here’s my routine:
- Check under every sink and faucet: Open the doors or access panels, wipe around all fittings, joints, and P-traps with a dry towel. If it comes back wet, something’s leaking.
- Feel around the toilet base and connections: The toilet seal and fittings can dry out or get bumped loose. Soft flooring or slight movements when you press around the toilet are signs to dig deeper.
- Inspect the shower area carefully: Look for any signs of missing sealant or cracked sealant, especially in corners and where fixtures meet walls. Cracks in the shower pan can also occur.
- Check water lines and the water pump: Listen for drips or air sounds when the pump runs. If the pump cycles on and off when no water is running, there’s likely a slow leak somewhere.
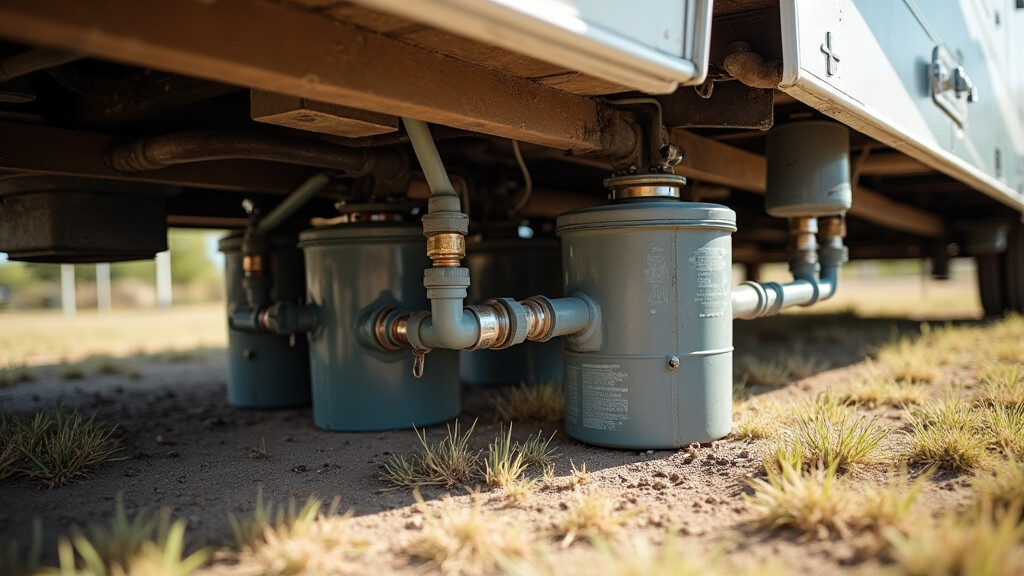
- Look under the RV with a flashlight: Sometimes, you’ll catch a drip from a busted drain line or tank connection that you would miss inside. Don’t forget to look around the water heater access and low point drains underneath.
One trick that works really well for hidden leaks is to keep all faucets off, turn on your pump, and watch the pressure. If the pump runs but you aren’t using water, that’s your cue: leaks are lurking. For city water, keep an eye on the water meter, if you have one. It should not move if no water is being used.
Common Problems and What to Watch For
Different RV models have their own quirks, but a lot of issues come up in similar spots. Here’s a quick rundown of what I often find (and you might too):
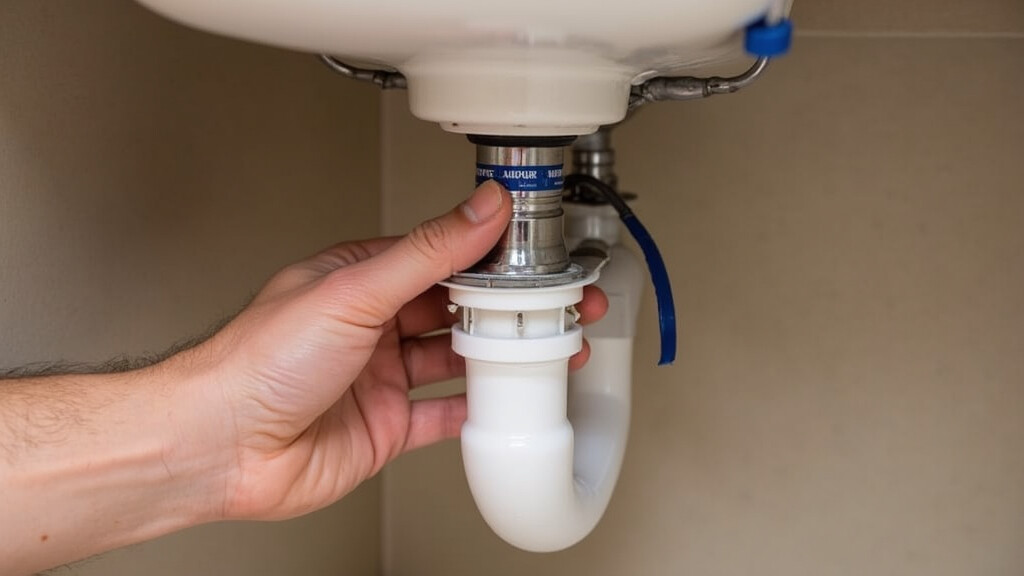
- Loose Fittings: Vibration while driving can loosen hose clamps or PEX compression rings. Retighten by hand or gently with a wrench until snug, but don’t overdo it.
- Cracked or Brittle Pipes: Old plastic pipes can get brittle in hot weather or after freeze-thaw cycles. Look for any discoloration or hairline cracks, especially near tank connections.
- Worn-outEven if you use RV antifreeze, lines hidden in walls or basement storage can crack from expansion and contraction cycles. Seals or Gaskets: Black tank flush valves, toilet seals, and even faucet washers will eventually wear out. Replace these at the first sign of a slow drip or leak.
- Clogged Vents or Traps: Sinks and showers need air vents to drain quickly. Listen for gurgling sounds that could mean clogged traps or vent pipes blocked by bug nests or debris.
- Leaking Tanks: Especially in older RVs, tanks might develop leaks at the seams or where fittings are glued. Look for dripping under the RV after filling up the tanks.
Don’t forget to check exposed plumbing after a freeze. Even if you use RV antifreeze, lines hidden in walls or basement storage can crack from expansion and contraction cycles. Any time you hear strange noises, see puddles, or smell anything odd, it’s worth checking closely.
Staying alert to new smells or changes in the RV can help you catch an issue before it gets worse.
RV Plumbing Maintenance Tips That Save Time and Money
Just spotting problems is only half the job. A little preventive maintenance keeps little issues from turning into big, expensive ones. I always keep a basic RV plumbing repair kit on board, extra PEX fittings, wrenches, Teflon tape, and a variety of hose clamps. I also love Sharkbite fittings. These items take up hardly any space and will bail you out of lots of situations at the campground.
- Regularly retighten fittings: Don’t assume one and done gets it fixed. Vibration causes things to loosen over time.
- Replace rubber hoses and washers every couple of years: UV and age wear these out. Swapping them is pretty cheap and way easier than patching a leak at midnight.
- Flush tanks often: Build-up inside tanks can stress fittings and tank walls. Rinse with lots of water, and use tank cleaning wands or spray attachments if you have them.
- Avoid using harsh chemical drain cleaners: These can eat away at seals and plastic pipes. Stick to enzyme-based treatments or a mix of baking soda and vinegar for clogs.
- Protect pipes from freezing: If you camp in cold areas, consider pipe insulation sleeves or heating pads on exposed lines. Opening cabinet doors on cold nights lets heat reach tucked-away pipes.
Taking care of these regular tasks has saved me a lot of hassle over the years. It also means you can head out on a trip without worrying about water leaks ruining your plans or damaging your flooring. Remember, it’s also wise to check for mineral buildup around fittings, as this can indicate slow leaks before they become serious.
If you’re storing your RV, draining the entire system is a solid way to prevent winter damage. These simple habits go a long way in extending the life of your system and saving money.
Popular Questions About RV Plumbing Inspections
Here are some questions I get from fellow RVers and beginners looking to keep their water systems in shape:
How often should I check my RV’s plumbing for leaks?
It helps to do quick checks at least every month, and a more thorough inspection after every longer trip or before/after winter travel.
What should I do if I find a slow leak under the sink?
First, tighten any loose fittings by hand. If that doesn’t help, you might need to replace a washer, gasket, or even a short hose segment. Always dry up any spills fast to prevent mold and water damage.
Why does my water pump keep cycling even when no water is running?
That usually means there’s a small leak somewhere. A toilet valve, a faucet dribble, or a loose joint. Listen for water movement, look for moisture around fittings, and check all fixtures one by one. Fixing the leak will help save pump wear.
How do I spot a hidden leak inside wall cavities?
Look for clues like stains, swelling, or soft spots on floors and walls. The nose is pretty handy too; a musty or sweet smell often means water is hiding somewhere it shouldn’t. Some people use moisture meters, but even touching and checking by hand can tell a lot. In tough cases, small mirrors and flexible cameras can give you a peek behind covers and narrow spaces, allowing you to spot issues before they grow.

Wrapping It Up
Regular plumbing inspections make RV living way less stressful, and you don’t need special tools or skills. The sooner you catch a leak or loose fitting, the less it’s going to cost you. Even if you only spend fifteen minutes each month checking things over, your RV will thank you with fewer problems and more time on the road.
Grab a flashlight, check every fitting, listen for weird pump sounds, and don’t ignore the little stuff. You’ll avoid stinky messes, sudden repairs, and a lot of headaches. If you’re unsure about a certain repair or spot a leak you can’t fix, reach out to a certified RV tech for help. There’s no shame in asking for backup, especially when it comes to protecting your home on wheels.
____________________________________________
For more practical RV tips and resources, click here.
Feel free to drop a question or a comment below before reading more articles on our site. I hope these steps help your RV adventures stay fun and leak-free!
If you’re interested in RV life and want to mix in some online work as you travel, there are tons of options to explore. Working from the road is a huge plus, making the travel dream more doable for many people.
Want help starting your own online business you can run from anywhere? I’m here to help you get a sense of how!

Drop any questions or concerns about your DIY RV electrical inspection in the comments.
_______________________________________________________
If you want a complete, detailed RV inspection checklist developed by me for the NRVIA, please visit this article, where you can download it for FREE. My RV inspection checklist is very detailed and is what is used by the professionals. If you need help understanding it, there is a source for that, too.
To learn more about me, click here.


Recent Comments