RV inspections are very useful whether you’re buying a new or used RV or prepping for the next road trip in your own. Even the most well-cared-for RVs have their little quirks and common problems.
I’ve seen plenty of those firsthand during my years checking out RVs for myself and clients. Catching these issues early can save some cash and steer clear of headaches later on.
Common Exterior RV Problems and Fixes
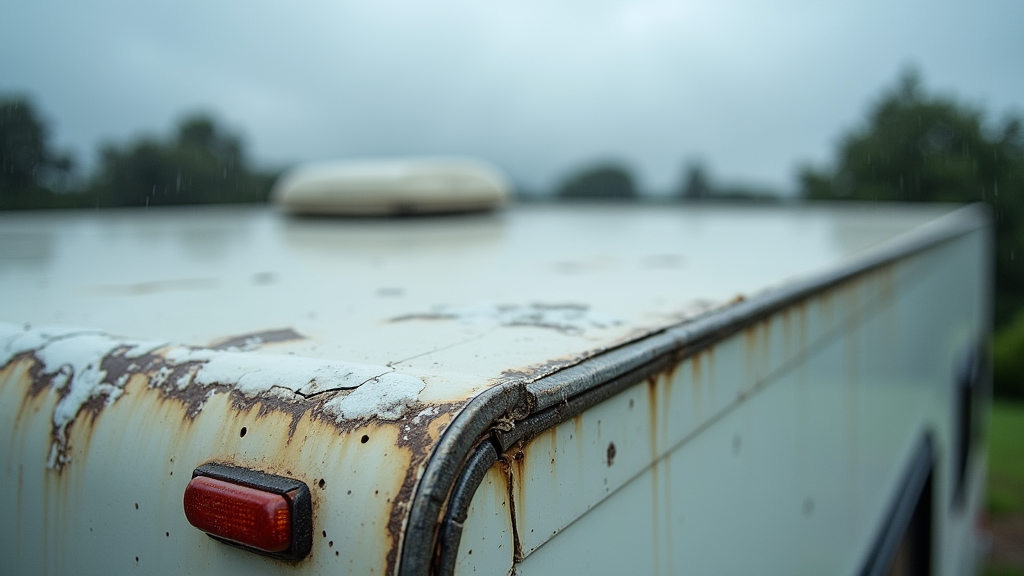
The outside of an RV takes a beating from the elements. Sun, wind, and rain all chip away at seams, seals, and surfaces. When I look over an RV, I check the roof first. Roof leaks are a classic problem.
Leaks usually start in roof vents, around AC units, along seams, or at the edges near gutters. Water sneaks in a little at a time until you notice a brown stain on the ceiling or find soft, soggy wall panels. That’s often a pretty clear sign of hidden water intrusion.
Fixing a leaky roof is manageable if you catch it quickly. I like to use a non-silicone RV sealant like Dicor or Eternabond tape (great stuff if appropriately applied) on seams and edges. These products stay flexible and won’t crack, which matters as your roof expands and contracts. For fiberglass or rubber roofs, cleaning and applying a UV protective roof coating, if required by the manufacturer, at least once a year, keeps things in good shape.
Examining the RVs Exterior Carefully is Paramount!
Another exterior problem is cracked or missing sealant around windows, lights, and storage hatches. If you see gaps or old, dried-out sealant peeling away, clear it off and run a fresh bead of RV-grade sealant. This stops water right where it wants to sneak in. Don’t forget to open every exterior compartment and check seals there, too.
Tires are a major concern. Old or weathered tires, even if they show lots of tread, aren’t trustworthy. I always check DOT codes to see how old the tires are. RV tires typically get replaced every five years, even if they appear fine.
Investing in new tires and carrying a portable air compressor is well worth it compared to dealing with a blowout on the highway. While inspecting, I look over the undercarriage for rust, loose bolts, or cracked welds, especially on older RVs. Catching frame rust early means you can handle it with a wire brush and spray on rust converter, rather than needing costly repairs later.
Exterior lights deserve attention as well. I go around and check every marker, brake, and turn signal. These are usually easy to fix, just swap out a unit or check for a loose connection. If any exterior power outlets or water inlets look corroded, replacing them is simple and can save you hassle when you need those connections at the campsite.
Interior Issues Found During RV Inspections
Once inside, I slow down and look for any signs of water damage. Sometimes all I notice is a slight wrinkle in the wall panel, a musty smell, or a soft feeling beneath my feet. These little signals usually mean a leak somewhere.
Catching these hints early can really help. I pull back window shades, open every cabinet, and check along the corners. Discoloration, swollen wood, or bubbling wallpaper are reliable giveaways.
If the slideouts are stubborn or don’t seal up tight, you can often fix this with lubrication or fresh weather seals. Make sure the slide seals are clean and still soft, not cracked or deformed. A dry silicone spray or a dusting of baby powder on the rubber helps keep them working smoothly and lasting longer.
Everything in This Section is Very Important!
Appliances must be checked as well. Run everything, turn on the air conditioner and furnace, try the microwave, fridge, and all outlets. If anything smells weird or fails to work, sometimes it’s a quick fix like a tripped breaker or blown fuse. Other times, if the fridge or water heater won’t run, it could mean a worn-out burner or a faulty circuit board that needs a pro’s touch.
The flooring in RVs can have issues, too. Vinyl or laminate strips peel or bubble if there’s leaked water. Soft spots in the floor are a red flag; the plywood beneath might need repair. With small soft spots, you might patch them from above or below, but larger areas often require professional help with some carpentry skills.
One last tip for the interior: check every window and roof vent. Do they open and close easily? Any condensation between the double panes? Foggy windows or those that won’t latch can sometimes be cleaned and re-lubed, but other times they need new hardware or seals, which you can track down by brand.
Plumbing Problems and Simple Solutions
Water leaks and plumbing concerns top my list of things to look for in any RV. Turn on every faucet and watch for drops in water pressure, slow drains, or drips. A leaky faucet or drip under the sink is often fixed by replacing an O-ring or adding plumber’s tape to the threads. If water is leaking in hidden areas, like under cabinets or behind walls, a moisture meter can spot it before it becomes a big repair headache.
RV water heaters have their own set of quirks. Mineral buildup or a worn anode rod can lead to poor hot water flow. I recommend draining and flushing the tank-type water heater once a season, and for Suburban water heaters, popping in a new anode rod if it looks rough. This step saves money and keeps hot water flowing every camping season.
Black and gray tanks are a frequent worry for RVers. Gauges can misread because of gunk or tissue stuck to the sensors. Tank treatment solutions, enzyme packets, or even a hose flush with a tank wand can clean sensors up.
Clogs in drains aren’t fun, but a flexible snake or holding tank cleaner tabs usually clear things out. The dump area valves need to move freely and shouldn’t leak. If you notice dripping, replacing a dump valve with basic tools is doable for most DIYers in an afternoon.
Electrical System Troubles and What You Can Do
I’ve come across plenty of electrical gremlins, especially with older RVs. The classic issue is a dead outlet or a light that only works sometimes. Usually, it’s an easy fix: reset the GFCI outlet first. If that doesn’t work, I’ll check fuses and breakers next. It’s always smart to carry spare fuses that match your setup. Swapping out a fuse is really quick once you know which circuit is faulty.
For 12V power issues, like lights, fans, or the water pump not working on the battery, it’s often just a loose ground wire or a tired battery. Make sure all connections are tight and clean. Adding dielectric grease to battery terminals keeps corrosion at bay and systems running better. If all else fails, qualified RV technicians have meters to track down more stubborn short circuits or wiring faults.
Always check the main power cord and plug; if it’s cracked, burnt, or frayed, it’s a hazard and should be replaced. Replacement cords are affordable, and having a good surge protector keeps your electrical system safer. Check the surge protector’s status; sometimes these will shut down power if they sense spikes or bad wiring at a campground, which guards your onboard electronics.
Converters and inverters can also act up, causing sluggish battery charging or dead AC outlets. If charging is slow, lights are dim, or outlets seem useless, sometimes a reset or easy fuse swap fixes things. In other cases, humming or clicking sounds may mean the unit is nearing the end of its life and needs expert help.
RV Furnace, Air Conditioning, and Ventilation Problems
Good climate control is crucial for comfortable trips, and RV HVAC systems develop problems over time. Clean the filters in both your AC and your furnace to start. Dirty filters block airflow and make both units work harder.
Rinsing with water and letting them dry is usually all it takes. If airflow is weak or the AC only puts out warm air, cleaning the coils and the fan with a vacuum brush often helps. Opening up the AC unit from inside is pretty simple, and dust bunnies can build up fast!
Furnaces may stop working if the sail switch sticks or there’s too much dust by the burner. Compressed air and a light shake out often clear this up. If the blower runs but no heat comes out, look for blown fuses or double-check the propane supply. Sometimes, all it takes is a new thermostat to get the heat running right.
Roof vents and fantastic fans can break with age. Sometimes the vent lid bends, the fan motor dies, or the crank handle breaks. Most replacement parts are standard and fairly cheap. Make sure your vent seals are soft and seal well to keep rain out. If you notice mold or excessive condensation, running the fan while cooking or showering helps keep your RV’s interior dry and fresh.
Frequently Asked Questions About RV Inspections
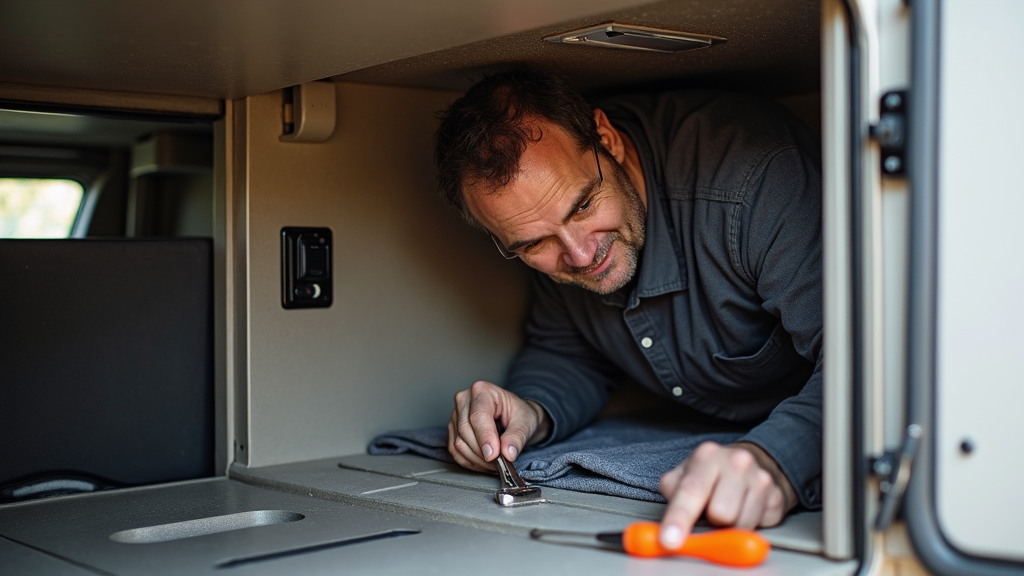
Here are some of the most common questions folks ask me, along with my quick answers:
Question: Is hiring a professional RV inspector a good idea?
Answer: For newer RVers, a professional brings plenty of experience and special tools; they often catch troubles that buyers miss. It’s a smart move when buying older, expensive, or unfamiliar rigs, especially before handing over any money.
Question: Can I do the RV inspection myself and save a lot of money?
Answer: For most seasoned RVers, purchasing a new or used RV, and with the proper checklist, a DIY RV inspection can be done by oneself. Check out this source!
Question: What makes for a solid home RV maintenance routine?
Answer: I clean, check, and reseal the roof yearly as needed, check all batteries regularly, look over water lines for leaks, and keep all moving parts lubed up. Small routines prevent many expensive issues down the road.
Question: Are there warning signs that make an RV a no-go?
Answer: Water stains, musty odors, floor soft spots, and rust on the frame always grab my attention. If a seller hurries you or insists you skip a detailed inspection, consider that a red flag.
Keeping Your RV In Shape For The Road
DIY RV inspections aren’t as overwhelming as they first seem. If you check each main system one after another, you’ll spot most issues before they can ruin a trip. I like to bring a notepad, snap plenty of photos, and ask lots of questions, especially when buying a new or used RV.
Watching for leaks, testing appliances, and ensuring all safety features work goes a long way toward making your RV journey hassle-free. Stay sharp and keep learning; every little check adds up to smoother trips, bigger savings, and more fun on the road.
__________________________________________________
If you’d like even more helpful tips on RV maintenance, check out my other posts here.
Feel free to drop your comments or share your own RV inspection experiences before exploring more of this site.
Happy trails, and keep having fun with your RV journeys!
__________________________________________________
Looking for more RV ownership ideas, or have questions about maintaining your RV? Head over to Your Full Time RV Living for extra tips, guides, and answers.
Pam and I are always happy to share what works. We hope your RV adventures are smooth and full of memories!
Drop any questions or concerns about your DIY RV inspection in the comments.
___________________________________________________
If you want a detailed RV inspection checklist developed by me for the NRVIA, please visit this article, where you can download it for FREE. My RV inspection checklist is very detailed and is what is used by the professionals. If you need help understanding it, there is a source for that, too.
To learn more about me, click here.







Recent Comments