
If you’re planning to hit the road in a new or used RV, doing a little DIY inspection before purchasing is a smart move before calling in an expert, which may cost you thousands. Handling some basic checks can help you dodge expensive surprise repairs and give you peace of mind for the trip ahead.
Doing your own inspection also saves time and could catch issues early on, so they can be fixed before they become expensive problems. Here’s how I handle a hands-on RV walkthrough, with tips and a checklist you can actually use.
Why DIY RV Inspections Matter
Checking your RV yourself really puts some confidence in your step. It isn’t just about saving a few bucks or skipping the mechanic. It’s about knowing your rig and catching common problems before they throw a wrench in your travel plans. Most people don’t realize how many little issues pop up just from sitting in storage for a while, or when purchasing a new or used RV.
Things like dead batteries, sneaky water leaks, or loose electrical connections can fly under the radar until you’re already rolling down the highway. Inspections help you spot these issues early, so you enjoy the ride without worrying about last-minute breakdowns.
The RV market keeps booming, and new owners join the ranks each year. More RVers are recognizing the perks of learning some basics about their rigs. Even if you don’t call yourself handy, simple checks like testing your lights, looking for leaks, or giving tires a quick look-over really help.
Plus, when you do the inspection yourself, it makes talking to professional technicians easier down the line if you ever need help. You’ll already know the basics of what’s normal and what needs attention.
If you’re new to RV life or just starting out, it’s a great idea to do a walkthrough before every longer trip. Make these inspections a habit. Before long, they’ll feel like second nature, and you might even be the friend everyone turns to for RV advice.
Your Step-by-Step DIY RV Inspection Checklist
Doing your own RV inspection isn’t as overwhelming as it sounds. It’s just about tackling things one section at a time. Here’s a practical checklist I follow:
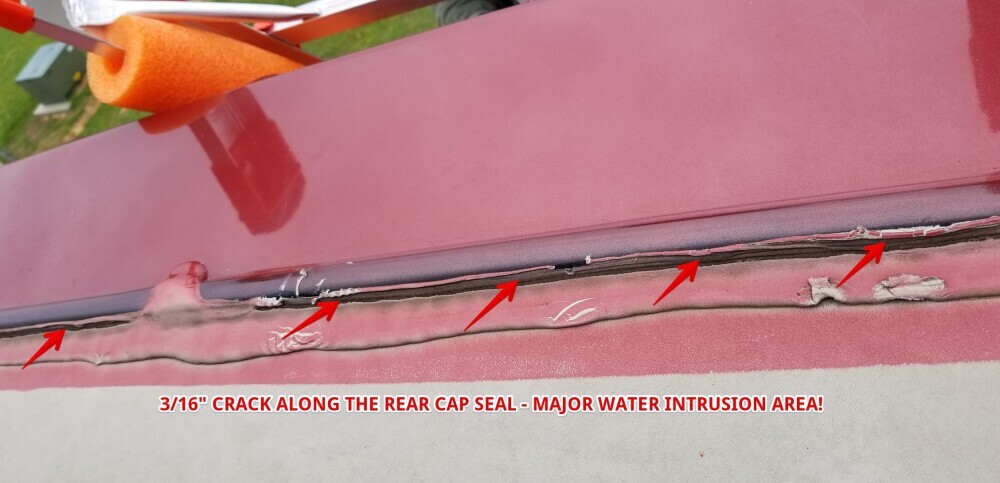
- Exterior and Roof: Walk around the outside to check for any visible damage, cracks, or loose trim. Use a ladder for the roof and check seams, seals, or standing water. Look for cracked vents, skylights, or other non-performing roof items.
- Windows and Doors: Make sure all latches, locks, and screens are working right. Open and close each window and door, noting any sticking or odd noises.
- Tires and Wheels: Look for cracks, thinning tread, or bulges. Use a tire gauge to confirm pressures. Don’t forget the spare tire. Check the tire’s age by looking at the DOT date code.
- Batteries and Power Connections: Open the battery compartment and check for corrosion or residue. Check connections and double-check that your shore power is secure. Be sure the batteries are holding a charge and perform under load.
- Propane System: Open up the propane locker and check for odd odors. Twist valves open and shut to check for smooth movement, and look over hoses and regulators for any signs of wear or age. A professional would also perform a leak test on the propane system.
- Plumbing: Check beneath sinks and around the water pump for leaks. Run water through and drain the tanks to make sure nothing’s clogged or leaking.
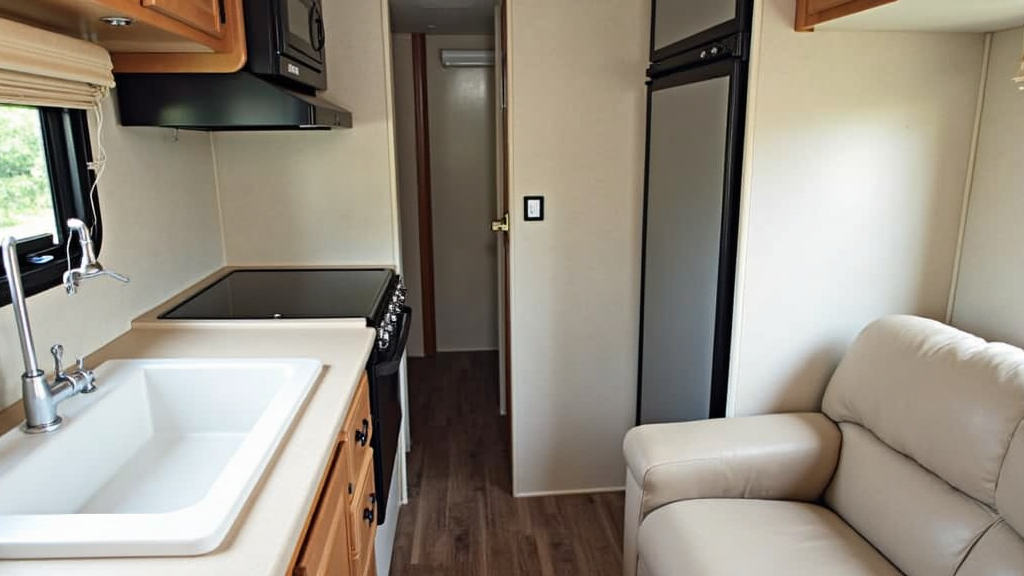
- Interior Appliances and Systems: Test the fridge, stove, lights, and fans. Flip all breaker switches and test each appliance. If something’s not working, you might just have a tripped circuit or a blown fuse.
- Safety Devices: Check your smoke detector, carbon monoxide alarm, and fire extinguisher. Replace batteries or recharge anything that needs a boost. These checks bring a huge sense of relief.
If you are feeling overwhelmed by this list, don’t fear! Read on, and I will help you through the specifics of the inspection process. I have an RV inspection checklist for you to use.
Also, don’t stress about checking everything in one go. Some owners split up the list one day on the exterior, another on the inside. This breaks the job into smaller pieces and keeps the process from feeling like a massive chore.
Common DIY Inspection Issues and Troubleshooting
RVs pack in tons of moving parts, so little things can crop up even when you think all’s well. These are some of the most common trouble spots I find during my inspections:
- Tire Trouble: Low pressure or old rubber gets overlooked. Always check tire sidewall dates, and replace any tires over five or six years old, even if the tread seems fine. You will know their age by looking for the DOT date code.
- Leaky Seals and Roof Cracks: Tiny cracks let water in, especially near roof vents or fixtures. It is recommended that leaking seals be touched up with RV-approved sealant for an easy patch.
- Dead Batteries: Batteries lose charge if left unused. Test voltage with a multimeter and test the batteries under load (run components inside the RV). Corroded posts mean it’s time for cleanup or a replacement.
- Loose Connections: After bumpy trips, fasteners can work themselves loose. Give cabinets, furniture, and even wall panels a quick wiggle.
- Electrical Surprises: Outlets and lights stop working due to blown fuses or loose wiring. Check both the 12-volt and 120-volt electrical systems.
If you hit a problem, jot down the details for a pro to resolve. Logging issues in a notebook or phone is super handy and can help you spot repeating problems or make your mechanic’s life much easier.
Helpful Tools and Supplies for the DIY RVer
A solid toolkit tackles most jobs for an RV inspection. Here’s my go-to list:
- Flashlight or Headlamp: Crucial for peering under cabinets and into deep storage spots, especially at night.
- Ladder: A reliable ladder is key for roof checks, just be sure it’s steady and weight-rated for you. Also, protect the RV when placing a ladder against the painted surfaces.
- Basic Hand Tools: Screwdrivers to remove items to be checked
- Tire Gauge: to check tire pressure against the manufacturer’s recommended pressure setting.
- Voltage Meter or Multimeter: Use this to check batteries, diagnose outlet issues, and catch wiring hiccups.
- Gloves and Eye Protection: Protect your hands and eyes, especially when checking batteries or the propane system.
These tools aren’t pricey. You can pick them up at hardware shops, RV stores, or order online. Once you’re comfortable, add specialty tools for more involved projects as you build DIY confidence.
Advanced DIY Tips and When To Call a Professional
As you get more comfortable, you can try testing extra systems or handling routine upkeep tasks yourself. For example, draining your water heater, cleaning the AC unit, or checking the slideout mechanisms.
Tons of online resources break down these projects, search for RV maintenance videos or guides to build your skills. Often, teaming up with a more experienced RVer makes tougher tasks less nerve-wracking and even a bit fun.
Certain problems are best left to the experts, though. If you notice soft flooring, rust on the frame, or catch a whiff of propane, don’t hesitate to call a pro. Electrical problems behind the breaker panel or engine oddities are other times when stepping aside is the safe move. Tackling these without proper know-how can do more harm than good and could even be risky.
When you’re working with a warranty, bringing in a certified technician is the way to go to keep your coverage intact. Keeping a log of your DIY checks can help your tech pinpoint trouble faster and may speed up appointments, too. This way, you also get peace of mind knowing you’ve covered your bases before calling in help.
Practical Examples: DIY Inspection Wins
When I was new to RV living, skipping a check on a roof vent seal led to a soaked ceiling when surprise thunderstorms hit. Thankfully, the leak was small; some quick sealant saved me a much bigger headache. Another time, my tire pressure check almost saved the trip before it began a nearly flat tire could’ve been a disaster on the highway, but a fast fix got me safely on my way.
Little wins like these happen every season, and I’m not alone. A friend caught a dying battery by measuring the voltage, not by noticing a lukewarm fridge later. Simple routines and basic tools stack up to big savings and fewer roadside headaches. Regular inspections don’t just prevent disasters; they make owning and maintaining your rig rewarding.
- Roof Seal: Spotted tiny cracks around roof vents, patched up with sealant in 15 minutes or less.
- Tire Lifespan: Double-checking tire dates rather than just tread condition can prevent blowouts because old tires can look perfectly fine on the outside.
- Stovetop Gas Leak: Noticed a faint propane smell, then fixed a loose connection with a quick wrench adjustment before it became a big problem.
- Hidden Dampness: Found early by shining a flashlight under the sink—catching it before mold took hold or wood warped.
Frequently Asked Questions
How often should I do a DIY RV inspection?
When buying a new or used RV, if you use your RV seasonally, aim for a major inspection before long trips and a quick walkaround before every outing. Full-timers often check things monthly.
What if I find a leak or a problem I can’t tackle?
Make a checklist with notes about the location and symptoms, then reach out to a local RV service shop or mobile RV technician. Providing lots of detail means faster help and better repairs.
Is it safe to do all parts of the inspection myself?
Stick with what you’re comfortable with: battery checks, plumbing, and visible issues. For propane and deep electrical tasks, it’s best to ask a pro. But the material I generated for teaching inspectors for the NRVIA may help you.
Final Pointers
DIY RV inspections are a straightforward way to keep your travel safe and stress-free. All you need is a bit of time, a checklist, and some basic tools. Please don’t purchase a new or used RV without inspecting it! You can do it!

Drop any questions or concerns about your DIY RV inspection in the comments.
_______________________________________________________
If you want a detailed RV inspection checklist developed by me for the NRVIA, please visit this article, where you can download it for FREE. My RV inspection checklist is very detailed and is what is used by the professionals. If you need help understanding it, there is a source for that, too.
To learn more about me, click here.


Recent Comments