
The best microphone and lighting setup for RV video calls starts with sound, then light, then camera. A close, directional microphone, a soft light in front of your face, and a webcam at eye level will make a small rig look professional on a client call without using much power or taking up much desk space.
What matters most on an RV video call: sound, light, or camera?
Sound matters most, light is second, and the camera comes last. People tolerate a soft or slightly grainy picture, but they stop listening when your voice is thin, echoing, or full of fan noise. A client who can’t understand you will remember that, not your resolution.
Light comes next because it does more for the picture than any camera upgrade. A cheap webcam with good light on your face beats an expensive camera in a dim nook. Light also fixes the problem RVs create most often: a bright window behind you that turns you into a silhouette.
The camera is last because the one you already have is usually good enough once the first two are handled. A laptop webcam has a small sensor and struggles in mixed light, so it may eventually deserve an upgrade. Fix the cheaper, higher-impact problems first.
This guide judges each choice by one test: how it performs on a client call from a campsite, with limited power, a narrow desk, and windows on every side.
Which microphone type works best in a small RV?
A directional microphone used close to your mouth works best, because it picks up your voice and rejects most of the room. In a small RV, you can’t control the room, so you control the distance instead. A microphone a hand’s span from your mouth hears you far louder than it hears the refrigerator, the furnace, or the neighbor’s generator.
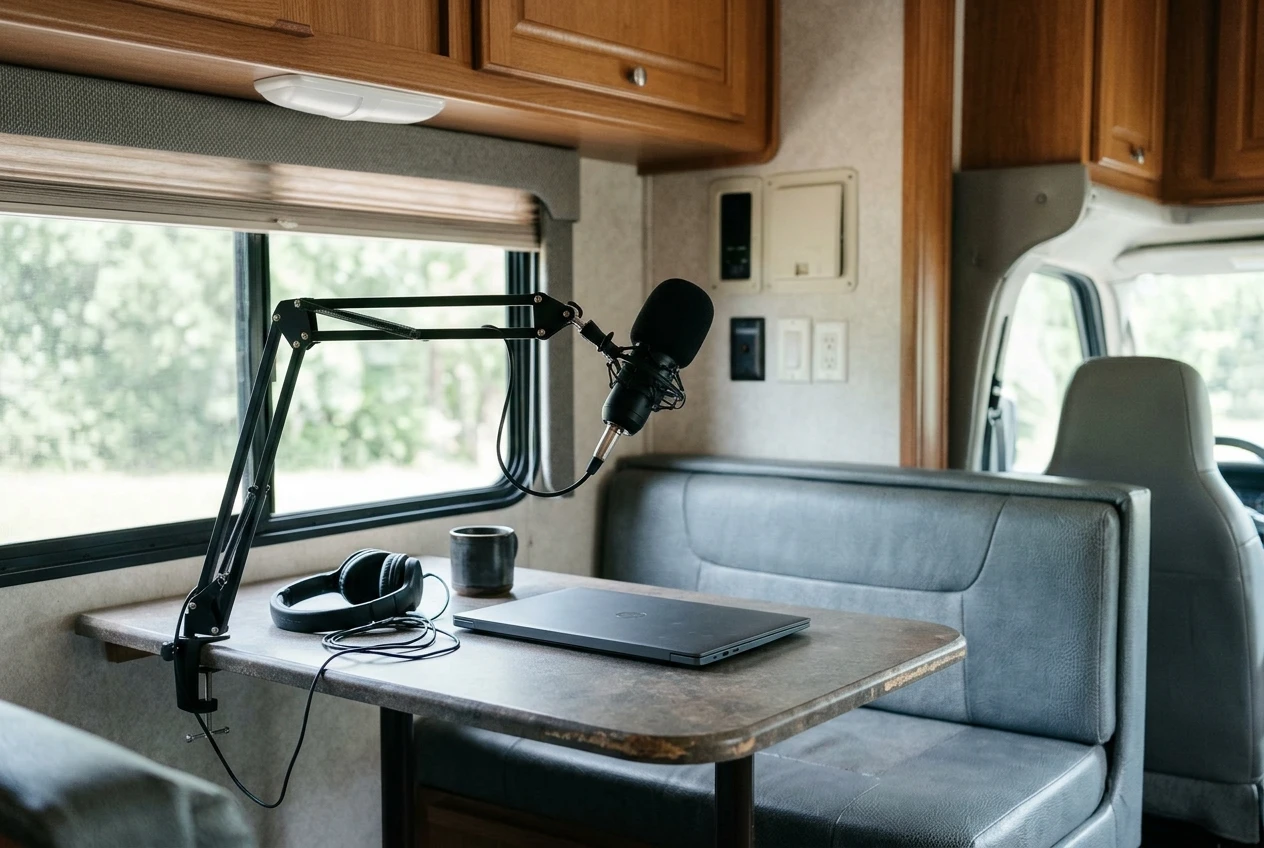
Here is how the common types compare for a rig like this.
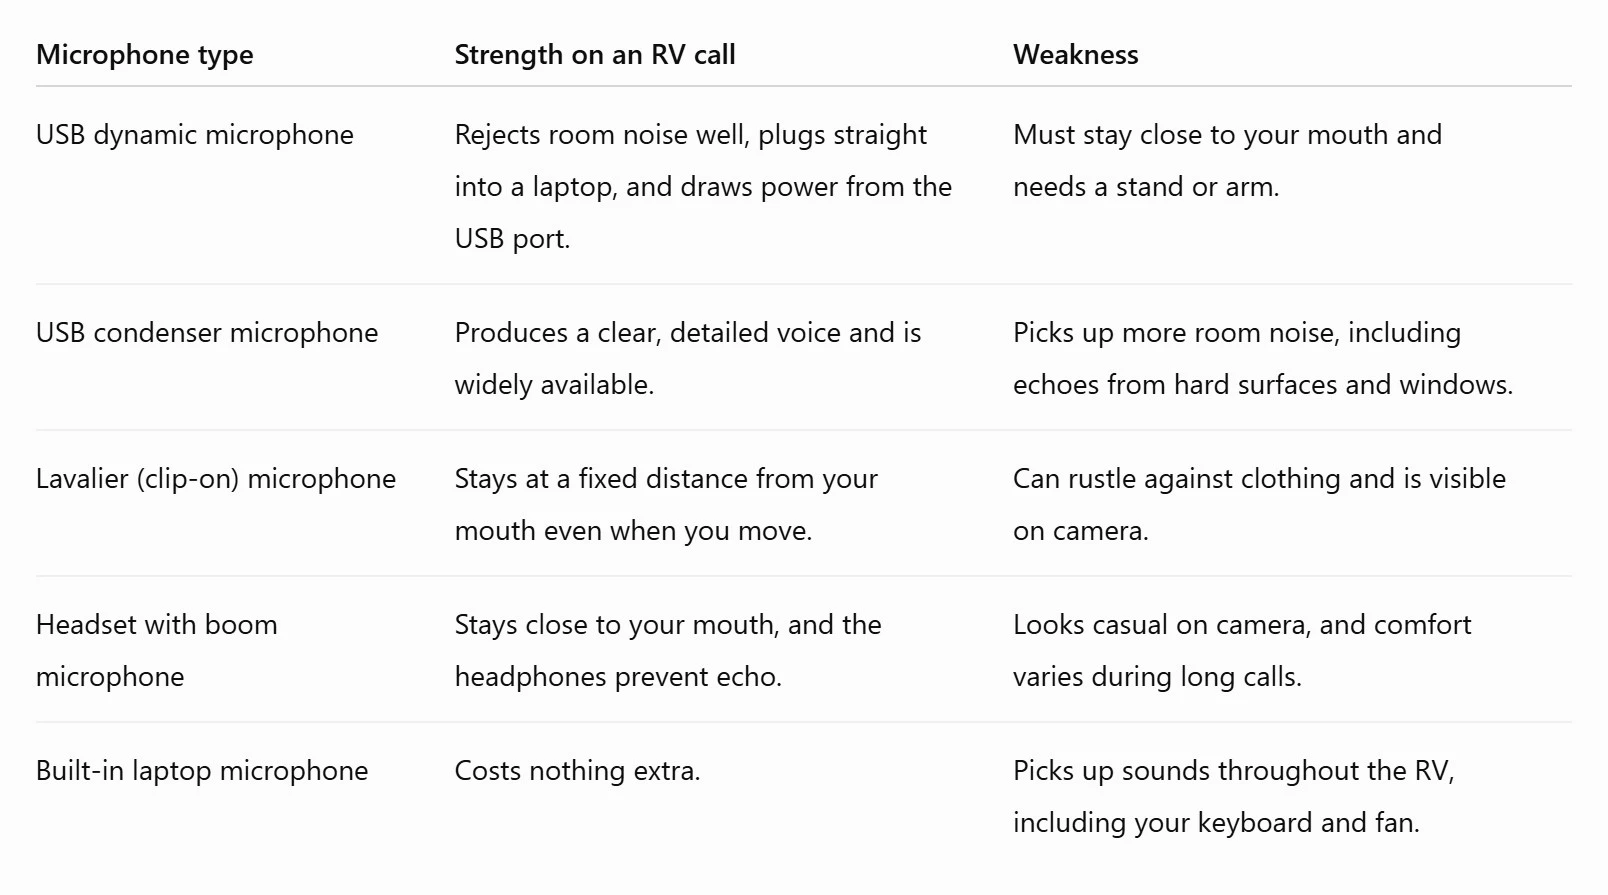
For most working RVers, a USB dynamic microphone on a small desk arm is the safest first choice. It needs no audio interface, adds almost nothing to your power load, and tolerates a noisy space better than a condenser does. If you take many calls while walking around or standing at a counter, a lavalier is the practical alternative.
Whichever you pick, wear headphones. If the other person’s voice plays through laptop speakers, your microphone picks it up and sends it back as echo. Wired headphones are the simplest option because they have no battery to die mid-meeting.
How do you light your face when the RV has windows everywhere?
Face a window, never sit with one behind you. Light coming from in front of you, spread evenly across your face, is the most flattering and the easiest for any camera to handle. A window behind your head makes the camera expose for the bright glass and leaves your face dark.
I use this light when these ideas do not solve the issue. It provides a highly adjustable light style and brightness level.
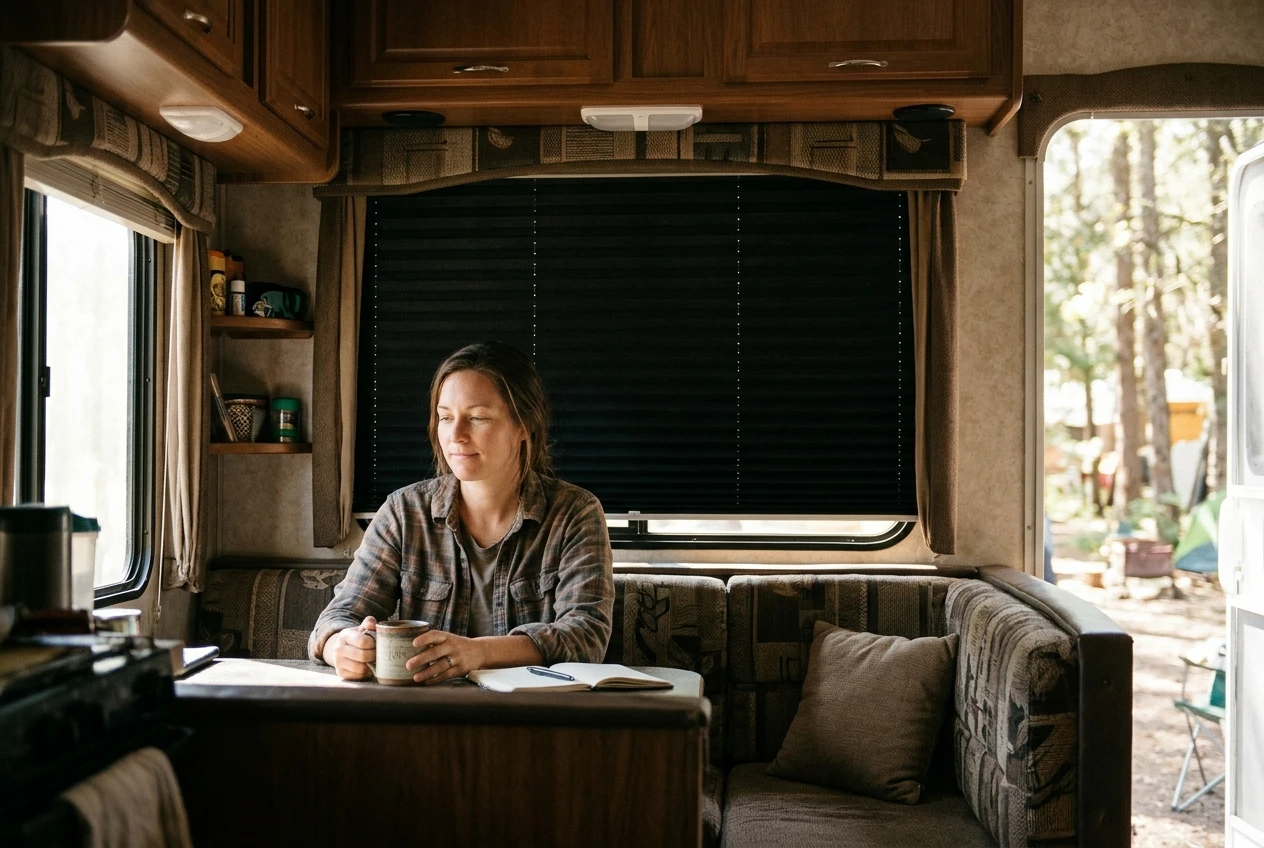
If your desk can only face one direction, you have two practical fixes:
- Turn the desk or the chair. Even a quarter turn can move the main window from behind you to beside you.
- Cover the window behind you. A blackout shade or a piece of reflective sunshade material cut to fit stops the glare.
Side windows deserve attention too. Light from one side makes half your face bright and the other half dark. Cover the window on one side with a sheer curtain or a shade, and your key light will have no competition.
Daylight at a campsite changes quickly. Clouds, tree shade, and the angle of the sun can all shift in the middle of a meeting. That is the strongest argument for using a real light even when the RV looks bright. A steady light of your own keeps your face looking the same at 10 a.m. and at 3 p.m., and you can close the shades and stop depending on the weather.
What lighting gear fits a small RV desk and a tight power budget?
A small, dimmable LED panel on a desk stand is the best fit. LED lights produce a lot of light for the electricity they use, and a small panel draws far less than a space heater, a toaster, or a microwave. Check the wattage printed on the light or its power adapter, then compare it with what your battery system or inverter can supply.
Look for these features:
- Adjustable brightness. You will want a low setting in the evening and a higher one on a cloudy afternoon.
- Adjustable color temperature. Being able to match the cool or warm tone of the room keeps your skin looking natural.
- A diffuser or soft panel. Bare LED points create harsh shadows. A diffused surface spreads the light evenly across your face.
- USB or low-voltage power. A light that runs from a USB power bank or a 12-volt source can stay on during a call even when you are not plugged into shore power.
- A small footprint. A clamp or a short stand keeps it off the work surface.
If you work on batteries or a portable power station, add up everything that stays on during a call: laptop, router, light, and any monitor. The Hub’s piece on choosing a portable power station for working off grid covers how to size that load. Run the light at moderate brightness rather than full, since face lighting rarely needs maximum output.
How should you position the mic, light, and camera in a cramped nook?
Put the camera at eye level, the light slightly above and to one side of it, and the microphone just below the frame. This arrangement works on a narrow dinette or a fold-out desk because every piece sits within arm’s reach.
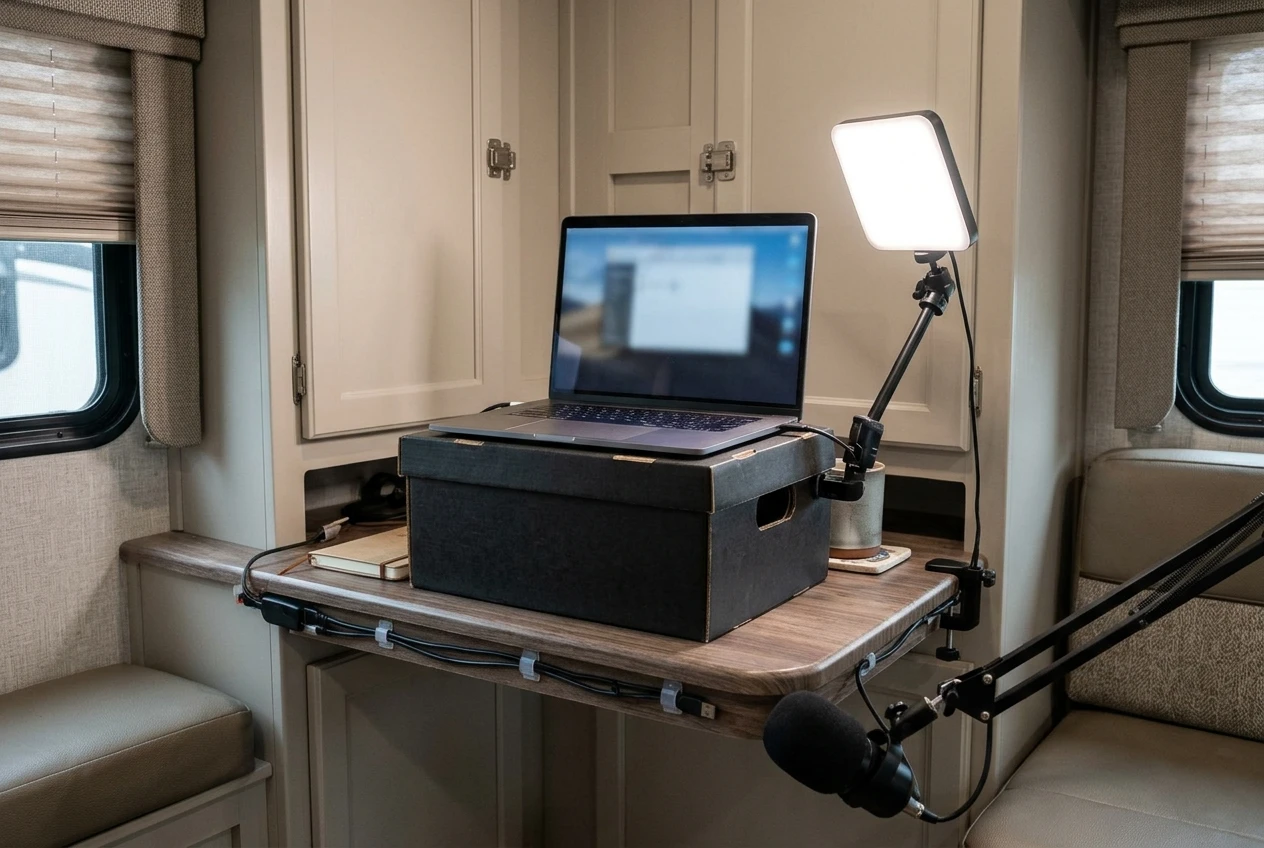
Use this order when you set up:
- Place the camera first. Raise the laptop or webcam until the lens is level with your eyes. A laptop sitting flat on a table points up your nose, so stack it on a sturdy box or a stand.
- Position the light next. Put it about 45 degrees to one side of the camera, a little above eye level, and angled down toward your face. Both of your eyes should have a small bright reflection.
- Set the microphone last. Place it close to your mouth but outside the picture. A desk arm lets you swing it away when you aren’t on a call, which keeps the table clear in a small space.
- Check the frame. Leave a little room above your head and avoid leaving the microphone or the light in the shot.
Keep cables short and tape or clip them down. In an RV, a dangling cable gets caught on elbows and knocks gear over, and a bump on the mic stand is loud on the other end of the call.
How do you set up the background so it does not say campground?
Choose the plainest, tidiest surface behind you and point the camera at it. A cabinet door, a wall panel, or a closed curtain looks calm on camera. A window showing a view of trees or a neighbor’s rig pulls attention away from you, and it brings back the glare problem.
A few adjustments help:
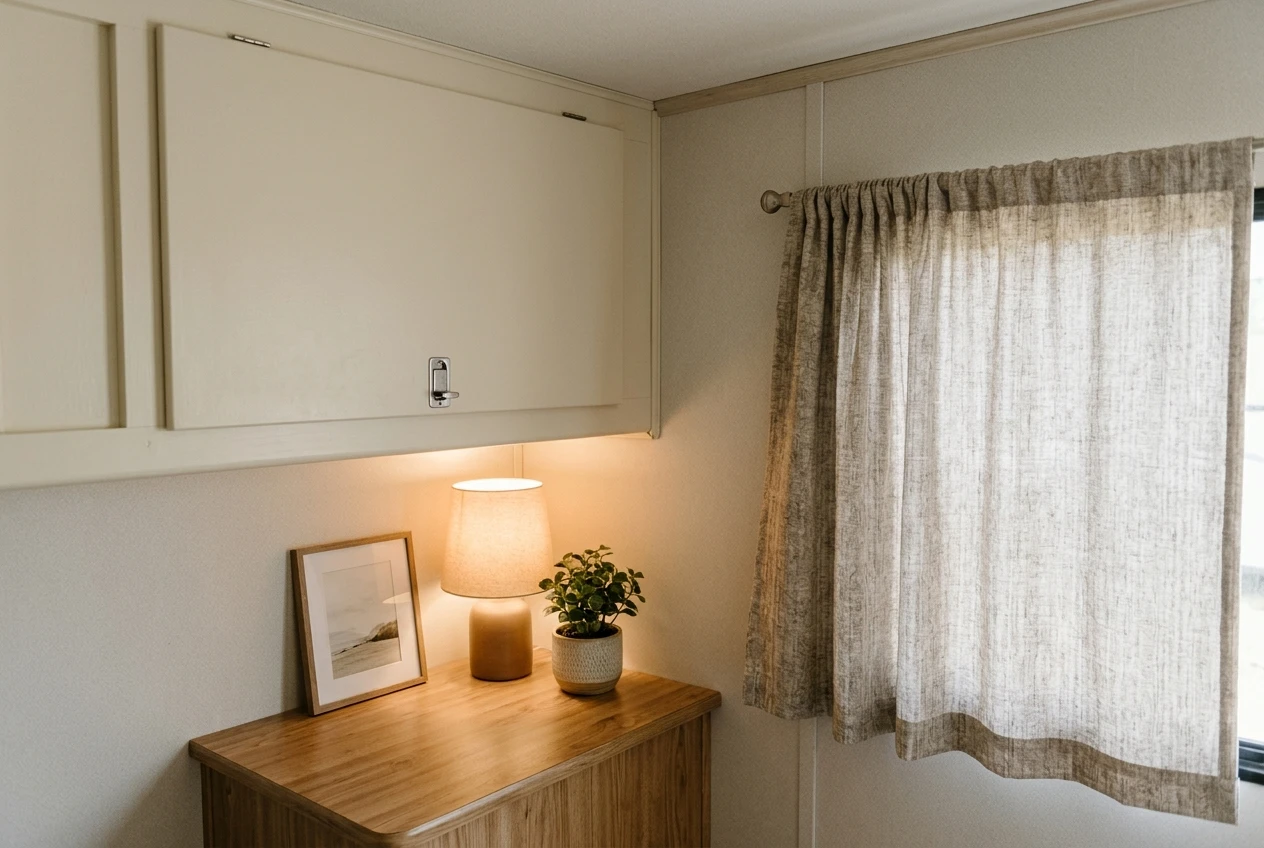
- Cover the window behind you. A neutral shade or curtain removes the campground from the shot and fixes exposure at once.
- Hide the RV hardware. Thermostats, fire extinguishers, vents, bunk beds, and stacked supplies all signal “camper” at a glance. Move the camera angle a few degrees or clear the shelf.
- Add one or two deliberate items. A plant, a framed print, or a small lamp gives the background some depth. Keep it to a few things that look intentional.
- Keep it consistent. Use the same corner and angle every time, so clients see the same office each call.
Blurring or replacing the background in the software is a fallback for days when you can’t change the space. A real, tidy background looks better, because software edges flicker around hair and moving hands. If you do use blur, apply it after your lighting is set, since a well-lit face gives the software cleaner edges to work with.
What should you test before every important call?
Run a short recording through the same app you will use for the call, then watch and listen to it. A few minutes of checking prevents most on-call surprises, and a quick routine is easy to repeat at every campsite.
Use this checklist:
- Record 30 seconds of yourself talking. Play it back with headphones and listen for hum, echo, clipped loud words, and background noise.
- Check what the microphone hears in silence. If you can hear the furnace, a fan, or the refrigerator cycling, turn it off or schedule the call around it.
- Look at your face, not the room. You should see even light, with no dark side and no glare off your glasses.
- Close the shades that matter. Do this at the time of the call, because the sun’s position will have changed since morning.
- Confirm the right devices are selected. Apps sometimes switch to the built-in microphone or camera after an update or after you unplug a cable.
- Check your power. Make sure the laptop, the light, and any battery-powered gear will last through the whole meeting, plus extra time for overruns.
- Silence notifications and your phone. A chime during a client call is audible and distracting.
Also look at the connection itself. A great picture and clear audio still break up on a weak signal, so check your internet before you join, not after.
What is the smartest order to buy this gear in?
Buy in the same order as the priorities: audio first, light second, camera third, and background touches last. Each step improves the call noticeably, and you can stop at any point and still look better than you did before.
- Wired headphones. They are inexpensive and stop echo straight away.
- A USB dynamic microphone with a desk arm. This gives you the largest single improvement in how professional you sound.
- A dimmable LED panel with a diffuser. It gives you consistent light, no matter what the windows are doing.
- Window coverings for the glass behind and beside you. Sunshade material or a simple shade costs little and makes the light controllable.
- An external webcam, or a better camera position. Do this only if the picture still looks soft after the light is fixed.
- Background details. A plant or a small lamp comes last, because it only matters once everything else works.
Before buying anything, check how each item connects and what it draws. USB gear that runs from your laptop is the easiest to power in a small RV, and anything that needs its own adapter should be compared against your available power before it goes in the cart.





Recent Comments