
Keeping your RV’s electrical system in good shape is really important for comfort and safety on the road. Whether you’re boondocking in the wild or staying at a busy campground, a well-maintained electrical system makes a huge difference.
I put together this step-by-step guide to help you check over your RV’s electrical system even if you’re not an electrician. You’ll find it’s a pretty approachable process once you know what to look for.
Why RV Electrical System Checks Matter
Your RV’s electrical system is the heart of everything that helps you feel at home while traveling. It powers your lights, fridge, AC, phone chargers, entertainment gear, and more. A problem with the electrical setup can turn a relaxing trip into a stressful experience. Flickering lights, tripped breakers, strange smells, or dead outlets are signs you can’t ignore.
The electrical system in most RVs has gotten a lot better over the years, with more modern rigs using advanced control boards, solar inverters, and smart panels. But all those gadgets also make things a bit more complicated. A thorough inspection isn’t just for older campers. Newer RVs benefit too, especially if you notice odd behavior or after you add upgrades like solar panels or a new inverter.
If you’re new to RVing, understanding the basics helps a lot. There are two main power systems: DC power (usually 12V) that runs lights and water pumps, and AC power (120V, like at home) for big stuff like microwaves and air conditioners. Keeping both in check lowers the chance of sudden surprises. Checking things the right way keeps your adventures on track and helps you spot little problems early, before they turn into costly repairs.
Getting Ready For An RV Electrical Inspection
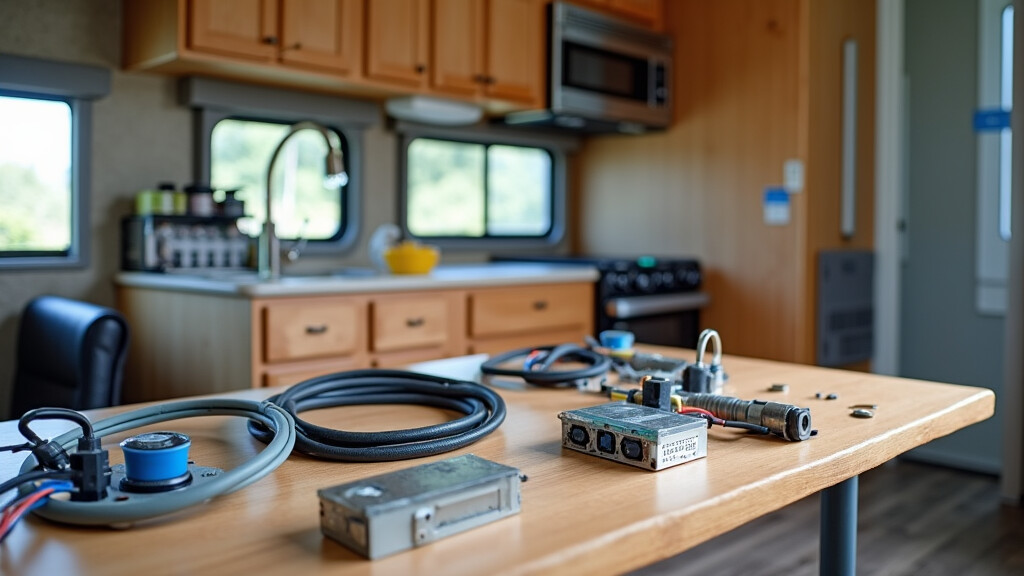
You don’t need lots of fancy tools for a basic RV electrical check, but a few things make it much easier. Here’s what I use for each checkup:
- Multimeter: A handheld meter is super useful for testing voltage and checking for wiring issues.
- Noncontact Voltage Tester: A quick way to see if an outlet or wire is live, so you don’t get surprised.
- Flashlight: Crawl spaces and electrical panels aren’t always well lit, so having a reliable light saves a ton of time.
- Insulated Screwdriver: For tightening loose terminals or removing panel covers safely.
- Safety Gloves: Thick gloves add an extra layer when poking around live wires. It’s always best to deactivate the 120V and 12V systems when working in the distribution panel.
Always turn off shore power or disconnect the batteries before you start digging into wiring. If you’re working on the AC system, unplug your RV from the power pedestal. For DC work, disconnect the battery ground cable.
If you’re not sure, playing it safe is the best choice. There’s no harm in double-checking with a noncontact voltage tester. Safety first means you’re around to enjoy the next trip.
Step-by-Step Inspection: What To Check and How
Covering the basics each time makes a difference. Here’s how I walk through the inspection so nothing gets missed.
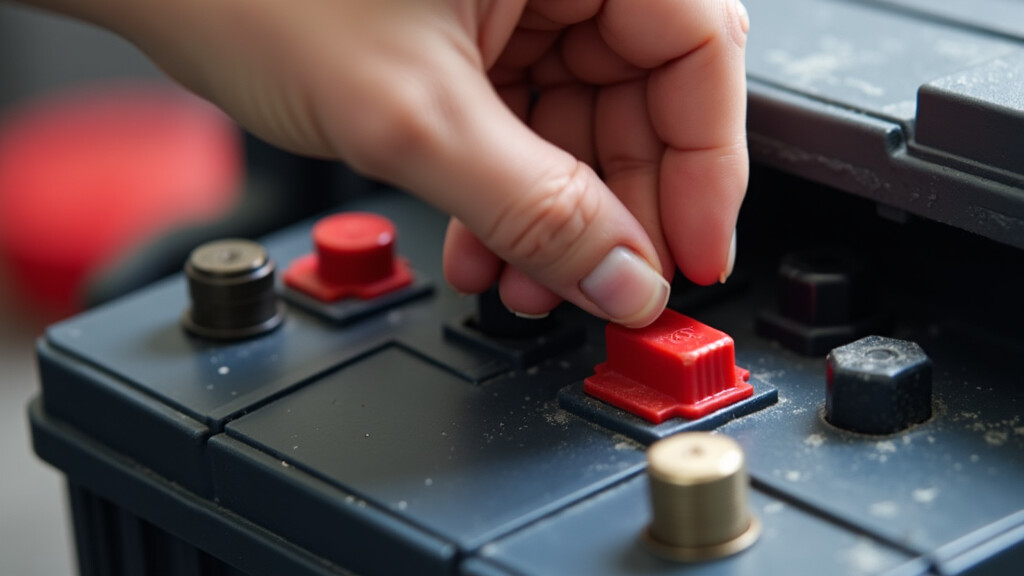
- Batteries and Connections: Start at the battery bank. Look for corrosion on the terminals, loose connections, or swelling in the battery cases. Clean connections with a brush and tighten as needed. A multimeter can check voltage; healthy 12V batteries at rest should read around 12.6V. If it’s much lower, charging or possible replacement might be needed.
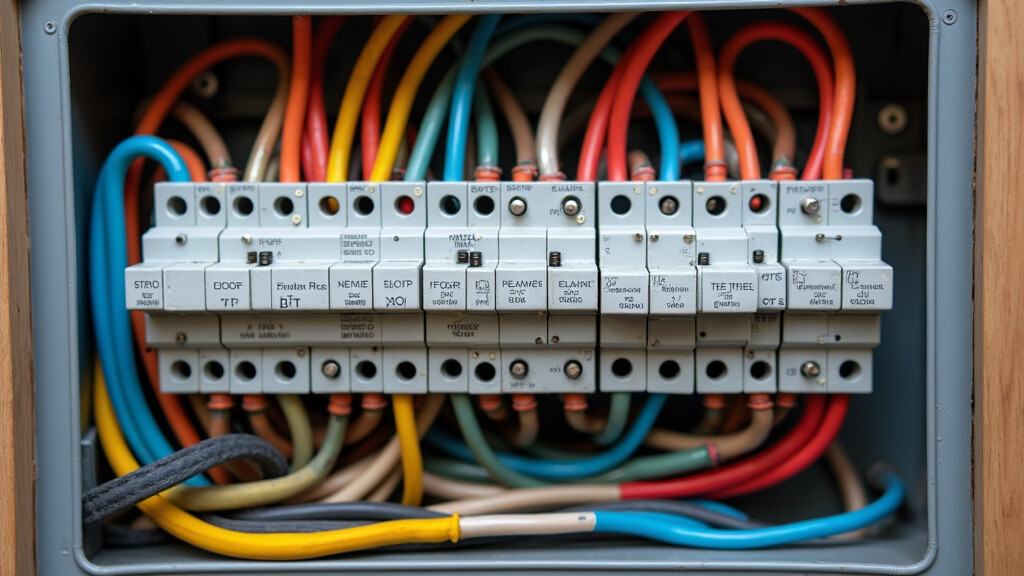
- Fuses and Breakers: Open the fuse box and breaker panel. Look for blown fuses or tripped breakers. Reset breakers by flipping them fully off, then back on. If fuses keep blowing, something in that circuit needs more digging.
- DC System Lights and Appliances: Turn on all lights, fans, and 12V appliances one by one. Dim or flickering lights might point to weak batteries or shaky wiring. Listen for weak water pumps or sluggish slideouts, too.
- AC Outlets and Appliances: Plug a small lamp or outlet tester into every AC outlet. Any that don’t work should be noted for closer inspection. Check major appliances like the microwave, air conditioner, and TV for proper operation. Unusual noises or burning smells mean it’s time to shut things down and call a pro.
- Power Cords and Plugs: Inspect your power cord (shoreline) for cracks, burn marks, or kinks. Look at the plug ends; they should not be discolored or melted. That’s a sign of overheating, which can be a fire risk.
- Converter and Inverter: Listen for odd humming or clicks, check for overheating, and make sure the cooling fan runs. Use your multimeter to check for proper output: the converter should deliver around 13.6V when charging.
- Solar and Generator (if you have them): Check solar charge controllers for errors, inspect all visible wiring, and listen for weird noises from the generator. Make sure your solar panel mounts are secure and clean the glass to boost efficiency.
Challenges and Tips For Troubleshooting RV Electrical Issues
Even after a good check, things happen on the road. These are a few problems I’ve run into, plus how I handled them.
- Batteries Draining Too Fast: Double-check for phantom loads like a forgotten cargo bin light or a fridge set on max. Sometimes, a weak battery can bring the whole system to a halt. Testing each battery separately can help spot the culprit.
- Flickering or Dead Lights: Corroded ground wires are a common cause of this issue. Clean up the ground connections at the frame or RV junction box. Swapping the bulb or fixture can also solve the problem.
- Outlets Not Working When Plugged In: If only some outlets work, check for a tripped GFCI outlet. Many RVs have hidden GFCIs that control several outlets. Hit the reset button and see if things come to life. Good RV manufacturers label GFCI outlets with a label.
- Shore Power Tripping: If plugging into a campground keeps tripping their breaker or yours, lower your power draw. Switch off the AC or other big appliances and try again. Sometimes using a surge protector helps protect your gear from power surges or bad campground wiring.
Writing down what’s wrong, rather than trying everything at once, helps you troubleshoot methodically. If you get stuck, RV forums like IRV2 or r/RV on Reddit have helpful folks who’ve seen just about every electrical problem known to RVers. And some fixes are as easy as tightening a screw!
Tools and Upgrades Worth Considering
A few extra gadgets can make life a lot simpler when you’re out camping. I’ve found these upgrades and add-ons especially useful:
- Surge Protector: Plug this in at every campground hookup to guard your RV’s electrical system from voltage spikes or power drops.
- Bluetooth Battery Monitor: Lets you keep tabs on your battery health using your phone, so you can spot problems early.
- Solar Panels: Even a portable foldout solar kit helps keep your batteries charged without running the generator.
- LED Bulbs: Replace all your old RV bulbs with LEDs to conserve battery power and enjoy brighter lights.
- Spare Fuses and Small Parts: A kit with spare fuses, connectors, and ring terminals is super handy when you need a fix in the middle of nowhere.
Upgrading small things, such as switching to USB outlets or adding a portable jump starter, takes just a little time but adds tremendous peace of mind. If you’re comfortable with simple wiring, installing a hardwired surge protector or a battery cutoff switch gives you even more control over your rig’s power.
Frequently Asked Questions
I receive many questions about working on RV electrical systems. Here are the ones that come up most:
Question: How often should I inspect my RV electrical system?
Answer: A thorough inspection twice each year is a good habit; usually at the start and end of camping season. I also recommend checking things anytime you notice a weird electrical issue.
Question: Can I do repairs myself, or do I need a pro?
Answer: Swapping fuses, checking outlets, or cleaning up terminals are safe projects for most folks. If you need to mess with wiring, suspect a major short, or smell burning electrical, call a mobile RV tech or take your rig to a shop.
Question: Should I upgrade my battery system?
Answer: If you do lots of off-grid camping, lithium batteries and a good solar setup are worth checking out. For weekend warriors, basic lead-acid batteries get the job done, but always keep them charged and topped off.
Question: Why does my converter fan keep running?
Answer: If your converter fan runs a lot, it might be struggling to keep up, or your batteries are drawing a heavy load. Make sure the area around it isn’t blocked and think about upgrading if it feels warm to the touch.
Real-World Uses and When To Seek Help
Every RVer will face a random electrical mystery at one point or another. I remember one trip where suddenly every outlet quit mid-breakfast. Turned out that one tripped GFCI outlet was the root of the problem. Another time, a faint smell led to catching a burnt wire behind the panel before it could do big damage. Catching these early saved both money and hassle.
There’s no need to get overwhelmed. Start small with the easy stuff. Just opening the panel or checking outlet voltage gives you a starting point. But if you hear crackling, see charred wiring, or notice burning smells, hit pause immediately. Unplug from shore power and disconnect your batteries. These are moments when calling a certified RV technician is the smart move. It costs less than a new RV and keeps you and everyone else safer.
Building Confidence Through Regular Checks
Staying on top of your RV’s electrical system gives you more freedom to roam. It saves you money, reduces stress, and helps avoid being stranded in a power outage or a remote spot. Regular inspections, little upgrades, and knowing when to ask for help build both peace of mind and technical confidence. Give your RV’s electrical system some attention before each major trip, and you’ll enjoy more adventures without unexpected interruptions.
Want more RV survival tips and electrical know-how? Check out my other guides here. Feel free to leave your questions, tips, or troubleshooting stories in the comments. I always enjoy hearing from fellow road warriors!
 ,
,
With a bit of practice and a simple toolkit, you’ll be troubleshooting your RV’s electrical system like a pro, leaving more time to focus on fun and adventure during every ride! Also, don’t forget to bring some extra cables and connectors, as tiny fixes can save a trip from turning sour. Keep your curiosity alive and continue to check those systems; your RV (and your fellow travelers) will thank you for it.
Drop any questions or concerns about your DIY RV electrical inspection in the comments.
_______________________________________________________
If you want a complete, detailed RV inspection checklist developed by me for the NRVIA, please visit this article, where you can download it for FREE. My RV inspection checklist is very detailed and is what is used by the professionals. If you need help understanding it, there is a source for that, too.
To learn more about me, click here.


Recent Comments