
Pam and I had to deal recently with something that is a major issue when you live in an RV in the summer.
We felt it was time to replace the rooftop AC unit! The question was to do it myself or to hire someone to take care of the project. The next question I had to ask myself was what is the best RV Air Conditioner to buy?
Read on and we’ll share what we did, what we feel is the best RV air conditioner on the market and the fact that a little understanding of your RV systems can help you save money and time when you need to get things done on your RV!
As you may or may not know, our current full time RV home is a Winnebago Aspect. It is a 2013 model year that we bought near-new and have traveled in it now for seventeen months of the eight plus years we have been on the road.
It has one air conditioning unit installed on the roof. I always felt better with the rooftop AC units on our other full time RV living home because we had two of them. If one failed, we had another. But it was forty feet long, and it required two!
So, with our current RV, and only having one rooftop AC unit, my thoughts have always been, what if? If it suddenly stops working when it is warm out, what will be my plan? It is even more challenging when you have a pet, and you worry about the AC going out when we are not around!
Getting an RV Tech to come quickly is difficult in the summer time! We have neighbors in our current location that have had AC problems, and they had to leave the RV park because they could not get service quickly enough.
An RV is like an automobile. Without the AC running the temperature inside rises quickly! For those of you that may not have purchased your RV yet, pay attention to the AC system and what BTU rating the AC units have. Some manufacturers go cheap, and they don’t put enough cooling power to deal with long spells of hot weather.
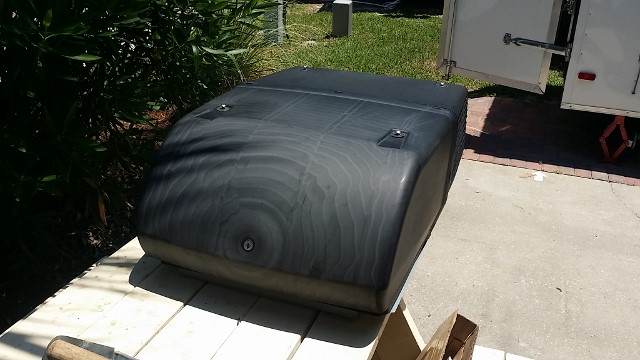
The AC unit our RV came with is a Coleman Mach 3. It is rated at 13.5k BTU’s. One would think that would be adequate, but a 15k unit would be better. Those are the only two choices you have with rooftop AC units.
The problem is a larger unit requires more amps to run it! A 15k rooftop AC unit running at full steam can draw 19 amps. When an RV only has 30 amps total to work with that leaves very little power to run any other electrical devices like the converter, the electric water heater, the micro/convection oven, and other smaller electrical appliances.
These are things that are helpful to know about when you are full time RVing! When it comes time to have to decide if you are going to work on your RV yourself, if you know how things work, a little about their electrical systems and how to do some minor appliance repair, you can save yourself a lot of money by doing your repairs!
Knowing about these things I decided to see if I could find a rooftop AC unit that would consume fewer amps and provide more efficient cooling. I thought that this must exist in today’s high tech world!
I started thinking about replacing the RV air conditioner months ago because our Coleman Mach unit was making quite a bit of noise. It was diagnosed that the reversal switch for the heat pump unit was going bad, and it was only a matter of time before it would quit.
It was making a terrible noise each time it cycled on and off. We were living with it, but when my sleeping is disturbed, it was time for it to go!
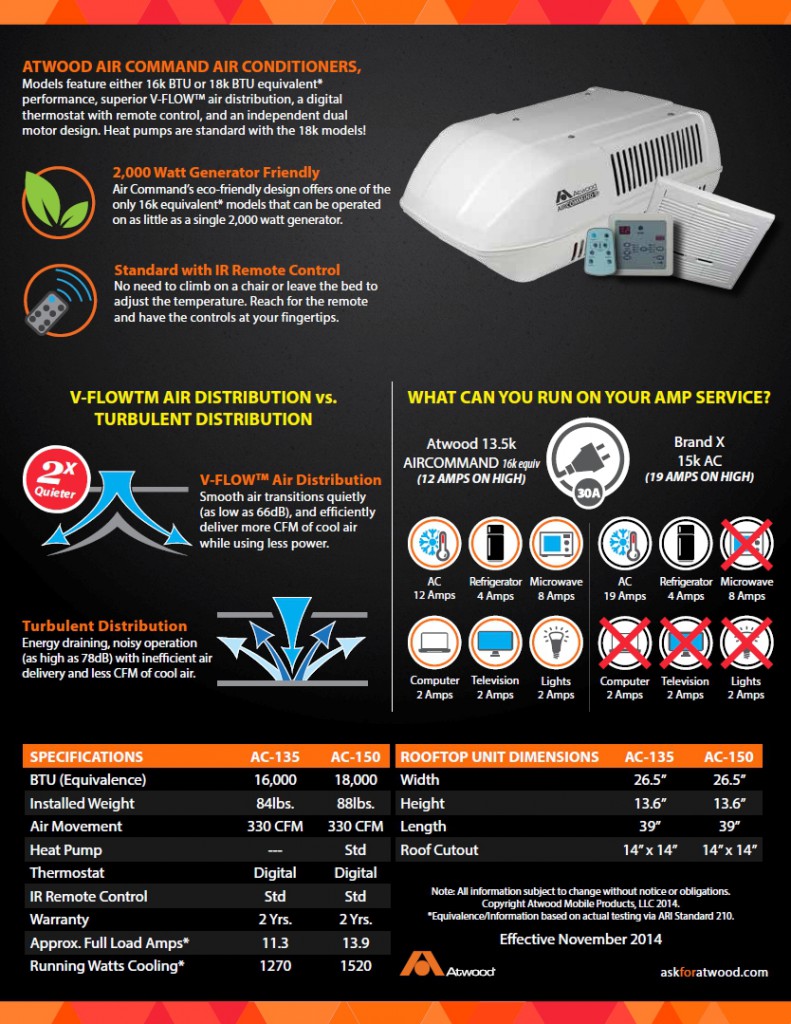
During my research months ago I found a rooftop AC unit from Atwood called an Air Command. The exciting thing about it was it was rated at 15k BTU’s, but due to technology, it is the equivalent of an 18k unit. I could not find other manufacturers of RV air conditioner units making that claim. And best of all, it only draws 14 amps running on high!
So when Pam and I decided to make the switch, we ordered the unit. It arrived in just a few days. The box was a bit beat up, but the AC unit was okay!

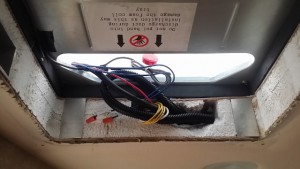
Atwood’s Air Command AC-150 is entirely different from the Coleman Mach AC unit. The main issue I had to deal with was that the internal RV wiring was not the same for the two units. The wires I had in the roof and at the thermostat area were not what I needed.
120-Volt Power and Thermostat Wires
Wires Marked From Wall Thermostat Location
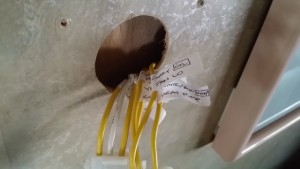
Wires Marked at Wall Thermostat Area
Wires Pulled Down From Connection Points
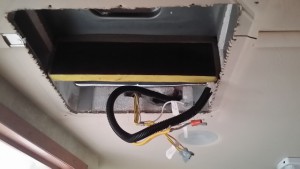
I needed 120-volts and 12-volts at the 14×14 opening in the roof. I only had the 120-volt power there.
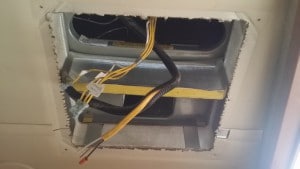
I had seven wires at the thermostat and five at the rooftop opening. My 12-volt power that I needed at the roof was at the thermostat area. So I had to route that up to the roof using some of the existing wires. That left me with three wires for the thermostat, and I needed four. Bummer!!
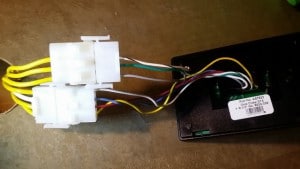
Wires Connected to the Coleman Mach Thermostat
So I wound up using the four-wire communication cable that came with the new thermostat to control the Air Command unit. This required a little more effort to hide the wiring in the wall panels. Again, not a problem! It worked out great!
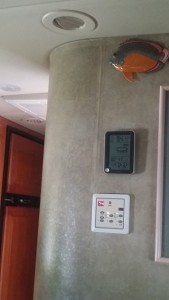
New Thermostat in Place
The Original Wall Thermostat
To figure out which of the five wires in the rooftop were at the thermostat area, I had to test for continuity using my Klein volt meter. That way once I hooked up the wiring to the new AC unit I would have the right wires.
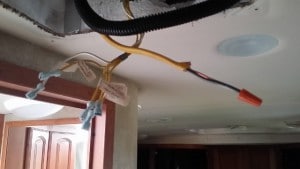
Once that was accomplished, the only other wires needing to be connected were the two blue thermostat wires for the Suburban gas fired furnace. The Air Command has a heat pump, but when the temperatures are cold enough that the heat pump can’t keep up, the furnace kicks in.
New Unit in Place With its Wiring – Blue Wire-Nutted Furnace Wires
I still have to trace where those two wires leave the furnace and get them to the thermostat area where I can then use two of the three remaining unused wires to get that hooked up.
Since I won’t need heat for many months to come, I decided to put off that part of the project and get the new AC unit running as quickly as possible.
In the few hours I had the AC off, the RV reached the mid-nineties pretty quickly. I tried to expedite the installation by having the new AC unit on the roof the night before. I had all tools and needed items to complete the installation ready to go.
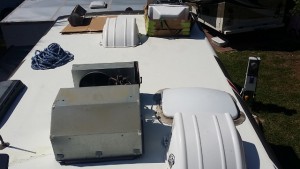
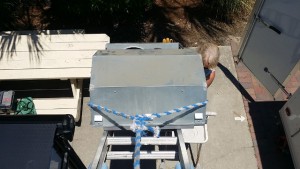
Old Unit in Place – New Unit Waiting in Back Corner
Speaking of the new AC unit on the roof, how do you get one up there without too much effort? When you are staying in a busy RV park, it is hard to make use of a tractor with forks, which would be an excellent method.
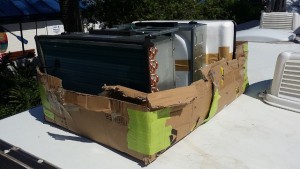
I decided to use an extension ladder set at an angle against the back side of the RV. I put the new unit on a cardboard base that I made from the box it came in and used a rope to pull the new AC unit up to the roof of the RV.
Old AC Unit Being Lowered off the RV Roof
Pam was on the ground, and I was on the roof. I pulled, and she pushed while keeping the AC unit on the ladder rails. It worked great, and we had the new unit on the roof with relative ease! Once we changed out the two AC units, the old one came down off the roof the same way.
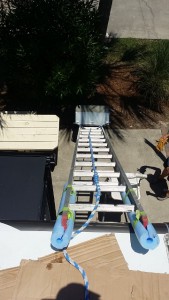
Success – The Old AC Unit is Off the Roof!
The only thing I had left to do was install the inside diffuser panel assembly and test it out! I set the thermostat for seventy-eight degrees and away it went!

Original Interior Ceiling Air Intake and Filter Housing
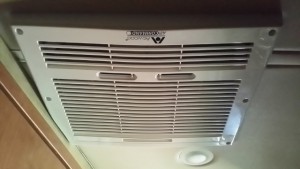
New Atwood Diffuser and Filter Assembly
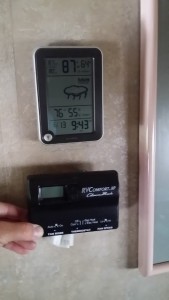
I checked the amperage draw at full steam, and it was drawing twelve amps. That is seven amps less than the old unit. The Atwood Air Command had the RV cooled down quickly, and it is so much quieter than the Coleman Mach unit!
We have been using it now for awhile, and we are very happy and so much more comfortable! The extra cooling power makes the unit work with much less effort than the old unit. It has an auto fan feature. Most times it runs on low fan, and the compressor is on about fifty percent of the time. And lately, we have been in the low nineties with high humidity during the day. That’s Fahrenheit for our Canadian friends! LOL
We used to have a hard time keeping the RV comfortable at seventy-eight degrees. Now we are running it at seventy-two degrees F and lower at night. It easily handles these lower temps due to the added BTU’s!
Because of my knowledge gained from an RV Tech Course I took a few years ago, I was confident in my abilities to be able to handle this task!
I saved hundreds of dollars ordering the AC unit online and doing the work myself. Sure it would have been a lot easier to have someone else install my new unit, but I think given the work required to change from one AC manufacturer to another, I would not have gotten what I wanted, and it would not have been installed the way I wanted it to be.
If you want to be able to handle your own maintenance issues and have the confidence to do so, check out the RV Tech Course.
Please feel free to leave a comment below before you go!


Recent Comments